Communication emails can be customized to suit each Event with company branding, promotional messaging, and bespoke timing for select Communications delivery.
Example of the Communications Step at Event Level: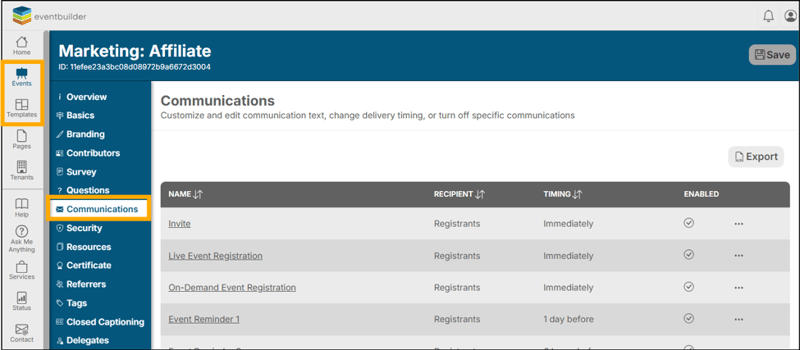
Considerations
There are a wide range of automated emails in this area, targeted at keeping both your Registrants and Delegates up to date during the life span of your event.
Emails in the Communications Step can be deactivated if you deem them unnecessary. We recommend deciding at the time of the Event/Template creation which Communications will be sent to Registrants and Delegates.
If enabled, chosen emails will be sent automatically as displayed on the main Communications step. This is especially important to note when rescheduling, deleting, or unpublishing Events. EventBuilder recommends double checking the content of these emails before making changes to the Event's status, date, or time.
Carefully consider whether or not to disable Registration Confirmation and Event Reminder emails. Important Event links are included in those Communications, Registrants may use the confirmation or reminder(s) to join your Event. Keeping the Event URL easily accessible to Registrants with these email communications can help with Event attendance.
The Interface - Overview
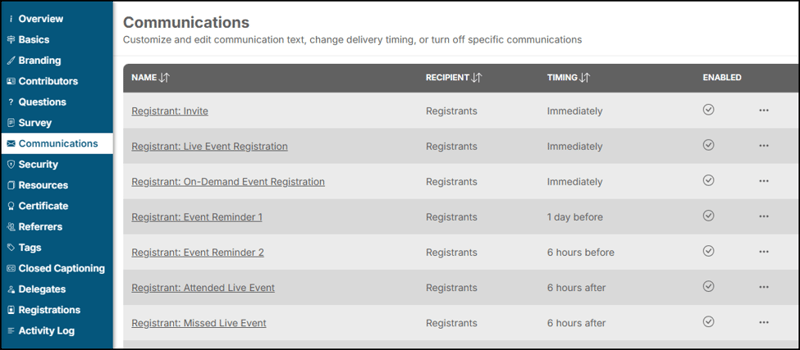
The Communications Step displays the Name, Recipient, Timing, and Enabled status of each available Communication:
Communication Defaults
The communications available for your event will vary depending on the event type selected. Certain communications are enabled automatically based on best practice for that event format. For example, On-Demand events do not require Event Reminder emails, so these communications are disabled by default.
Distribution timings are also pre-configured for each communication, helping you get started quickly. These default settings can be adjusted at any time to suit your event requirements.
Available Registrant E-mails
-
Invite: Send Event Invitations with a link to your Registration page directly from your EventBuilder Tenant.
-
Live Event Registration: Sent immediately following registration, includes Event access information.
-
On-Demand Event Registration: Sent when a registration to view a recorded Event has been made.
-
Event Reminder 1: Notifies Registrants of the upcoming Event.
-
Event Reminder 2: A second Event reminder email for notification of upcoming Event.
-
Attended Live Event: Follow-up email - acknowledgement of Event attendance. Useful for event follow-up and can also contain a link to an Event's recording, Certificate, or Post-Event Survey.
-
Missed Live Event: Sent to Registrants who did not attend the Event and can include link to recording.
-
Event Rescheduled: Notification for an Event that has been rescheduled.
-
Event Canceled: Event cancelation notification.
-
On the Fly: Created at any time, an open-ended option for Registrant/Attendee communication.
Available Delegate E-mails
-
Event Rescheduled: Notification to Delegates that an Event has been rescheduled.
-
Event Canceled: Notification to Delegates that an Event has been canceled.
-
Access Granted: Access Granted email contains the delegate’s unique link to join the event.
-
Event Reminder: Notify Delegate of upcoming event.
Activate/Deactivate/Test/Copy/Delete Communications
-
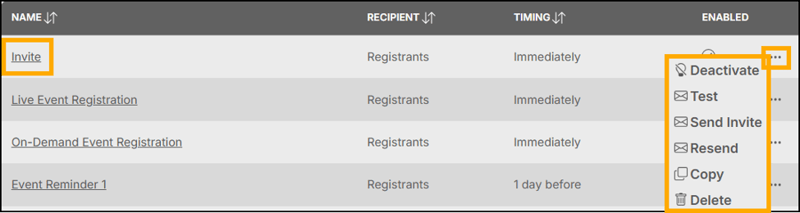
To open and edit any Communication, click on its name.
-
Enabled emails are denoted by a circle with a tick mark inside.
-
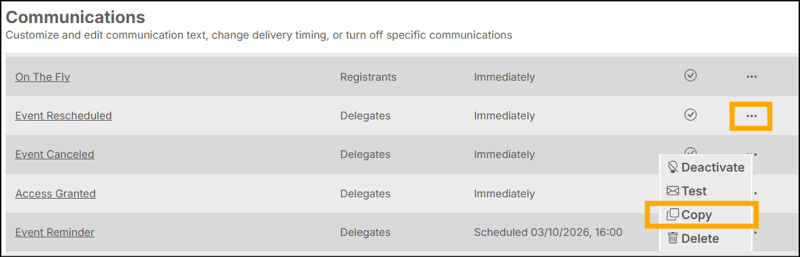
The ellipses (three dots) to the right of each entry allows you to quickly Activate/Deactivate, Test, Send Invite (on Invite Communication only), Copy or Delete a Communication.
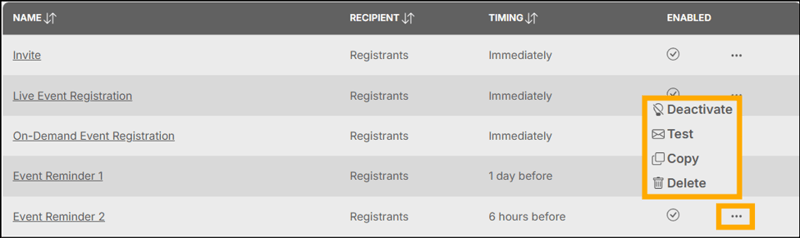
Deactivate: Choose which communications are sent to your delegates. For example, you may want to disable certain reminder emails, or turn off all communications entirely.
Test: Preview the design and layout of your email before sending it. This preview is for visual purposes only and does not reflect the live functionality of the email. Calendar invitations (.ics files) are not active, and any links included in the preview will not work. If you'd like to test the full delegate experience, register for your event yourself or create a test event to explore the journey from start to finish.
Copy: Create a duplicate of an existing email in a single click. This is useful when building additional reminders or creating a series of emails with a consistent design. You can make changes to the content, such as updating text or adding images, and then copy the email to reduce the time spent creating future communications.
Delete: Permanently remove the email from your event. A confirmation pop-up will appear before deletion to help prevent accidental removal.
Editing Communication Content
Each Communication will automatically be headed by the Banner Image you entered in the Branding Step of your build. This is visible when you open the Communication editor.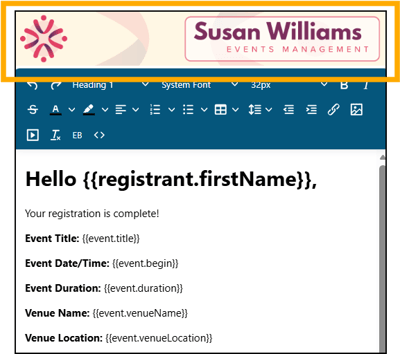
All Communications include a full-featured HTML editor to customize content, options for graphics and/or promotional images. EventBuilder's system-generated emails also allow for customization and personalization through database variables.
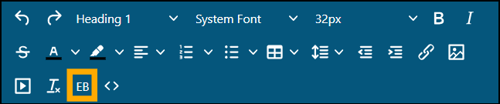
The following EventBuilder variables are available to add to Communication emails:
Event Name, Subtitle, Description, Identifier, Begin, End, Time Zone, Duration, Venue Name, Venue Location, Contact Name, Contact Email.
Registrant First Name, Last Name, Email, Event URL, Survey URL, Certificate URL.
Delgate First Name, Last Name, Email, Role.
Example of Registrants Live Event Registration Communication in editor and received email:
-png.png?width=1000&height=800&name=KB%20image%20communications%20(1)-png.png)
Using the Invite Communication
Inviting Registrants
There are two ways to invite delegates to your event using the Invite communication.
Once you've finished customising the Invite email content, select Send Invite. A pop-up window will appear, allowing you to add or upload a list of recipients before sending.
-
Upload an Invitee List:
-
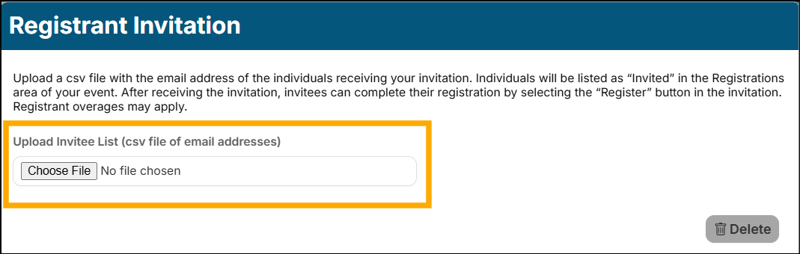
Upload a CSV file containing the email addresses of the individuals you would like to invite. Once uploaded, these individuals will appear as Invited in the Registrations area of your event.
-
After receiving the invitation email, invitees can complete their registration by selecting the Register button within the email.
-
Note: Registrant overages may apply depending on your subscription and event attendance limits.
-
-
Add Individual Email Addresses
-
Alternatively, you can manually enter email addresses directly into the invitee list. This is useful when inviting a small number of delegates without creating a CSV file.
-
Before sending invitations, review your recipient list to ensure all email addresses are correct.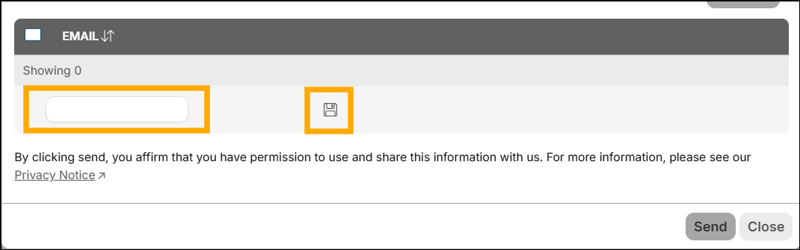
Privacy Notice
By sending invitations, you confirm that you have the appropriate permission to share this information with EventBuilder. For more information, please review our Privacy Notice.
Using On The Fly Communication

On-the-Fly Emails can be sent at any time before, during, or after your event. They are ideal for sharing additional information, notifying registrants of important changes, sending reminders, or communicating with specific groups of attendees.
Unlike scheduled communications, On-the-Fly Emails are sent manually when required, giving you complete control over who receives the message and when it is delivered.
Best Practice
Before sending an On-The-Fly Email, review both the content and recipient list carefully. Because these emails are sent immediately, confirming your audience beforehand helps ensure the right information reaches the right people.
Create and Edit an On-The-Fly Email
-
Create a new On-The-Fly Email or select an existing one.
-
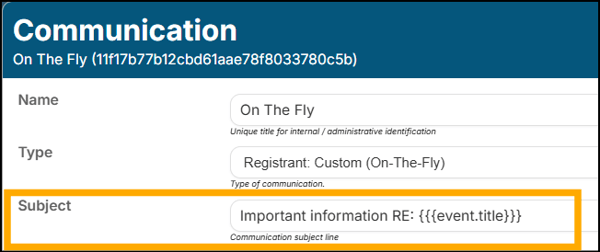
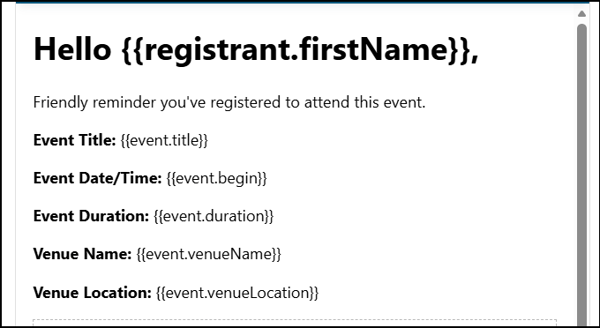
Edit the subject line and email content as required.
- Save your changes.
Send an On-The-Fly Email
-
Open the three dots menu beside the email.
-
Select Send.
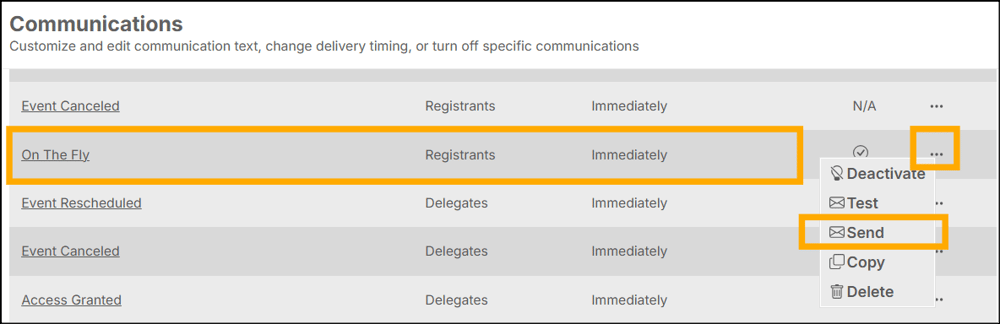
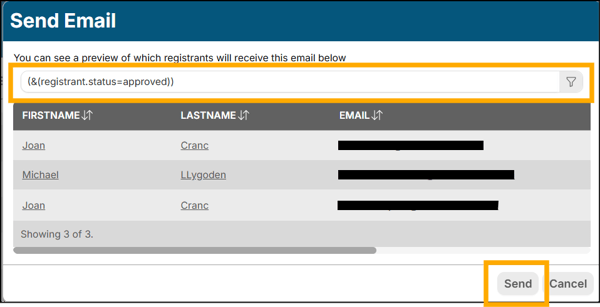
A recipient selection window will appear, allowing you to choose who should receive the communication.
Send to all approved Recipients
The filter is set by default to send to all approved registrants. If this meets your criteria, simply continue by clicking the Send button.
Send Using Filters
Filters allow you to target groups of registrants based on specific criteria, ensuring the message only reaches the audience you intend.
For example, to send an email only to registrants who attended in-person. select the Filter and choose:
Attended In Person > Equals > Yes
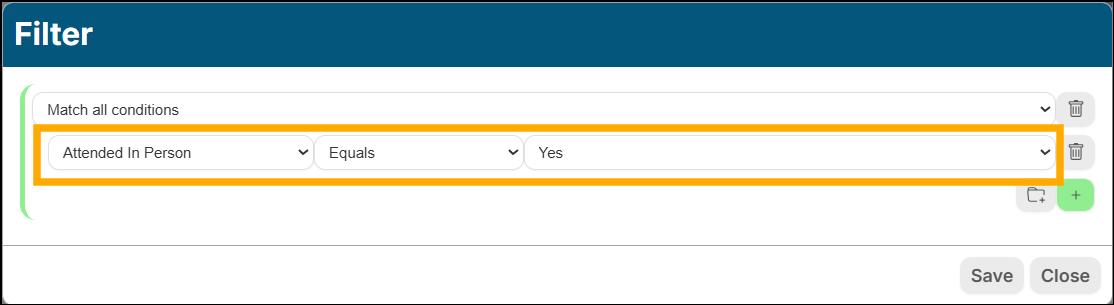
You can also target registrants based on other criteria, such as:
-
Survey completion status
-
Registration status
-
Attendance information
-
Source of Referral Link
Creating Custom Communications
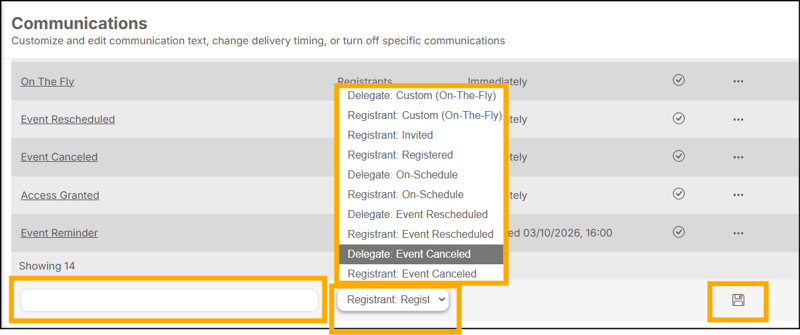
In addition to the standard event communications, EventBuilder provides several pre-configured email templates that can be used as the starting point for bespoke communications. These templates can be added to your list of active communications and customised to suit your event requirements.
To create a new communication:
-
Add a name to the blank field at the bottom of the Communications list area.
-
Select from available email types in the drop down box
-
Press the disk icon to save
-
Go ahead and set the timing and content of your email
Copy Existing Communications
You can also create a Copy of any existing communication listed on the Communications step. This is a useful way to create additional reminders or bespoke emails while maintaining consistent branding and formatting across your communications. After creating a copy, you can modify the content, timing, images, and styling as needed without affecting the original email.
Variable Buttons in Emails
Variable Buttons allow you to insert dynamic event information into your email communications. When selected, a list of available variable buttons for all event types is displayed.
Examples of variable buttons:



Not every variable will appear in every email. EventBuilder automatically determines which variables are relevant when the email is sent and only displays applicable information to recipients. For example, the Location variable will only populate for in-person events, while virtual event details will only appear for virtual or hybrid events.
This allows you to create flexible email templates that can be reused across different event types without manually updating event-specific details each time.
Editing Communication Distribution Timing
All Communications that are not automated to be sent immediately can be altered to reach your Registrants/Delegates at a time of your choosing. You may choose to use the default timings or select your own.
Simply, open the Communication you wish to change.
Select a new time frame from the dropdown list in the ‘When to send’ field.
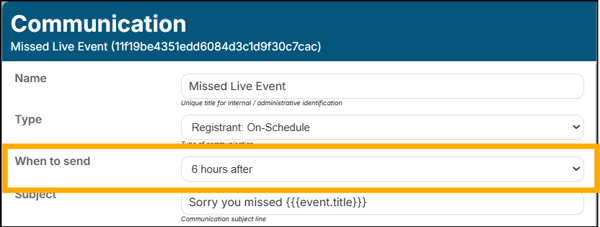
Time periods available range from 1 month before to 1 month after, with week, day and hour increments available.
.ics Calendar Content
The Registration Confirmation email contains the unique 'join' link for Registrants, providing access to your Event. If disabled, Registrants will not receive the access link prior to the day/start time of your scheduled Event.
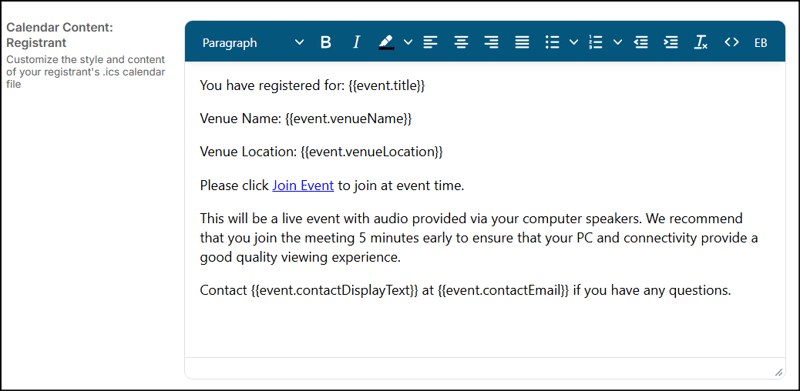
Calendar Content: Registrant
This is the text recipients will see in the ics file. You may customize Event information in the calendar invite. The invite file contains a 'Join' link that delivers them directly to the live Event. The default Calendar Invitation Copy also includes Event title and the event contact name/contact email. This should not be edited. You can add additional information and/or database variables by clicking in the text editor above the default copy.
Calendar Reminder: Registrant
Customize the timing of the registrant reminder automated by the Registrants .ics calendar item by hovering over the field and increasing/decreasing the number of minutes with the arrow function.

Calendar Content: Delegate & Calendar Reminder: Delegate
As above
Example of .ics attachment in a Communication email:
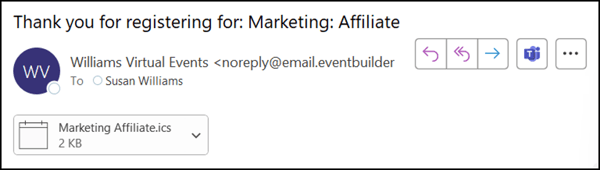
Example of ‘Add To Calendar’ field in Communication email body: