
Short on time to get your virtual event scheduled and ready to promote? We've got a plan for that. Sometimes virtual event timelines are tight. With that in mind, let's give you a play-by-play of how to get your event ready to go, fast.
What's the IDEAL?
Before we get started on guiding you through the quick version of getting your virtual event ready, it's worthwhile to have an idea of the best-case-scenario timeline for goal-setting, creating, and promoting an online event. Generally, creation to completion, we recommend at least six weeks. On a shorter timeline than four weeks from "I have to create this and get the promotion set and out" to event? We recommend AGAINST that tight of a timeline because you risk having a very stressful, expensive, and ultimately unsuccessful event.
Teach Your Team: Realistic Expectations
With that in mind, we recommend setting appropriate expectations with your team as to the timing needed to create and promote a successful virtual event. The dream scenario is 8-12 weeks start to finish. Absolute minimum timeline? Four. As an event organizer, you're the expert in the room; the hands-on, boots on the ground, know what it actually takes to make a virtual event successful authority. Leverage your expertise!
The Four-Week Timeline
So, let's say you've been handed the task of spinning up a virtual event in four weeks. Ideally you want as much lead time as possible to work on structure and strategy, as well as a cushion to account for any unforeseen hiccups. Allow yourself one week to create the event, and three weeks to prepare.
Week One: Get Your Event Ready
1. One Week Roadmap - Create a timeline of a typical event and identify where you can streamline your processes. Then create a timeline for this event and stick to it.
2. Goal Setting - Set the goal centered on the topic: What is the theme of your event? Who do you want to reach? Why? Answering these questions early helps you narrow down your potential audience and find the right presenters.
3. Presenters -Find your presenter(s) and nail down their availability ASAP. On day one. Leverage your networks to find the right people. Once committed, request their headshot and bio be returned to you as soon as humanly possible. Our advice? Have the headshot and bio in-hand within 48 hours - max. In your early communications be sure to schedule a rehearsal time with them as well.
4. Event Agenda -With your clearly defined topic, create an event agenda with scheduled subtopics. Not only will having a defined timeline help you with messaging and marketing, it will keep the event moving along when you are live.
5. Plan Your Logistics - Event technology varies based on number of attendees, engagement features based on your goals, and presentation format. Base your decision on the technology that meets your needs and is easy to use for your production team. Keep in mind that features like polling, messaging and 2-way audio vary by platform. Remember when you have an event panel that not all speakers may be familiar with the tool you’re using. Also, determining what level of reporting you need is part of logistics planning.
6. Promotion Strategy -Identify which promotion channels you want to use: Take advantage of source tracking - where are your attendees coming from? Which avenue of promotion is proving to be the most useful? Some options to consider include:
Segmenting Invites - With EventBuilder, you can choose Validation on the Security step and use different Promo codes for different audience segments.
Co-branding - Reach out to another brand you have a relationship with and team up for a co-branded event. Send an email with the ask, and then coordinate use of their logo for your Registration page and other event correspondence. Co-branding is an easy way to double your potential audience - and help with promotion on a short timeline.
Networking and Social - Get your speakers and employees/co-workers to share with their networks and on their social channels once your invites have been sent. With this tight a timeline, you need "all hands on deck."
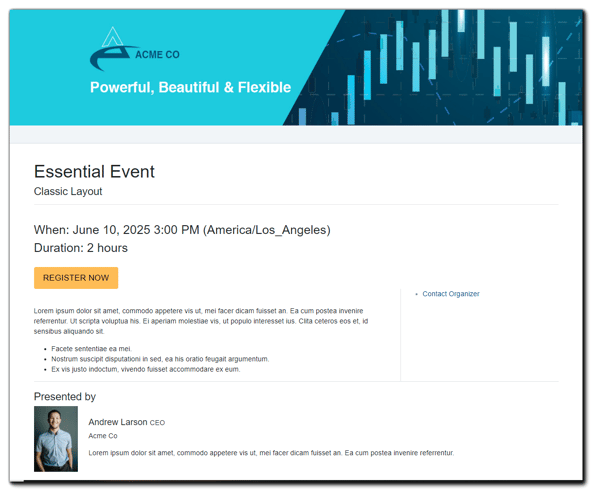
7. Build Your Registration Page - Here's where you want to knock it out of the park. With such a short timeline, you want to be *very* clear about what your audience will see. Be informative but also mindful of length in regards to your event description. Writing a novel here won't work - get straight to the point. Your Registration page should include:
- Eye-catching banner
- Topic and Subtopic
- Date and Time
- Expand on your event topic with specific takeaways - bullet points are good
- Presenter: Add headshot and bio - name recognition and info about your presenters can help sell your event.
In your registration questions, be sure to add anything you may need to know from your attendees that may require planning ahead for, such as accessibility needs like Closed Captioning.
In the Three Weeks Leading Up to Your Event
Keep your eyes on the prize:
- Monitor registrations! Do you have a waitlist? Be sure to check regularly for pending registrants!
- Adjust promotion strategy, channel engagement, etc. and edit your source tracking accordingly.
- Check in with your presenters to confirm and gather any supporting materials they need you to assist with.
- Conduct a rehearsal to test your tech, get a feel for the flow, and event pacing. Troubleshoot and fix any issues well in advance of event day.
- Add and/or order any additional services you may need based on responses from Registrants.
Let Us Do the Heavy Lifting
Our Professional Services can take a load off your plate, so you can focus on the stuff you do best: strategy and promotion. We offer the full package, from white-glove event and technology management to seamless training and support. Learn more about our Professional Services, and contact us for a consultation today!

How to Build a Comprehensive Event Strategy

Virtual & Hybrid Events in Uncertain Times: A Strategic Guide for Resilience

No Comments Yet
Let us know what you think