Building Events: Getting Started
Last updated: April 27, 2023The first step in creating Events with EventBuilder is choosing how you would like to start your Event build: from scratch, or from an existing Template.
For Suite-level subscribers, Organizers can also create Events directly from their Outlook calendar.
Create New Event
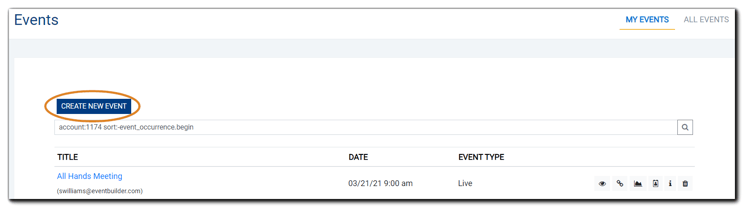
First, navigate to the Events option on your Dashboard. Your Events list will appear, as well as a Create New Event button and a Search Events option. Click on the Create New Event button to get started:
 "How would you like to start?"
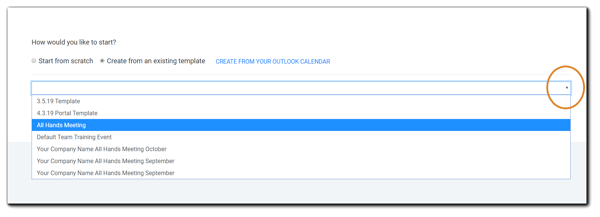
After clicking on the Create New Event button, the Create Event window will appear. Select from the following and click 'Continue:'
- Start from scratch
- Create from an existing template

Start From Scratch
When Organizers choose 'Start from scratch' and 'Continue,' they are directed to the Schedule step to craft their Event's details. 'Start from scratch' gives Organizers full control over their Event, including details, graphics, Attendee engagement options, and more.
Note: The 'Start from Scratch' option uses the Portal default Template.
Create From an Existing Template
Organizers have the option to create Events based on Templates they or their Portal Administrator have created, allowing for consistency across Events and simplifying the Event creation process.
Learn more about using EventBuilder Templates.
After selecting the 'Create from an existing template' radio button, click on the dropdown menu and choose the Template you wish to use for your Event.
Once you've selected the method for creating your Event, click 'Continue.'
Create From Your Outlook Calendar
Note: Available for Suite-level Subscribers only.
Organizers with a Suite-level subscription also have the option to create Events and Registration pages directly from their Outlook calendar in one step using the Organizer's default Template.
Creating an Event from Outlook replaces the methods above. Once created in Outlook, the Event will appear in the Organizer's Event List in the Portal and can be edited as needed.
Note: When using this option, EventBuilder recommends creating a versatile, well-designed Template to set as your default. This will maximize the efficiency of creating Events via Outlook.
To Create an Event from Outlook:
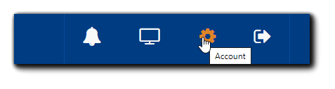
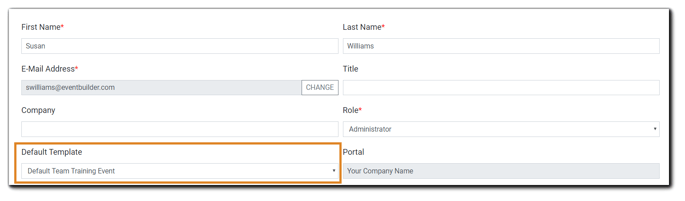
First, set your Default Template to the type of event you want to create. Navigate to your Account Page (the gear icon in the upper right of your portal).
On your Account Page, click on the dropdown menu to set the default:
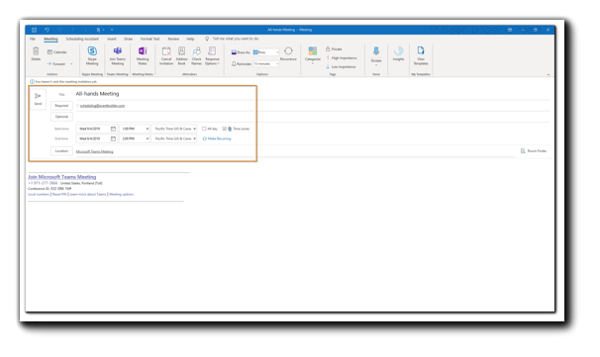
Next, go to your Outlook calendar and set a meeting for the date/time/duration of your Event. Enter your Event title as the Subject line and make it a Teams meeting.
Note: Events must be 18 hours or less in duration.
Invite scheduling@eventbuilder.com and a Registration Page/Event will be automatically created in EventBuilder using the settings in your Default Template.
.png)