Creating Hybrid Events
Last updated: May 2, 2023
For Events with both online and in-person elements, EventBuilder can be customized for Organizers to offer this exciting option in the following two ways.
Tip: Creating a Template specifically for Hybrid Events will streamline your building process.
Method #1: Adding an In-Person Option During Event Build
By customizing a few elements on your virtual event build, Organizers can add a hybrid component that integrates both in-person and online options into one Registration page.
Mode Selection
Start your Event build as usual. Select Live Webinar as the type of Event you wish to create. This will create the online component of your Event.

If applicable, select 'Yes, I want to stream/record.' 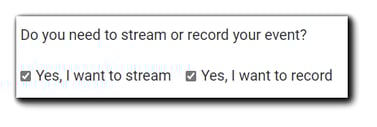
Registration Questions
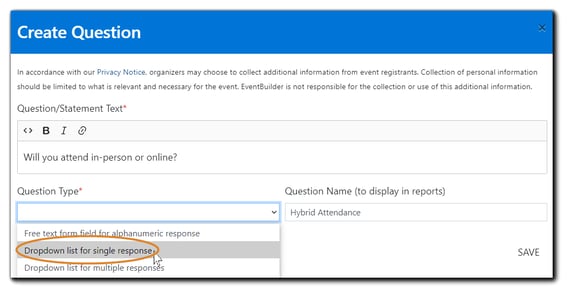
On the Engage step, create a required question indicating which the Attendee would prefer: online or in-person. For Question Type, we suggest 'Dropdown list for single response.'
Select the checkbox to make the field required for registration.
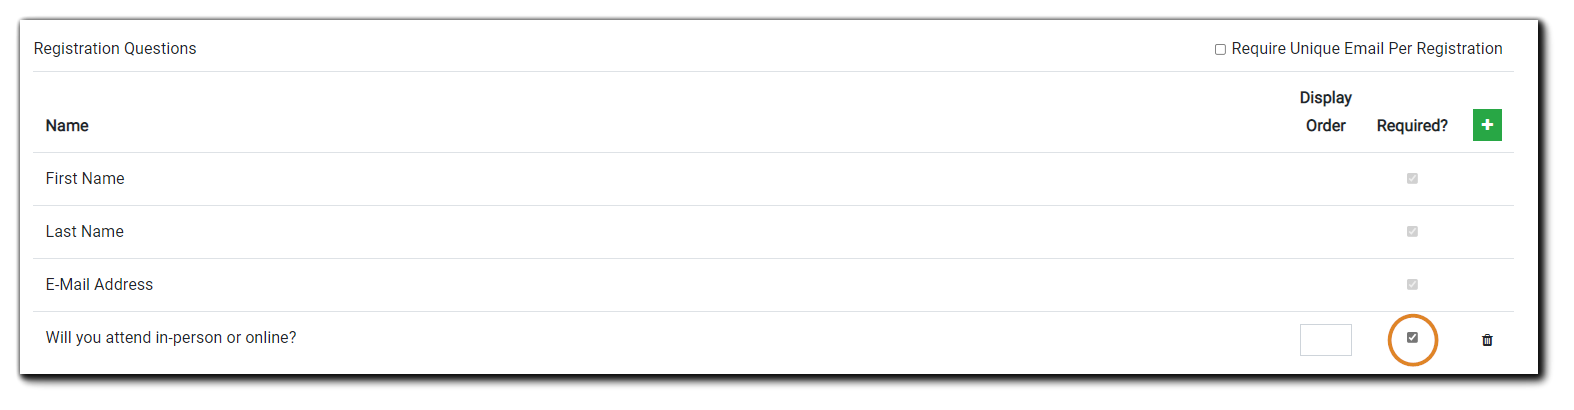
The required question will appear to on the Registration Form:

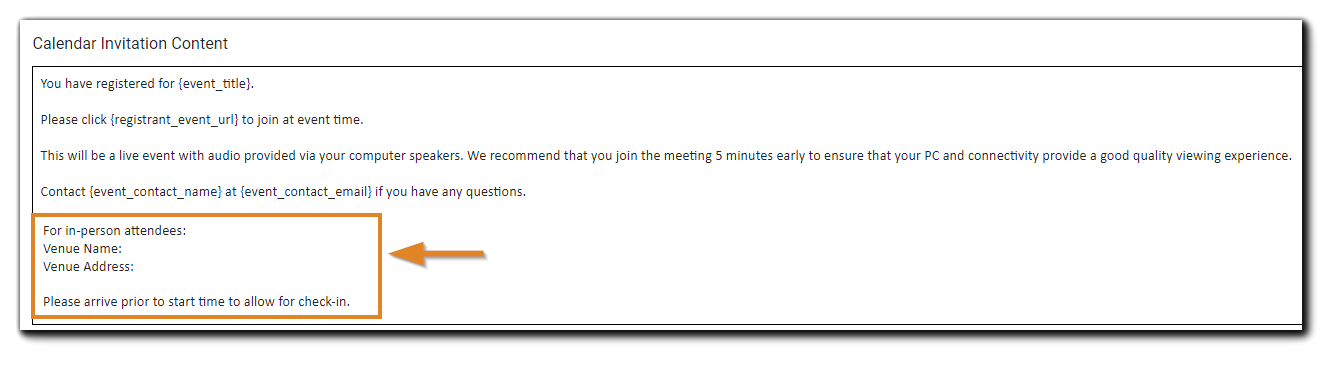
Adding Venue Information
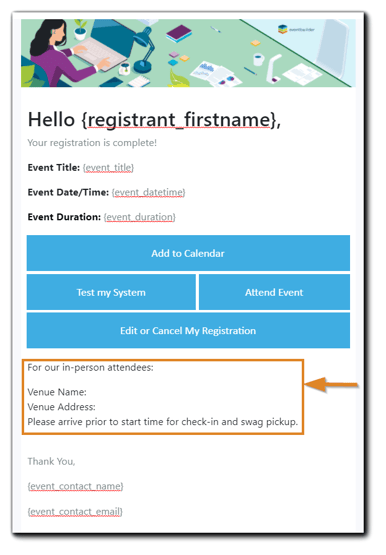
On the Communicate step, customize the Attendee communication emails and calendar file to include venue information - location, address, etc.
Confirmation Email:
Calendar File:
Complete the rest of your event build as usual.
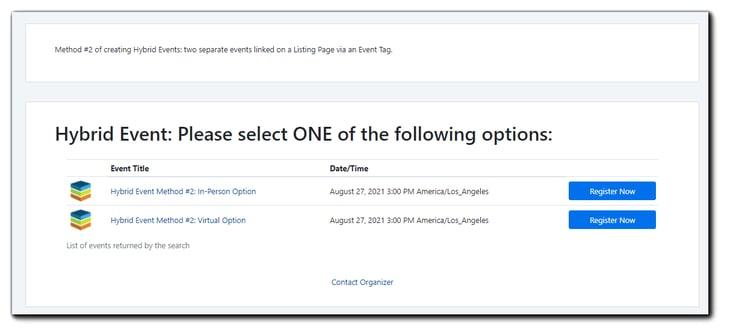
Method #2: Create Two Events to Display on a Listing Page
By creating two separate Events, one virtual and one in-person, Organizers can utilize the Tags functionality to display both event options on a single Registration Listing Page.
Create Each Event
Create each separate Event in the usual manner, selecting 'Live Webinar' for one, and 'Live In-Person Event' for the other. For your Live Webinar, you may also add Streaming/Recording if applicable.
In-Person Attendee Roster Tip
To help ensure the accuracy of your In-Person Attendee roster, we recommend selecting the Security add-on, 'Registration Cancel/Edit Deadline:"
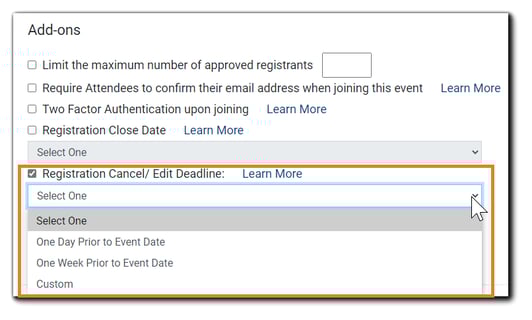
Enabling this feature prevents Registrants from editing or canceling their Registration after 12:00 am on the date specified, based on the registrant's time zone.
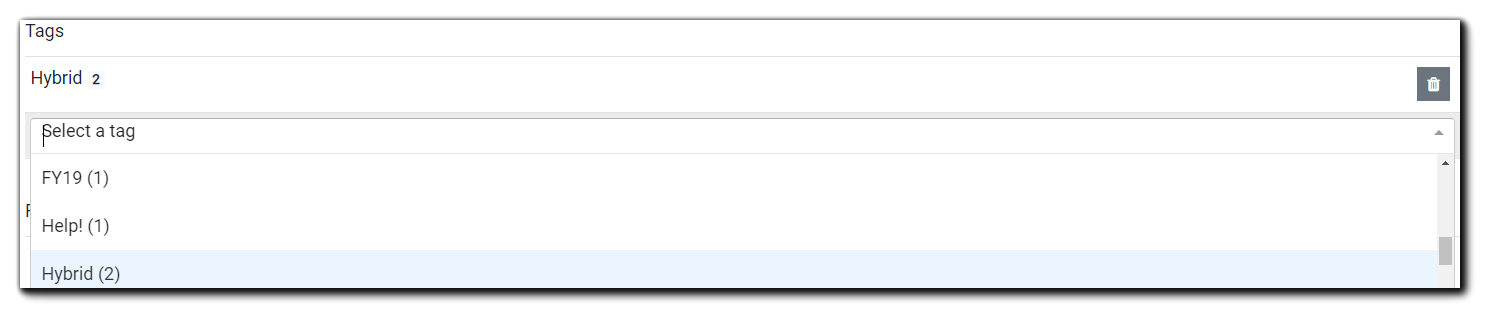
On the Extras Step, create and assign a common Tag to associate with each Event. 
Complete your Event build as usual.
Create the Event Listing Page
Next, go to Pages from your left navigation. Select 'Create New Page.'
Select 'Listing Page' as the page type.
Add the relevant information to the Listing Page.
Learn more: Listing Page instructions
Select Tag
Click on the dropdown menu in the Tags field and select the Tag associated with your Events. This will ensure both your virtual and in-person events will appear on the Listing Page.
Complete the page build as usual.
Listing Page Sample
Attendee Check-In
For Method #1 - Only Organizers can access the Registrant area for In-Person Event check-in.
For Method #2 - Guest accounts can access the Registrant area for the In-Person Event check-in.
Note: Online participants will be marked as attended upon joining the Event.
From your Events list, click on the Registrant icon:
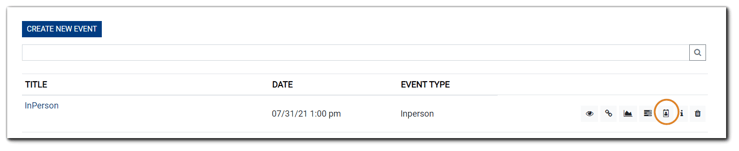
A list of all Event Registrants will appear.
Locate the checkmark icon for the Registrant you wish to mark as 'Attended.'
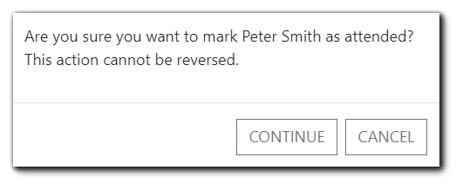
 A confirmation dialog will appear, asking, "Are you sure you want to mark (registrant name) as attended? This action cannot be reversed." Continue/Cancel.
 Once the Attendee has been marked as attended, the check-in icon will no longer appear on the Attendee record.
Changing a Registrant's Event Format
Organizers can customize the Event Confirmation and/or Event Reminder emails to provide instructions for changing a Registrant's attendance preference, e.g., switching from in-person to virtual.
EventBuilder recommends Organizers instruct Registrants who wish to change their attendance preference to cancel the original registration and re-register for their new preferred format.
Creating Hybrid Events Video Training
.png)