Customizing Your Portal Dashboard
Last updated: April 26, 2023
Administrators and Organizers can customize their EventBuilder Portal Dashboard with widgets and other functional tools to provide them with at-a-glance information about their Events, Registrations, and Attendance.
 Dashboard Overview
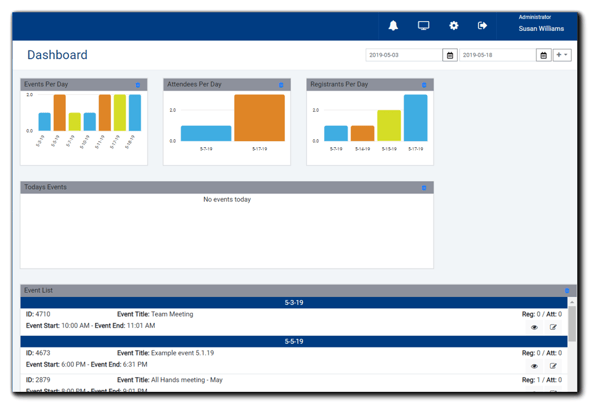
Upon login, the Portal Dashboard appears. Any customizations you implement are unique to your account. For example, an Administrator's Dashboard view and an Organizer's Dashboard view can be configured differently according to their preferences. The customizations are connected to individual User Accounts.
Sample customized Dashboard:
Adding Widgets
Open the Widget tool by clicking on the pencil icon:

The Dashboard editor will open.
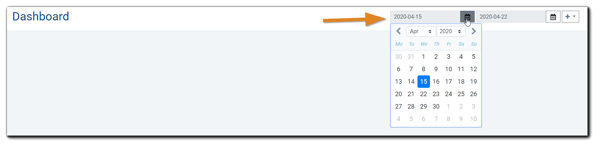
To add a widget, click on the '+' icon next to the date range fields:

A drop-down list of available widgets will appear:
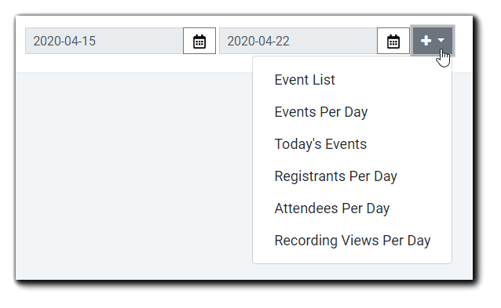
Available widgets:
Event List - Listing of Events in the selected date range:

Today's Events - Displays Event ID, Portal, Title, Start/End times, # Registered/Attended, and Actions available.

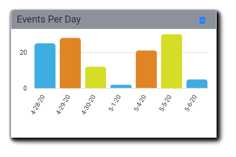
The following widgets display as a bar graph on your Portal Dashboard:
Events Per Day - Overview of the Events scheduled within the selected date range,
Registrants Per Day - Total number of expected Registrants.
Attendees Per Day - Total number of Attendees.
Recording Views Per Day - Displays the viewings of a recorded Event,
Sizing, Arranging, and Removing Your Widgets
All Dashboard widgets can be sized and arranged according to your preferences.
To size a widget:
Open the widget tool by clicking the pencil icon: 
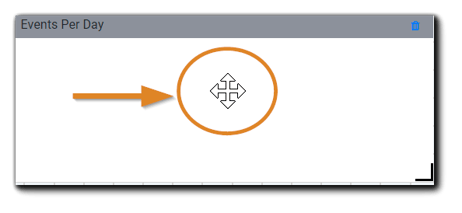
Hover your mouse on over bracket on the bottom right corner of the widget you wish to size. The pointer will change to a double-sided arrow: 
Click and drag the edge to the desired size. This action can be done horizontally or vertically and can make the widget smaller or larger. There are gridlines to assist in sizing and arranging your widgets.
To arrange your widgets:
Hover your mouse in the widget you wish to move. Click and hold, drag the widget to the desired location on the Dashboard, then release.
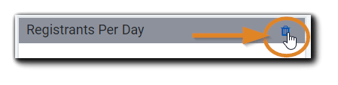
To remove a widget:
Click on the blue trash can icon located in the grey title bar. The widget will be removed from view. You may add the widget back to your Dashboard view at any time.
When finished customizing your Dashboard widgets, click the 'Save' icon:

Once you've selected the widgets you would like on your Dashboard view, click on the calendar icon and select a date range for Events you would like to see information about.
Note: Once a widget is selected, the relevant data can take a few minutes to populate. Selecting a narrower date range can help speed load time.
Video Training: Customizing Your Portal Dashboard
.png)