Deactivating and Deleting Events
Last updated: May 10, 2023
If an Event requires cancelation, Organizers have two options:
Deactivating an Event preserves the Event and all associated data. The Event can be reactivated at any time. Organizers may choose this option if they would like to move a canceled Event off of their Events list but maintain access to the data already collected.
EventBuilder recommends deactivating canceled events as a best practice, to preserve the Event's data and allow Organizers to reactivate the Event should the need arise.
Deleting an Event will permanently remove it and all associated data from the Portal. For example, an Organizer may choose to delete an Event if it was a test or the Event contains an error.
System-Generated Emails
If you are deactivating or deleting the Event prior to the scheduled live start date, review the cancelation email via the Communications step and make any necessary edits:

The 'Event Canceled' email will be sent automatically if enabled. If the live event start date has passed, this email will not be sent.
Other system-generated emails on this step are disabled once the Event has been deactivated. The following notification will appear on the Communicate step:

Image text: Emails do not distribute on deactivated events. If you want emails to distribute, please reactivate this event.
Deactivating or Deleting an Event
Navigate to your Events list and locate the Event you wish to modify. Click on the trash icon:

A confirmation window will appear, with explanations for each option: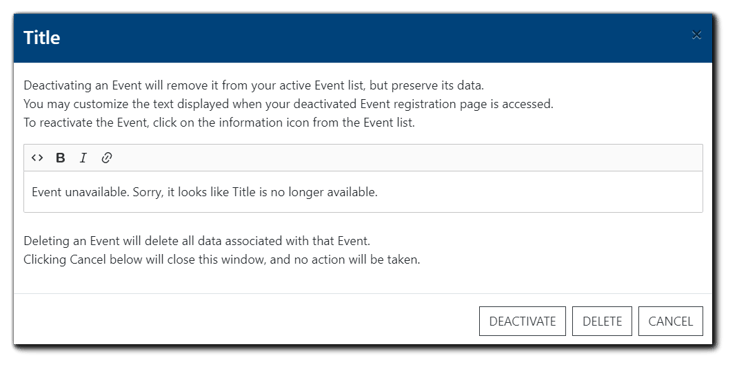
Image text:
Deactivating an Event will remove it from your active event list but preserve its data.
You may customize the text displayed when your deactivated Event registration page is accessed.
To reactivate the Event, click on the information icon from the Event list.
Deleting an Event will delete all data associated with that Event.
Clicking Cancel below will close this window, and no action will be taken.
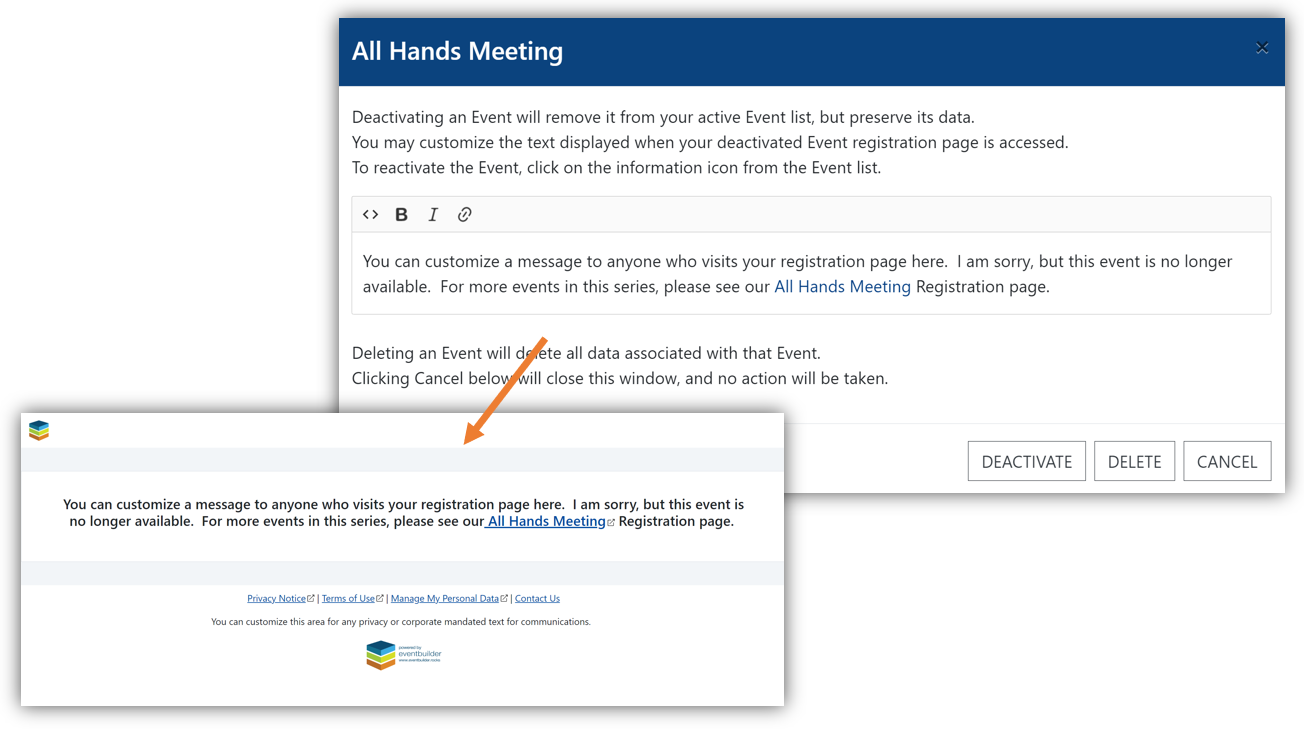
Use the text editor provided to customize any message you wish to display when the Registration page is accessed:
Click the 'Deactivate' button and confirm your selection. The Event will now be listed as 'Inactive.' This removes it from your Active Events list but retains all associated Event data. If you click the 'Delete' button, after confirming your selection, the Event and all associated data will be deleted from your Portal.
Locating and Reactivating an Event
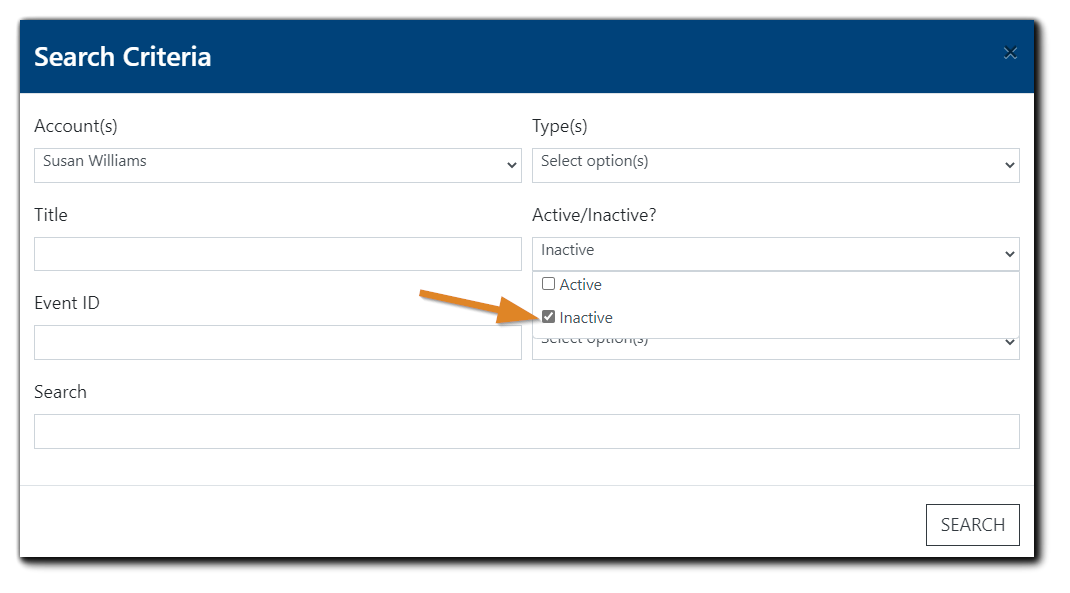
To find a deactivated Event, navigate to the Events section on your Portal, and select the Advanced Search tool:

The Search Criteria window will appear. Select 'Inactive' from the dropdown menu highlighted below, and any other search criteria you wish to add, then click 'Search.'
A list of inactive Events that meet your search criteria will appear. Select the information icon to the right of the inactive Event:

The Event detail window will appear:
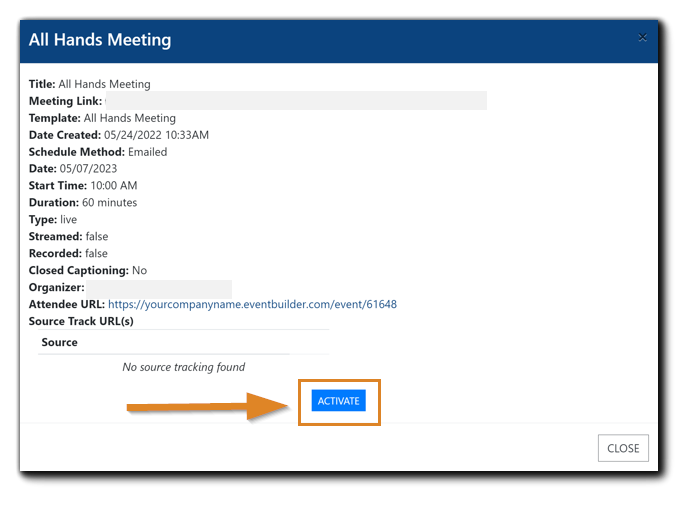
Click the 'Activate' button to reactivate the Event. You must reactivate the Event to send system-generated emails to Registrants.
Note: There is no auto-generated "reactivate" email. To inform Registrants that your Event has been reactivated, use the "on-the-fly" email communication option.
E-Published Events
For Suite-level subscribers, events can be scheduled directly from Outlook using EventBuilder's E-Publish scheduling functionality.
To deactivate an E-Published Event, navigate to your Portal and follow the Deactivate Event instructions located above.
Note: E-Published Events cannot be deactivated from Outlook. This function must be accomplished within your Portal. If an Event is deleted from Outlook's calendar, the Event and all associated data is deleted from the Portal.Video Training: Deleting/Deactivating Events
.png)