File Repository Management
Last updated: May 10, 2023
User and Guest Accounts have the option to upload files for sharing/distribution to Attendees.
File Repository Overview
A File Repository is associated with each Admin and Organizer account to upload and store assets such as slides, videos, PDFs, and images prior to or during their live Events. Additionally, Administrators can add files to a Portal-level File Repository, available to Portal Account Users: Administrators and Organizers. Guest Presenters and Moderators can upload Event materials via the Moderator Console.
Note: Access to Portal-level files is not available to Guest Presenters and Moderators.
Permissions
| Files Access Permissions | Admin | Org | Mod | Pres |
| Upload Files to Portal-Level Repository | ||||
| Change Filename/Delete Portal-Level Files | ||||
| Manage Repository Files from Left Navigation Area | ||||
| Attach/Share Portal-Level Files | ||||
| Change/Delete Files From Organizers' Repository | ||||
| Pre-Live Event In-Build Access (Engage Step) | ||||
| Console Access (Pre-Conference, Live Event) |
Administrator & Organizer File Repository Access
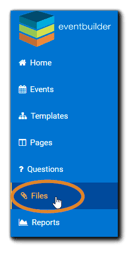
Admins & Organizers can access their account's File Repository from the Left Navigation.
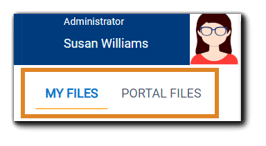
The User's File Repository dialog will appear. The far right corner displays 'My Files' (default view) or 'Portal Files.'
Here, Account Users can upload, manage, search, sort, and delete files from their repository:

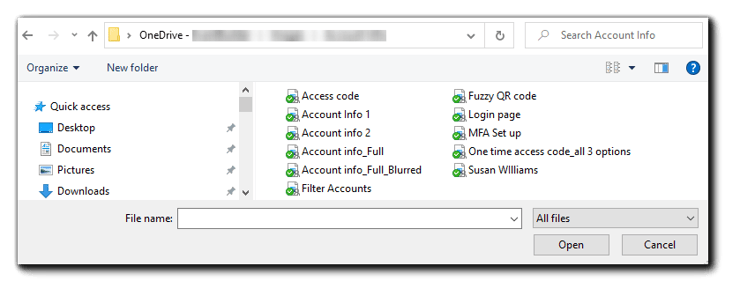
- Upload File(s) Button - Opens dialog for selecting your file(s) stored locally or in a cloud drive.
- Search Field - Enter a partial filename to locate the file you wish to use. Results appear below the Search Field.
- Filename and Created columns - Click the column label to sort either alphabetically (Name) or by date (Created).
- Trash icon - Delete file from User's own repository.
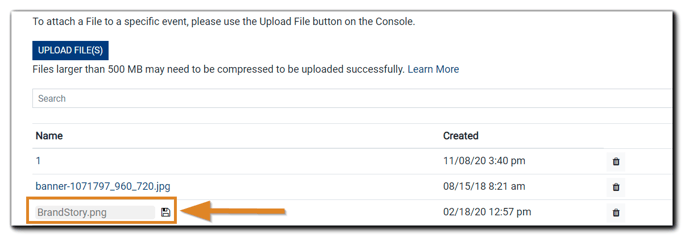
Image Text (top): To attach a File to a specific event, please use the Upload File button on the Console.
Image Text (bottom): File names should not contain non-ASCII characters. Files larger than 500 MB may need to be compressed to be uploaded successfully.
Upload File(s)
Click on the 'Upload Files' button. Your File Manager window will open. Select the file you wish to upload and click 'open.'
Once the upload is complete, a green confirmation notification will appear in the upper right, and the file will appear in your 'My Files' list.
Changing File Names
From the main File Repository dialog:
 To rename, right-click on the file. The field will turn grey and a 'save' icon will appear. Click in the grey box and change the file name, then click the 'save' icon.
Note: Changes to filenames in the Repository will not be reflected in the Event(s) the files are already attached to. For the updated filename to appear on the Event, please delete the file, then re-upload with the new filename and reattach to the Event(s).
Deleting Files
Organizers can delete files from their individual repository, and Administrators can delete both Portal-Level files and individual files for all User Accounts.
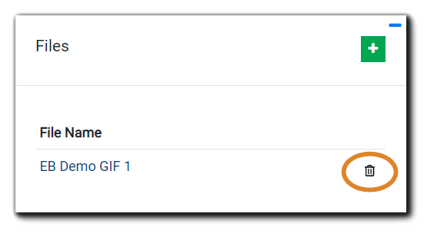
Navigate to the Files area from the Left Navigation. The File Management area will open to 'My Files.' Locate the file you wish to delete, and click on the 'trash' icon.
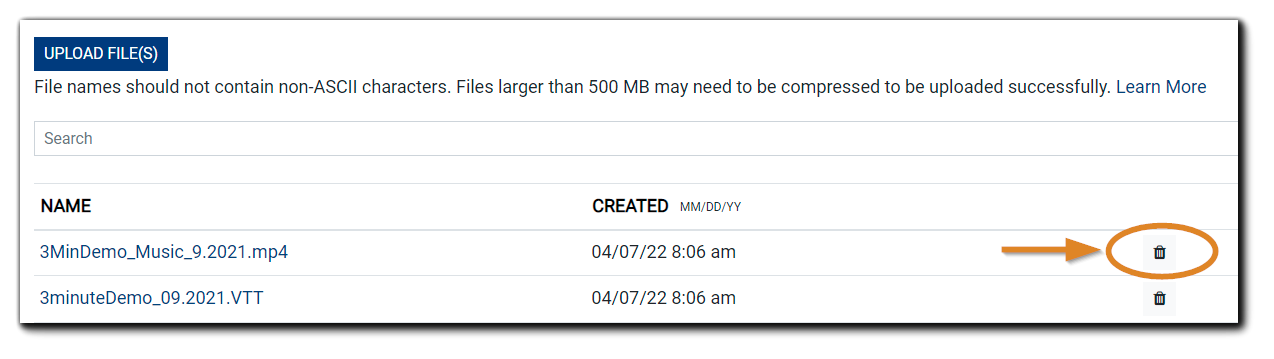
The following confirmation dialog will appear: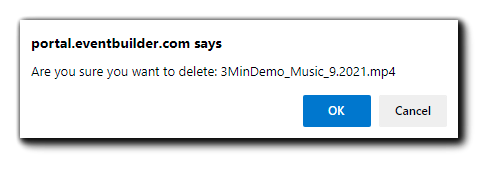
Click 'Ok" to delete the file.
Note: Deleted files cannot be recovered.
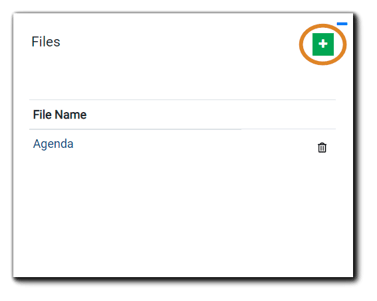
Uploading From the Moderator Console
Presenters and Moderators can upload event-specific files in the Console during the 30 minute pre-conference or when the Event is live.
Navigate to the Files widget in the right margin of the Console and click the green plus icon:
The 'Select File' dialog will appear. Upload a new File and/or choose from the Files list. Click 'Select' to add to the Files widget and make it available to Attendees.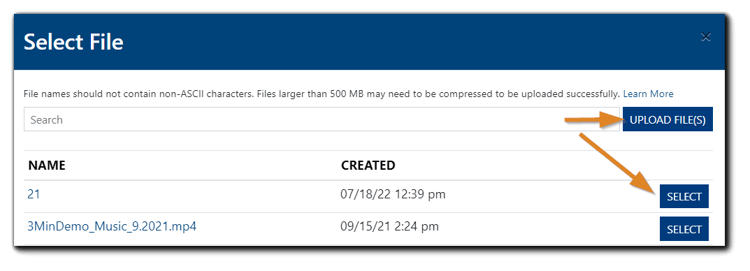
Once added to the Files widget, a paperclip icon will appear on the Attendees viewing console controls.

Deleting Files from the Moderator Console
From the Files Widget, locate the file you wish to delete, and click the trash icon:
The following confirmation dialog will display:
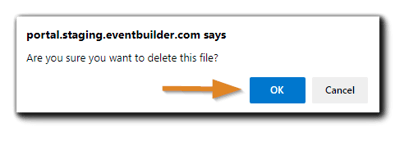
Click 'Ok' to delete the selected file.
Note: Selecting the trash icon in the Files widget removes the file for the specific event only. The file is retained in the Presenter or Moderator's individual File Repository.
.png)