Registrant Management
Last updated: May 5, 2023
Organizers can access Registrant information from their Events list to manage tasks related to individual Registrants, including Approve/Deny, mark as attended, redact Registrant information, or cancel an individual Registration. Additionally, Administrators can search for and access all Registrant records via the 'Registrants' option on the left navigation.
Registrant Management Area Navigation
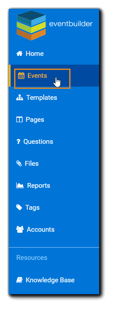
To access Registrant records from specific Events, click on 'Events' on the left navigation:
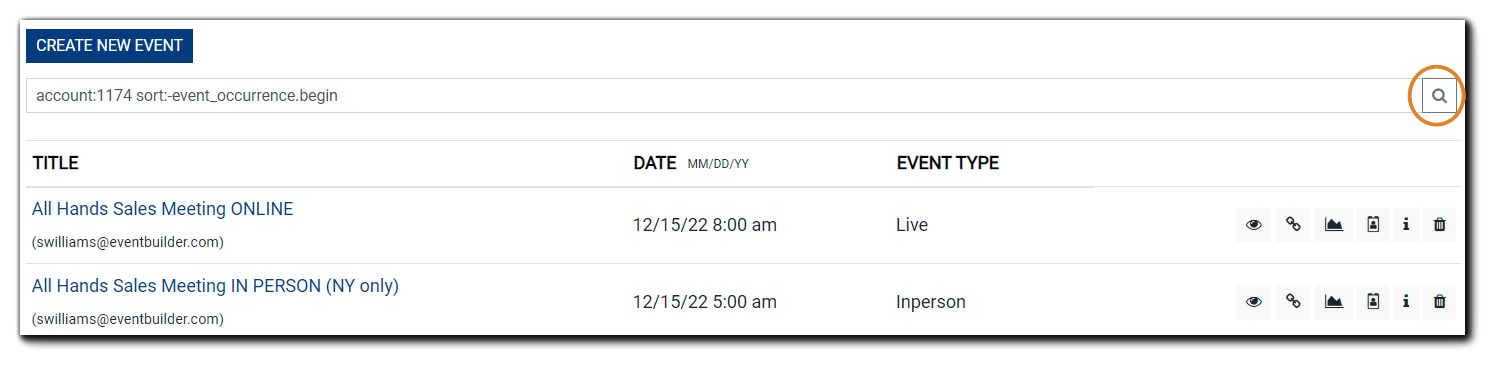
Your Events List will appear. Locate your Event in the list, or, using the Search bar, search for the Event you are managing Registrants for.
To Search, click on the magnifying glass icon to launch the Advanced Search window.
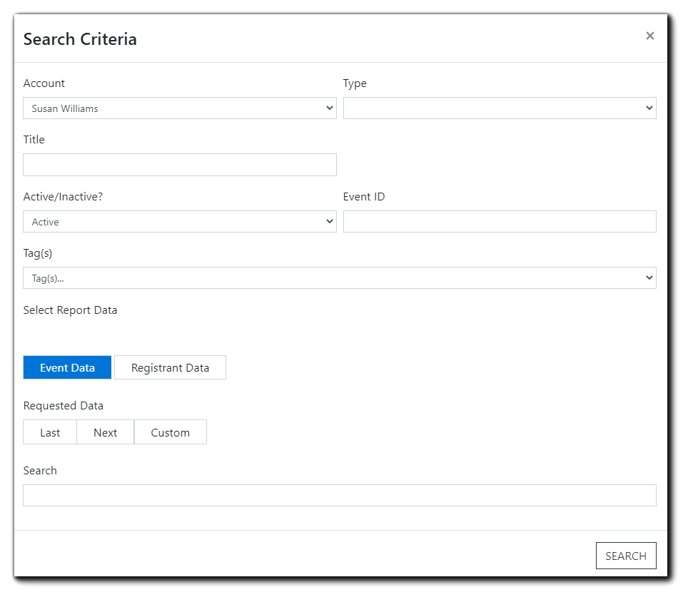
Enter your search criteria from the available options:
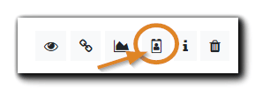
Events that match your search criteria will appear. Click on the 'person' icon to access the Registrant Management area:
The Registrant Management area will appear, listing all current Registrants for your Event.
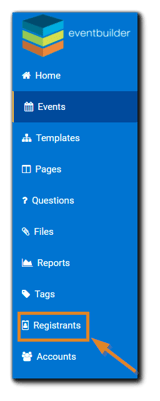
Portal-Level (Administrators Only)
Administrators can search for and directly access all portal Registrant records via the 'Registrants' option on the left navigation:
A list of Registrants will appear:
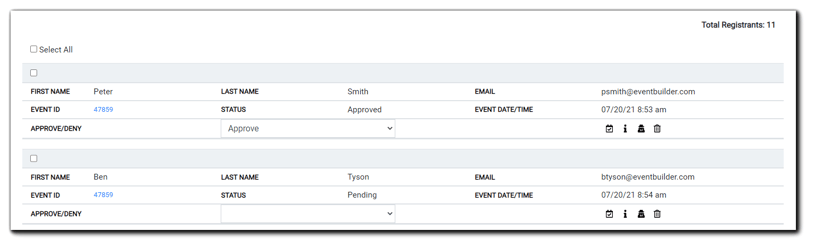
Registrant information displayed: First/Last Name, Email Address, Event ID, Status (Approve/Deny), Event Date/Time, Approve/Deny dropdown menu, and Action Icons: Mark as Attended, Registrant Information, Redact Registrant, Cancel Registration.
Approve/Deny Registrations
Organizers can approve or deny Event registrations individually via the Registrant Management area.
On the selected Registrant, click on the "Approve/Deny" drop-down menu and select the option you wish. 
A confirmation window will appear:
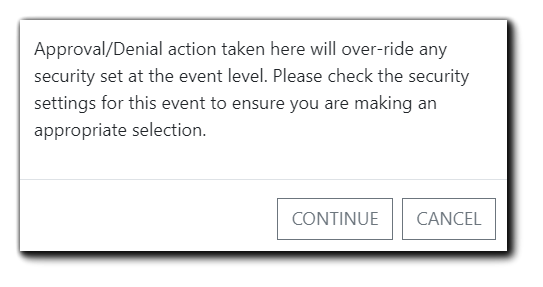
Image Text: Approval/Denial action taken here will over-ride any security set at the event level. Please check the security settings for this event to ensure you are making an appropriate selection.
Note: This action overrides Event security settings for the Registrant. E.g., Your Event has a denylist in place, but you would like to Approve the registration of an individual who meets the denylist criteria. Approving the registration will override the denylist setting for that individual Registrant.
Registrant Management Functions
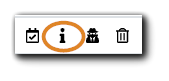
To the right of a Registrant's information are icons that allow Organizers to execute specific actions to manage Registrant information and other tasks
Registrant Management Icons:
| Icon | Function |
|---|---|
 |
Mark Registrant attended |
 |
View Registrant information |
 |
Redact Registrant information |
 |
Cancel Registration |
Mark Registrant Attended
The 'Mark Attended' function works dynamically for virtual Events/Webinars, and manually for In-Person Events. Upon delivery to a virtual event/webinar, the Registrant will be marked as 'Attended' automatically. For In-Person Events, Organizers use the 'Mark Attended' function manually for Attendee check-in.
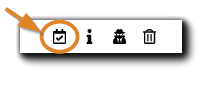
To mark a Registrant as Attended, click on the Mark Attended icon.
The following confirmation window will appear:
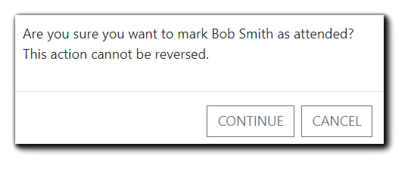
Image text: Are you sure you want to make Bob Smith as attended? This action cannot be reversed.
Click 'Continue' to mark the Registrant as Attended or Cancel to close the confirmation window and leave the Registrant attendance information as-is.
Registrant Info
The Registrant Information area gives Organizers a snapshot of a Registrant's basic details, such as name, email address, source of registration, and status, as well as additional information such as answers to Registration questions, polls, surveys, and emails sent.
Navigate to Registrant Info by clicking on the 'View Registrant Info' icon:
The Registrant's record will open:
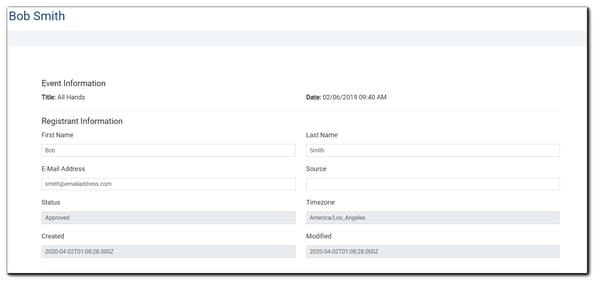
The top portion of the record includes:
Event Information: Title, Registration Date/Time
Registrant Information: First and Last Name, E-mail address, Source, Registration Status, Time Zone
Record Information: Date Created and Date Last Modified
The lower portion of the record provides information on the Registrant's interaction with EventBuilder - including
Registrant Questions - Answers submitted with their Event Registration.
Registrant Polls - Any poll answers submitted by the Registrant.
Registrant Surveys - Survey answers, including pre- and post- Event.
Individual Registrant Emails -A list of which system-generated emails were sent and when.
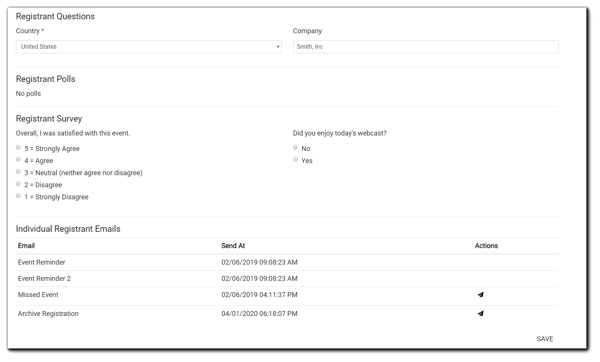
The paper airplane icon that appears in the 'Actions' column for some emails allow Organizers to resend the selected e-mail to the individual Registrant.

After making any necessary edits to the record, click 'Save' to close the record and return to the Registrant list.
Redact Registrant
Registrants can request their Personally Identifiable Information (PII) be redacted in accordance with their rights under the GDPR and EventBuilder's Privacy Policy.
To redact a Registrant's PII, click on the 'Redact Registrant' icon
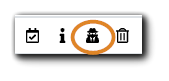 A confirmation window will appear:
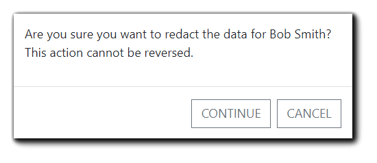
Image text: Are you sure you want to redact the data for Bob Smith? This action cannot be reversed.
Once redacted, the Registrant's information is not recoverable. Upon completion of this action the Registrant record entry will indicate the redaction:
 Note: Redacting a Registrant's information still allows them access to their Event. A redacted Registrant's name, email, and other identifiable information will not appear in Event Reports.
Cancel/Delete Registrant
To cancel an individual Registration or delete a Registrant record, click on the trash icon:
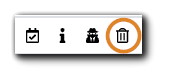 A confirmation window will appear:
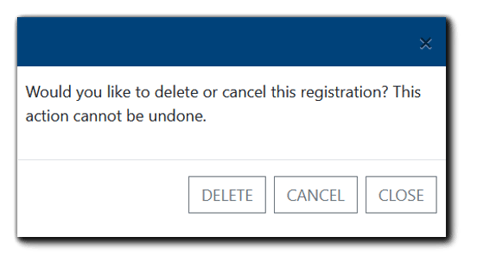
Image text: Would you like to delete or cancel this registration? This action cannot be undone. (buttons text) Delete/Cancel/Close
Click 'Continue' to confirm the cancelation. Upon completion of this action the Registrant record entry will indicate the cancelation, and the status will change:

Note: Once an individual's Registration has been canceled, they will no longer have access to the Event.
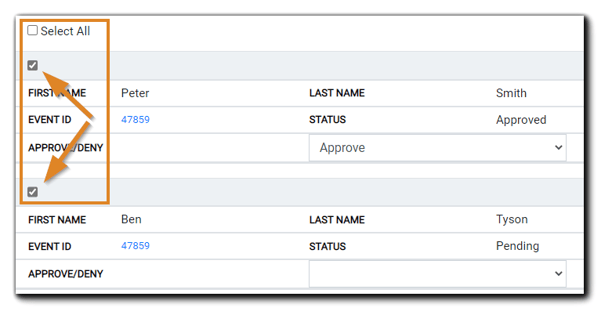
Bulk/Group Actions
To perform a task for multiple Registrants at once, click on the checkmark buttons next to each Registrant you would like to include in your action:
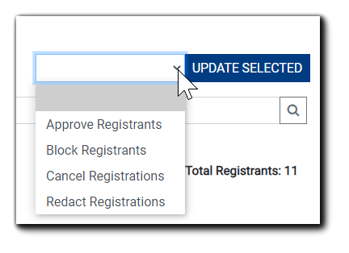
Once you have selected Registrants, click on the drop-down menu located at the bottom or the top of the Registrant list:
.png)