Please note, some features are not available with all subscription levels.
Last updated: April 26, 2023
Sign into your Portal with your username and password: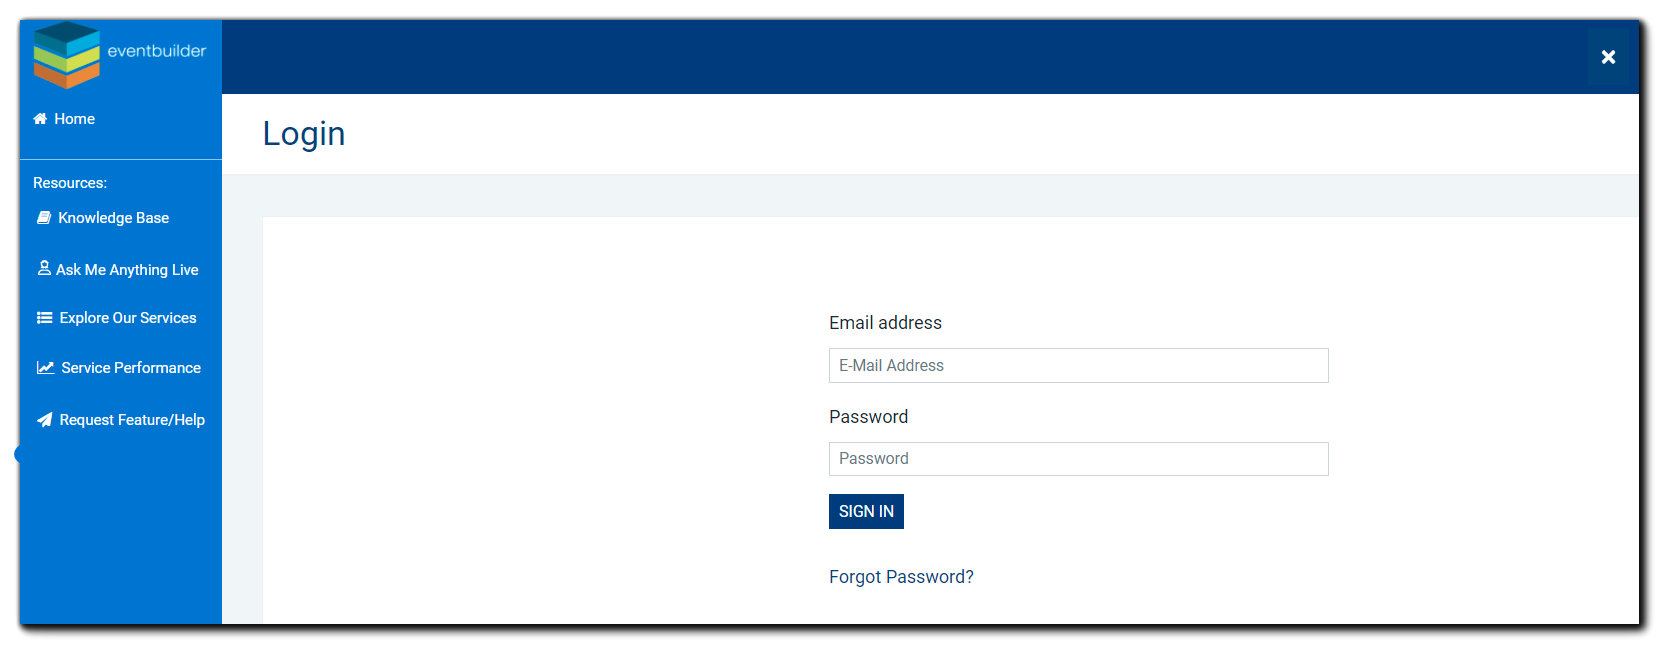
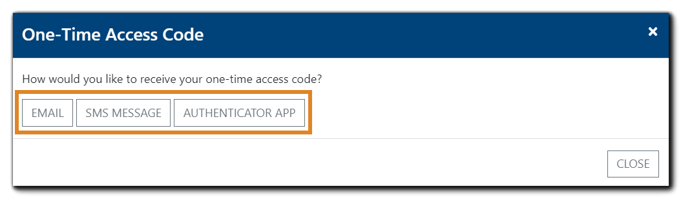
When prompted, select your preferred user verification method: Email, SMS Message, or Authenticator App.
Note: Email is the set as the default identity verification method. SMS Message/Authenticator App verification is configured in the User Account area.
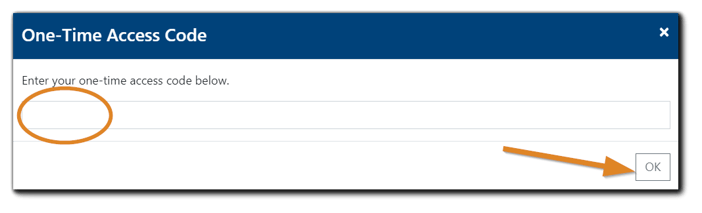
 Enter the One-Time Access Code you received and click 'Ok'
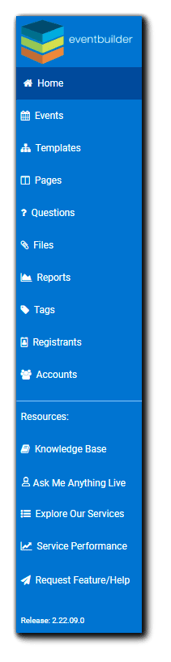
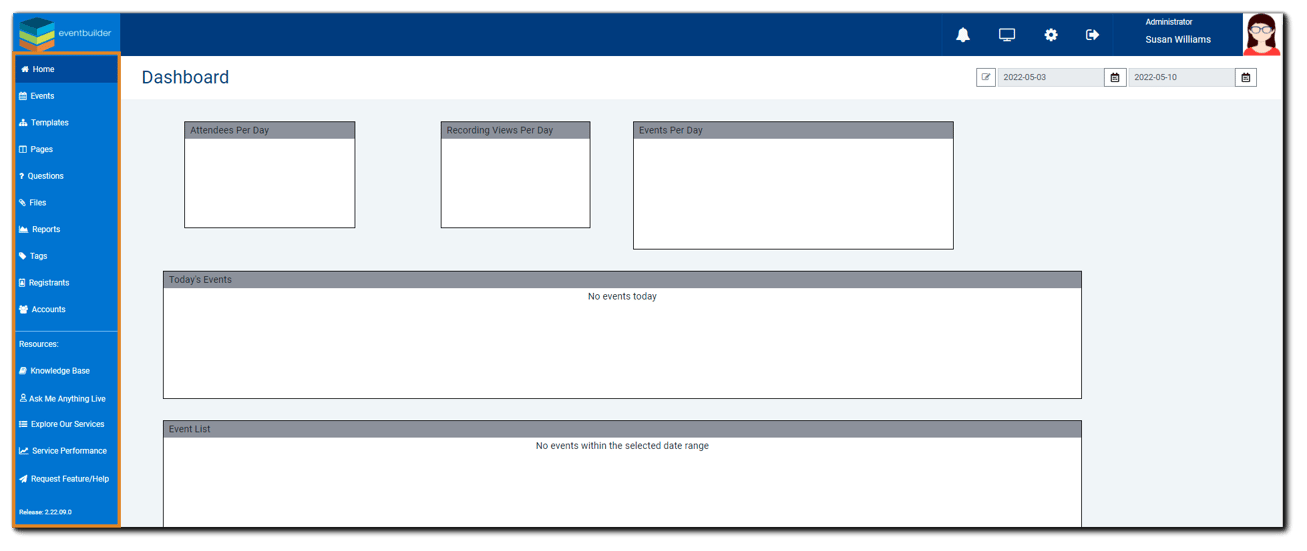 Upon login you will see your EventBuilder Portal Dashboard. The left navigation options link to the named areas within the software: Home, Events, Templates, Pages, Questions, Files, Reports, Tags, Registrants, and Accounts (Admin only). The Resources section includes links to the Knowledge Base, Ask Me Anything Live Webinars , Explore Our Services, Service Performance , Request Feature/Help , and the most recent version of the software.
The Dashboard displays information about your Events in the form of widgets, which can be customized. Note: Customizations are associated with individual User Accounts (Administrators and Organizers).
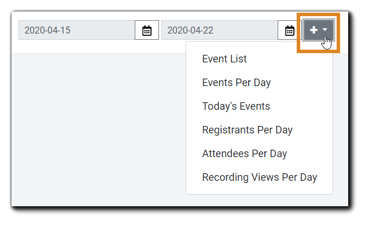
To customize your Event Dashboard, open the Widget tool by clicking the pencil icon.

To add a widget, click on the '+' drop down menu and select the desired widget(s) to add to your Dashboard.
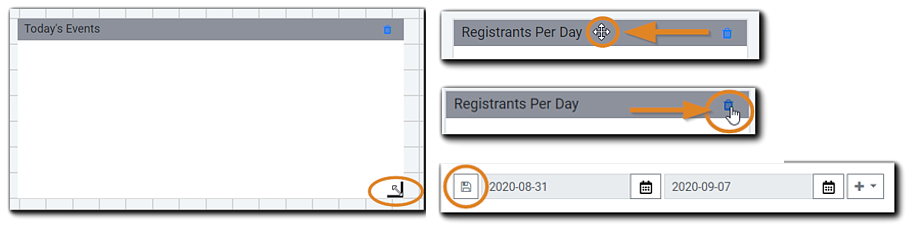
To size widgets, use your mouse and hover over the black corner highlighted in image. Click and drag the corner to the desired size.
To move widgets, hover your mouse in the title bar. Click the arrow icon and drag to your desired location.
To remove a widget from your Dashboard view, click on the trash icon located in the title bar.
When finished, click the Save icon.
Learn more about 2-Factor Authentication, Portal Configuration and Customizing Your Dashboard.
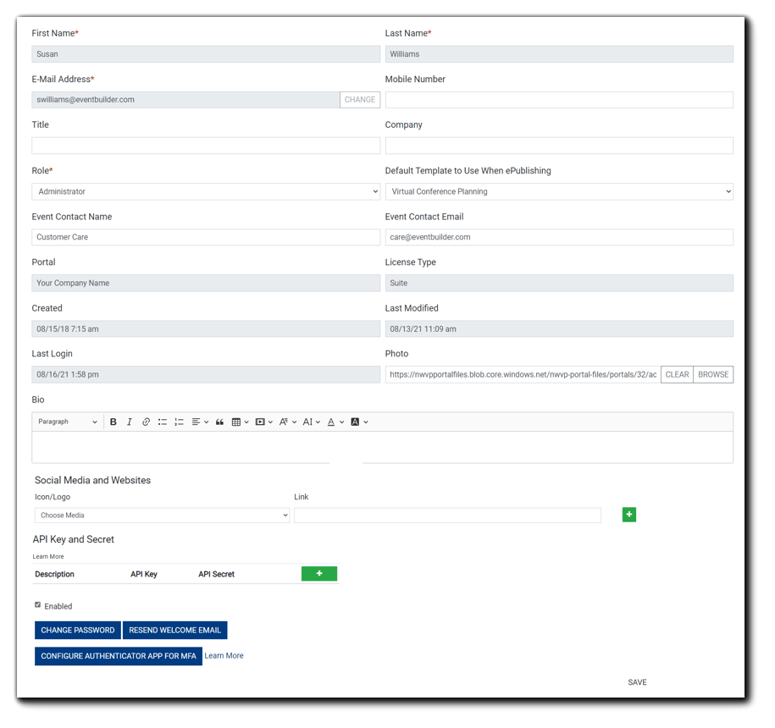
To update your User Account information, click on the gear icon located on the top right of your Dashboard.

Make any desired edits to your User Account, including mobile number and/or Authentication App configuration for 2-Factor Authentication, and click Save:
Use EventBuilder to add registration, reporting, privacy, and security to webinars and virtual events. There are two ways to schedule Events on EventBuilder:
1. From your Outlook Calendar (E-publish)
2. Directly from your Portal
Schedule from your Outlook calendar (E-Publish) Note: E-publish is available for Suite-level subscriptions only.
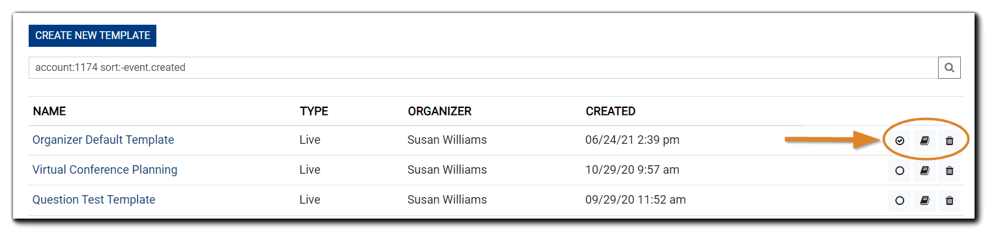
Before creating your E-published Event: Please ensure the correct default Template has been selected. Set or confirm your default Template by logging into your Portal, navigate to the Templates view, and put a checkmark in the Default Template icon in your My Templates list. Learn more about E-publishing.
To learn more about Templates, please see the Templates Overview and Building Templates knowledge base articles.
To schedule an Event from Outlook, create a new Microsoft Teams meeting. Invite scheduling@eventbuilder.com in the "To" field. Your Event will be created utilizing your default Template as it's foundation. Note: E-publish is not available for Teams Live Event.
Enter the Event title in the "Subject" field.
Select the date, time and duration of the Event.
Do not remove any of the default Microsoft Teams meeting information in the body of the email.
Click Send once the required information has been entered.

Once scheduled, you will receive an email confirming your Event has been created. Log into EventBuilder to fully customize your Event.
Locate the Event in the Events view. Click on the Event title to access the editing tools and finish building your Event.
Schedule directly from your Portal
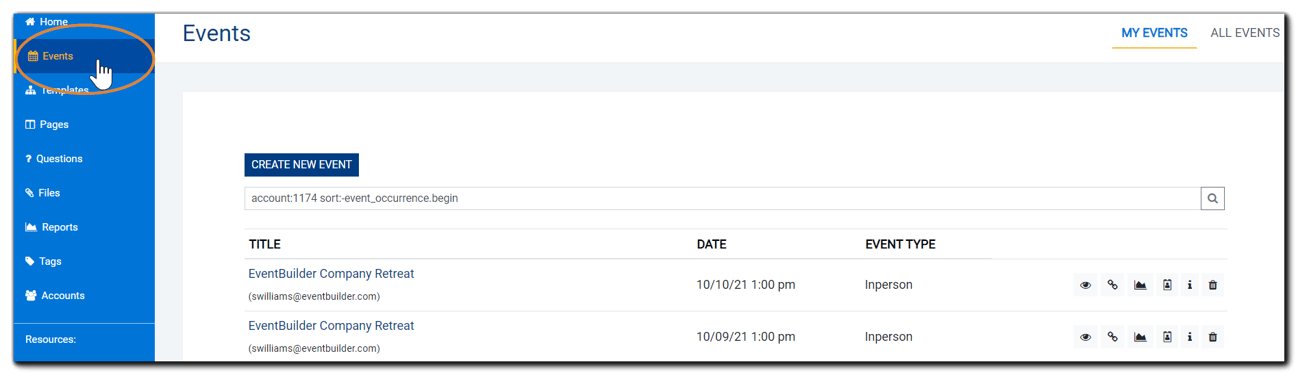
To create an Event directly from your Portal, navigate to the Events view, then click on New Event. Select the best option for your Event: Start from scratch or Create from an existing Template and click Continue.

Start from scratch: Event creation is self-guided in a step-by-step format. A Microsoft Teams or Teams Live Event meeting link is required as part of the setup for Live Events. This option will use your Portal's default Template. (Set by the Portal Administrator.)
Create from an existing Template: Build an Event using an existing Template.
For information on how Templates work and best practices for their use, please refer to the Templates Overview Knowledge Base article.
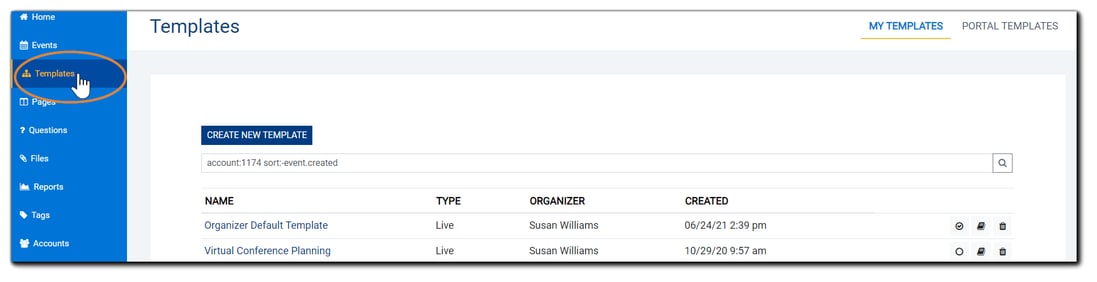
To create a Template instead of an Event, go to the Templates view from your left-hand navigation.
How do you want to engage your audience? There are five different Event Modes to choose from.
Live Webinar Mode: Add Registration Pages and Listing Pages, security, automated cloud-based recording and sharing as well as robust reports to Microsoft Teams and Teams Live Event. Presenters and Attendees join the Microsoft Teams or Teams Live Event presentation environment.
Streaming Mode: Presenters join Microsoft Teams, and the EventBuilder Bot streams the Microsoft Teams staging area (audio, PowerPoint deck, desktop sharing, and whiteboards) to a no-download, any-browser Attendee console that allows you to "see" your Attendees in real-time. Engagement with Attendees is done with polling, questions, messages, and moderated Q&A. Presenters join Teams and Attendees join the EventBuilder Attendee Console. (Suite-level only) EventBuilder Streaming is not available with Teams Live Event.
Simulated-Live Mode: Play pre-recorded content while interacting with your audience in real-time with EventBuilder's Engagement Tools. Attendees join a no-download, any-browser Attendee Console that allows you to "see" your Attendees in real-time. Engage with polling/interactions and moderated Q&A. Moderators join the EventBuilder Moderator Console while Attendees join the EventBuilder Attendee Console via their chosen browser. (Suite-level only)
On-Demand Mode: Add Registration and Reporting tools, Surveys, and/or Handouts/Resources to your recorded webinars and/or your own uploaded video content. (Suite-level only)
In-Person Event: Essential and Suite-level subscribers can utilize EventBuilder's powerful registration and reporting tools to create In-Person Events for seminars, courses, conferences, meetings, and off-sites. Learn more about In-Person Events.

For Live Webinar/Streaming mode, paste the Teams or Teams Live Event link:

If you are creating a Simulated-Live or On-Demand Event, upload your recording. Click 'edit' to access tools to trim and/or add chaptering.
Learn about Event Recording Management

Note: We recommend uploaded recordings not exceed 500 MB. Learn more: File Upload Requirements.
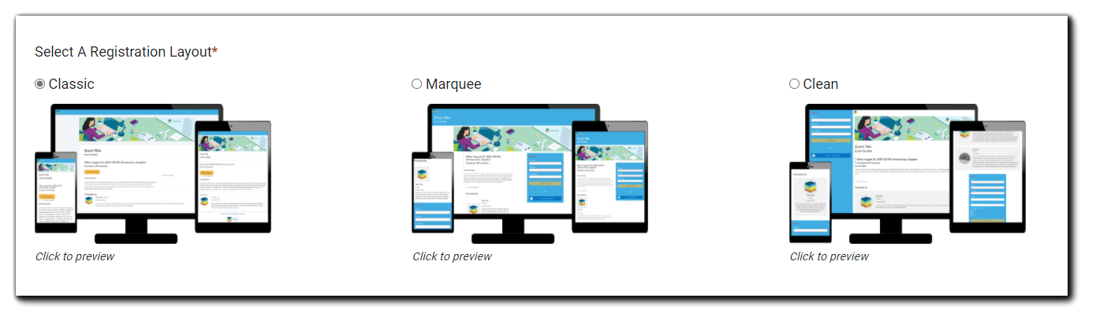
Select a layout for your Event Registration Page. Choose Between Classic, Marquee, and Clean.
Next, assign Title (required), Subtitle (optional), Date, Time, Time Zone, Duration Display, and Event Duration. Optionally, select the checkbox to display the original event date on the Registration page.

Event Organizers have full access to edit the Registration page, join and interact during the Live Event, and run Reports. Organizers also have the option to grant access to others for assistance in the delivery of Events. There are three Event Management roles available:
 Presenter: Responsible for presenting materials and answering Attendee questions. They have access to Engagement Tools.
Moderator: Has full control of the Live Event and Engagement Tools.
Organizer: Creates the Event or has all of the same access and privileges as the creator of the Event. This includes full editing, scheduling, and access to reporting features.
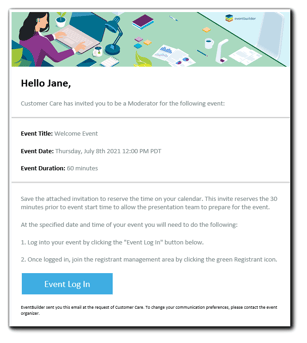
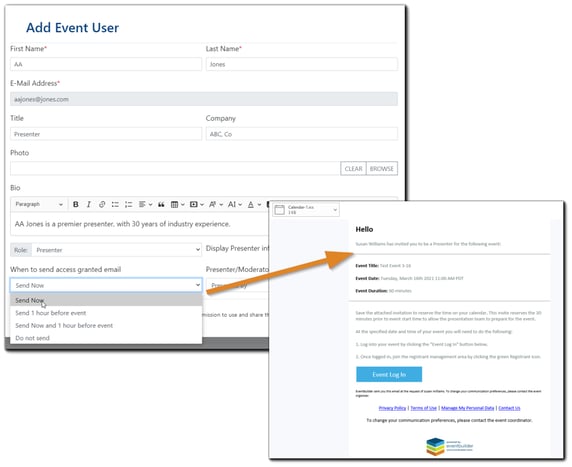
Assigning someone a role of Presenter, Moderator, or Organizer will automatically send them an email (see image) with a link to join the Event and an attached invitation to reserve time on their calendar. The invite reserves the 30 minutes prior to the Event's start time to allow the presentation team to prepare and access all technologies.
Learn more about Event Management Roles and permissions.
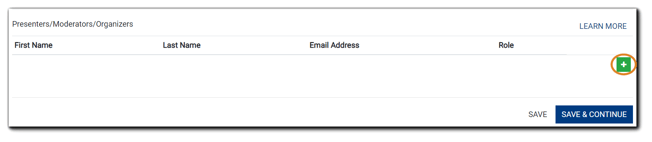
To assign an Event role, click on the green plus sign.
A new window will appear. Search for a User that already exists on your Portal (image on left) or create a new User (image on right) and assign them the appropriate role.
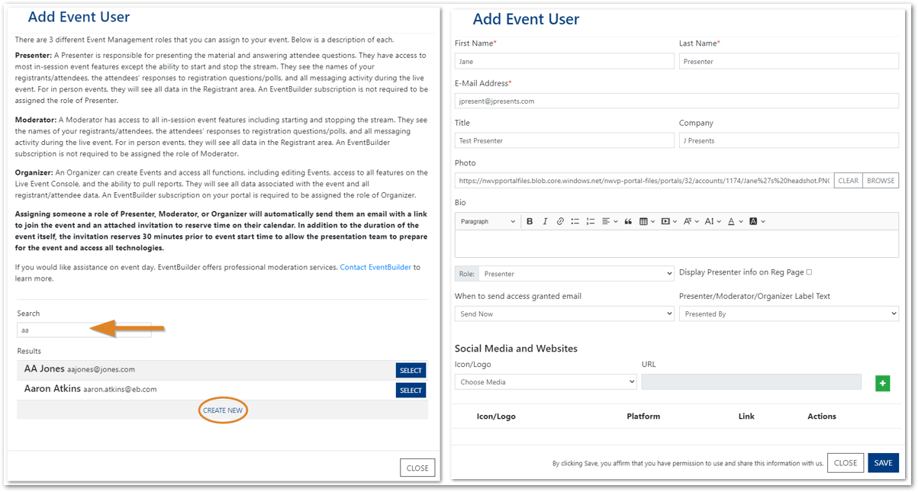
In the Add Event User dialog, assign roles and enter information about your Event User, including a photo, bio, social media and website links, and whether you would like their information displayed on the Registration Page. The editor is HTML-enabled and supports images.
Organizers may also choose when - or if - Presenters, Moderators, or additional Organizers receive their system-generated Access Granted email.
Once you've assigned Event roles, click Save & Continue.
This step allows you to customize the overall appearance of your Event Registration Page.
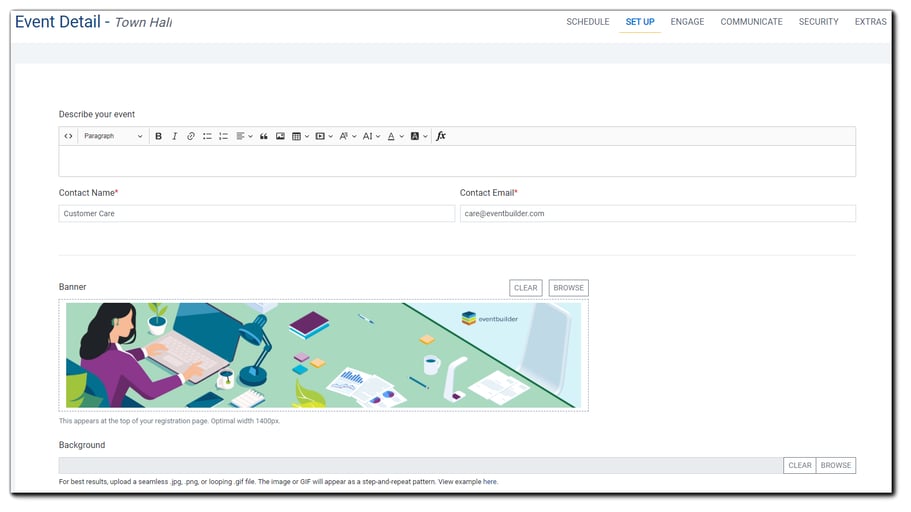
Describe Your Event: Add Event details via the full-featured HTML-enabled editor, provided to allow Organizers creative flexibility for designing their Registration pages.
Event Contact Information: The Contact Name and Contact Email listed on the User's account record will pre-populate these fields. This information will also appear on the calendar invite and the contact the organizer link on the Registration Page.
Banner: The banner image is displayed at the top of your Registration Page, as well as system-generated emails.
Note: Banners are set at the Portal-level but can be changed to suit the topic. Recommended width: 1400px.
Background: (available to Suite subscribers) - Upload a seamless .jpg, png, or looping GIF file. The GIF will appear in a step-and-repeat pattern. (View example here )
Once complete, click 'Save & Continue.'
Event details appear on your Registration Page, as well as Event Description, Additional Resources links, and Presenter Bio (if chosen to display.)

Learn more about the Setup Step.
There are several ways you can engage Attendees during your Event. 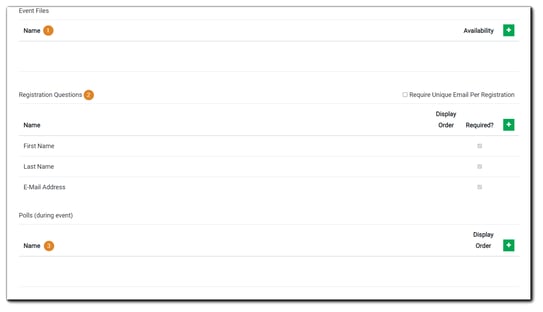
1. Files: Add downloadable files to the Registration Page. Organizers can choose to make files available before or after registration. Files will also be made available to Attendees for download on Streaming, Simulated-Live, and On-Demand Events.
2. Registration Questions: First Name, Last Name, and Email Address are required demographic questions by default. Additional questions may be created to gather custom information at the time of registration.
3. Polls: (for Streaming Mode and Simulated-Live Mode) - Polling questions can be created ahead of time or on-the-fly and launched during the Live Event by the Event's Presenter, Moderator, or Organizer.
4. Custom Pre-Survey and Post-Survey Text: Customize text on Registrant Survey correspondence with the Pre-event and Post-event Survey HTML-enabled text editor.
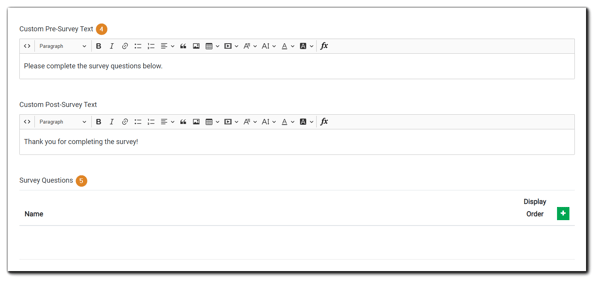
5. Survey Questions: Survey questions can be created here. In Live Webinar Mode with EventBuilder Streaming, questions are launched once the stream has ended. A link to the Post-event Survey questions may also be included in the follow-up emails.
6. Additional Resources: Organizers can add Additional Resources to their Event, such as links to relevant sites, and choose to have the resources appear on the Registration Page, during the Live Event on the Streaming Console, or both. Resources appearing during the Live Event will be hyperlinked in the Attendee Viewing Console on the 'Files' panel, indicated by a green paperclip icon. (See Streaming Console - Attendee Experience)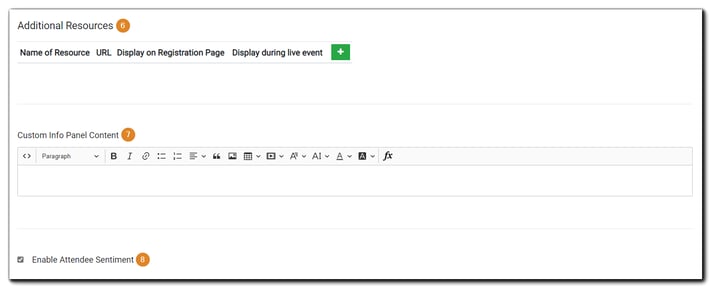
7. Custom Info Panel Content: Add text, links, images, etc. with the provided HTML editor. The content added here will display on the Info Panel in the Attendee Streaming Console.
8. Attendee Sentiment: A "thumbs up" or "thumbs down" option for Attendees. Organizers can enable this additional engagement tool to help Presenters/Moderators receive immediate feedback from their audience.
Learn more about the Engage Step.
Select and customize emails to be delivered to your Registrants automatically.
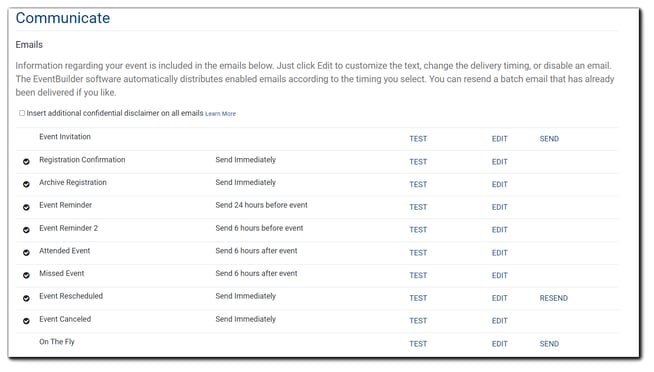
Click Edit next to each email to customize it.
Click Test to send a test email to yourself to ensure delivery and see what your Registrants will receive.
Available emails: Event Invitation, Registration Confirmation, Archive Registration, Event Reminder, Event Reminder 2, Attended Event, Missed Event, Event Rescheduled, Event Canceled, On-the-Fly.
Event Invitation Send: Organizers can upload a .csv-formatted list of Invitees.
Edit Mode:
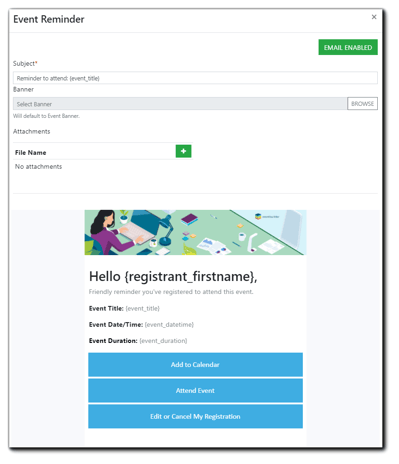 Use the text editor to customize the body of the email. Click on the Source button (< >) in the text editor to use HTML if desired.
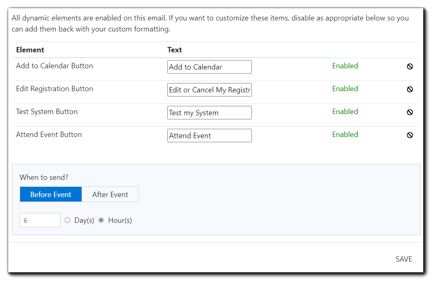
After making edits to the top portion of the email, scroll to the bottom portion to select dynamic button options: Add to Calendar, Edit Registration, Test System (Streaming only), Attend Event. Next, choose the timing of delivery for your email. Click 'Save' to confirm your changes and return to the main Communicate window.
Calendar Invitation Content: The calendar invitation contains default Event information, attached to the Registrant's Confirmation email in .ics file format. Organizers can add text via the HTML editor provided. The default Event information cannot be changed or deleted.
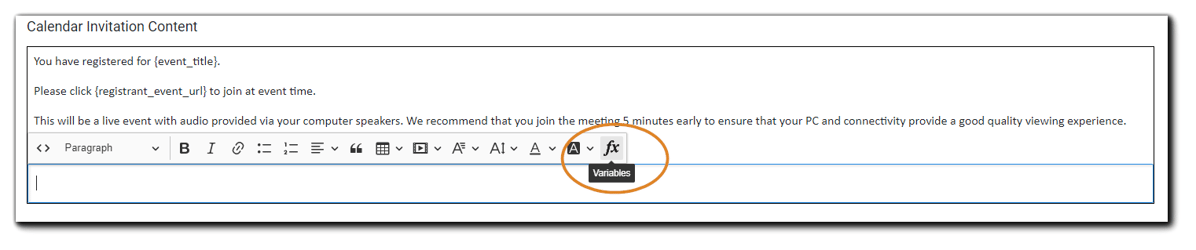
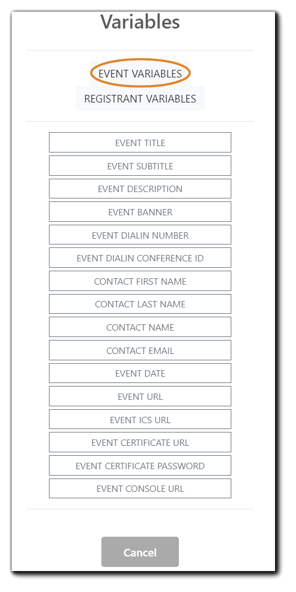
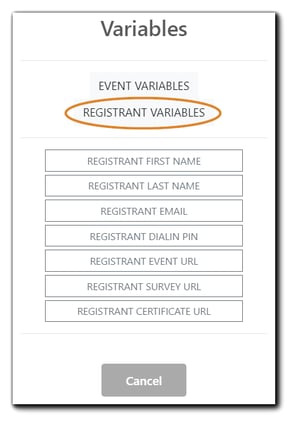
To customize the calendar invitation: Click in the bottom of the Calendar Invitation Content window and the 'fx' button (highlighted above) will appear. Click 'fx' to select the variables you wish to add. Organizers can add text by clicking in the HTML editor window.
Event Opening and Closing Images: For Streaming and Simulated-Live Events, customize the static images that appear to the audience before and after the Event. Organizers may also upload rotating slides in GIF format. Learn more about rotating slides.

Have greater control over who can register for and attend your Event using comprehensive security features.

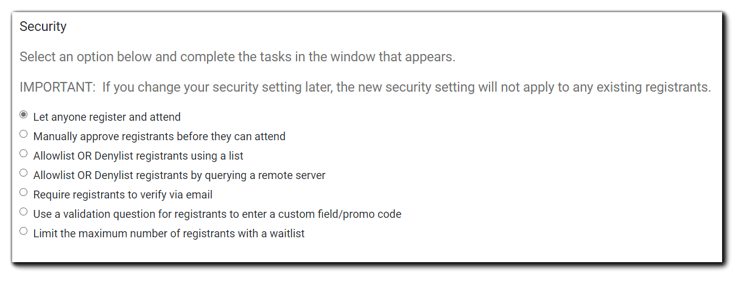
Let anyone register and attend: The default setting, allows anyone with the Registration Page link to attend an Event.
Manually approve registrants before they can attend: Organizers decide which Registrants can attend the scheduled Event. After people register, a message reading, "Registration Pending. You will receive a confirmation as soon as the event organizer confirms your registration" is the default message shown. Organizers can customize the message text to suit the situation. Organizers may then approve these registrants on the Security step. Once approved, the Registrant receives a confirmation email and allowed to attend the Event.
Allowlist or Denylist registrants using a list: Organizers can automatically screen Registrants by domain and/or email address.
Allowlist or Denylist registrants by querying a remote server: This option allows Organizers to automatically screen Registrants by querying a remote server - requires Organizers to have administrator access to the endpoint server.
Require registrants to verify via email: Enables 2-factor authentication for Event registration. Once the Registrant replies to the email, they are sent a confirmation email with the join link included.
Use a Validation Question For Registrants to Enter a Custom Field/Promo Code: Screens Registrants by a custom value entered at the time of Registration. Organizers create or select a validation question on the Engage step and add it to the Registration Questions to associate the validation question with the Event.
Limit the number of registrants: Set a maximum number of Registrants. Once the number has been reached, any additional Registrants will be placed on a waiting list. The maximum number can be adjusted at any time.
Upon selecting the option, "Limit the number of registrants," options for managing a waitlist will appear.

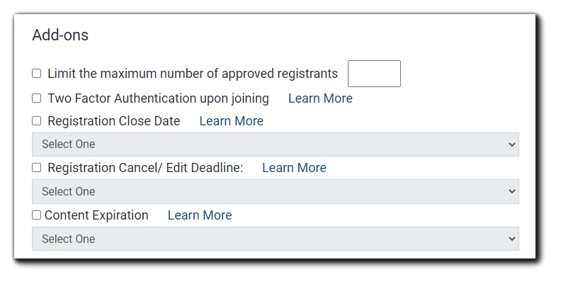
Security Add-ons
Limit the maximum number of Registrants: Places a hard registration limit on your Event
Two-Factor Authentication upon joining: Requires Registrants to enter a one-time access code to join the Event
Registration close date: The Event's Registration button will change to 'Registration Closed' on the date selected
Registration Edit/Cancel Deadline: Prevents Registrants from editing or canceling their registration after 12:00 am on the date specified, based on the Registrant's time zone
Content Expiration: The Event page will be deactivated on the date selected at 12:00 AM UTC
Learn more about EventBuilder Learn more about EventBuilder Security options
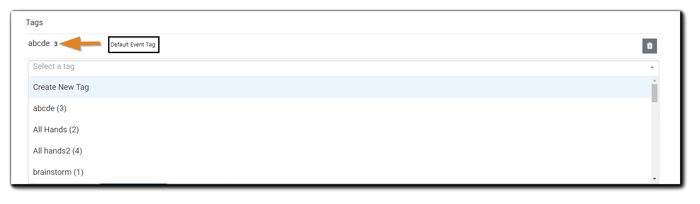
Event Tags: Adding Tags to Events allows Organizers to filter and group Events to streamline the registration process for Listing Pages, and to pull data across multiple Events for Reports.
To add Tags to your Event, click on the drop-down menu and create a new Tag or select an existing Tag. The number in parentheses indicates the number of Events the Tag is associated with. You may add multiple Tags to a single Event or group of Events, and a default Tag may be set at the Template-level. You may remove the default Tag by clicking on the 'Trash' icon.
Learn more about Tags and how they work with EventBuilder software.
Listing Page Image: Customize the image your Invitees see next to the Event when shown on a Listing Page.
Click on Browse, and the following window will appear:
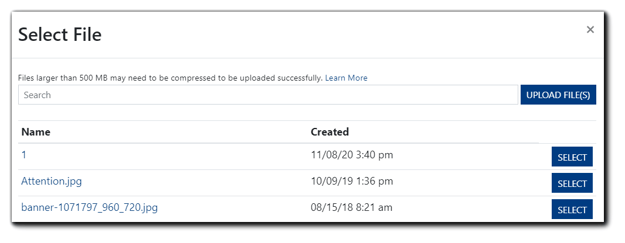
You may choose an image that has already been added to your portal or upload a new image.
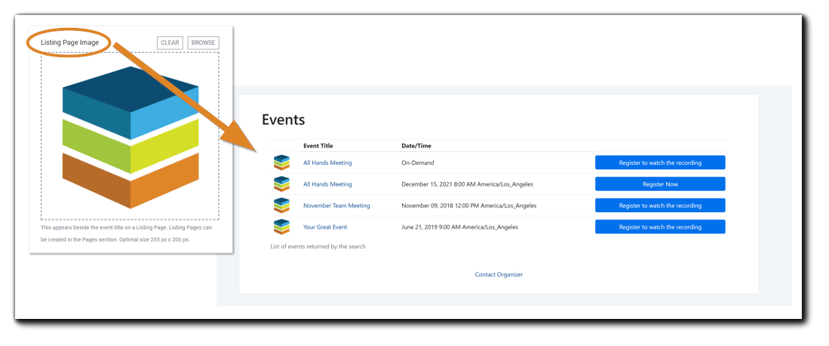
Once selected, the image will appear as shown on the Listing Page
Recommended image dimensions: 255px x 200px. File compression may be necessary for uploads larger than 500 MB.
Learn more about file uploads.
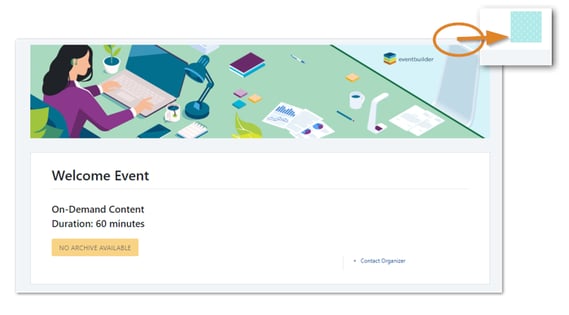
Co-Branding Image - For Events that are presented/sponsored by more than one organization, Organizers can add a hyperlinked logo of the participating company.

The brand's logo will appear in the upper right corner of the Registration Page:
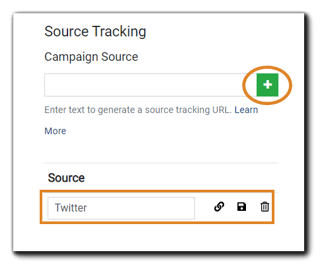
Source Tracking is a valuable tool for evaluating the effectiveness of marketing campaigns. By creating unique registration links for each of the channels used to invite Attendees (e.g., email, website, Facebook, LinkedIn) Organizers can track where registrants are coming from when they register for the Event.
 There is no limit to the number of custom links you can create using EventBuilder's Source Tracking feature.
To generate a custom link, type the name of the source in the text box. The link will be added to a list below. Click on the link icon to copy, then post to the appropriate source.
There is a column for source tracking results on your Event Registration Activity report.
Certificate To create customized completion Certificates for Event Attendees, click on 'Enable Event Certificate.'
Design your certificate by adding content in the HTML editor. Images, links, and styles can be added or changed.
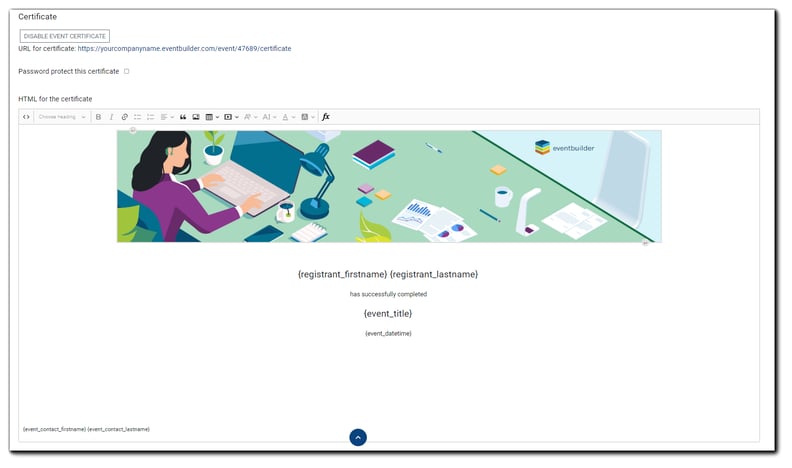
Click on the 'fx' button to select Event and/or Registrant variables to add to the Certificate:


Add the certificate link to your post-Event email to Attendees. Organizers may also choose to password-protect Event Certificates, which are automatically generated. The password will be sent to Attendees in post-Event emails.
Registration Page Action Button Labels Organizers can customize the text on action buttons included on Registration Pages. (Optional) note: Action Buttons are dynamic based on the cycle of the Event and functional as-is.)

Click on Show/Hide to open the button label dialog:
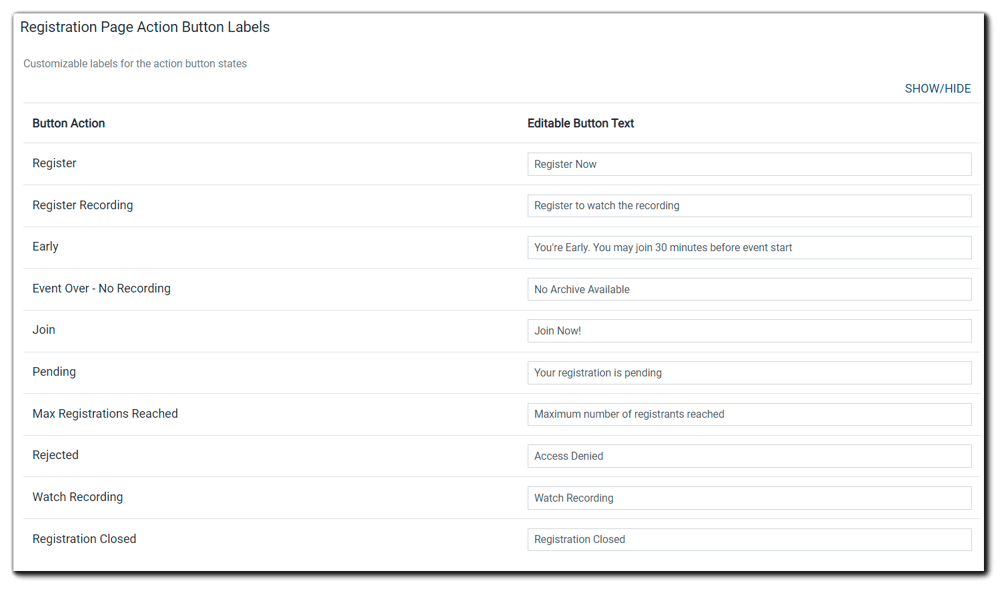
Click in each text field you wish to edit. Your custom text will appear on your Event's Registration Page.
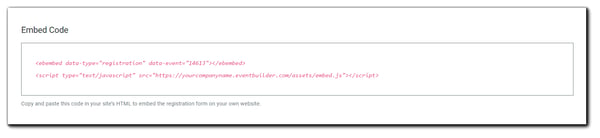
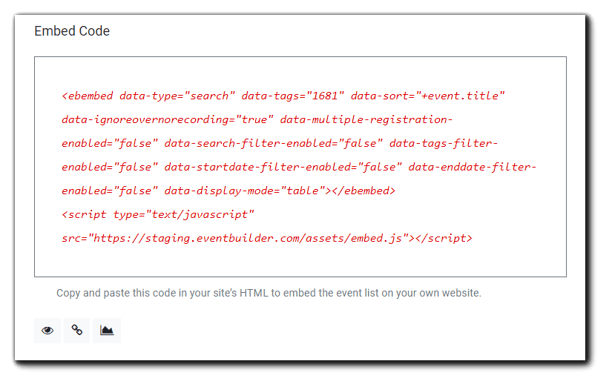
Embed Codes allow Organizers to embed Registration forms on their website. Copy the HMTL code in the window provided and paste where appropriate:
Closed Captioning is offered for EventBuilder Streaming Events, with two options available: Live Captioning or Automated Captioning.
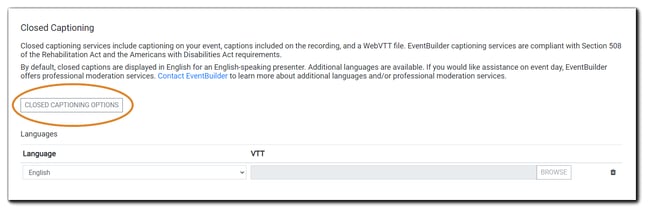
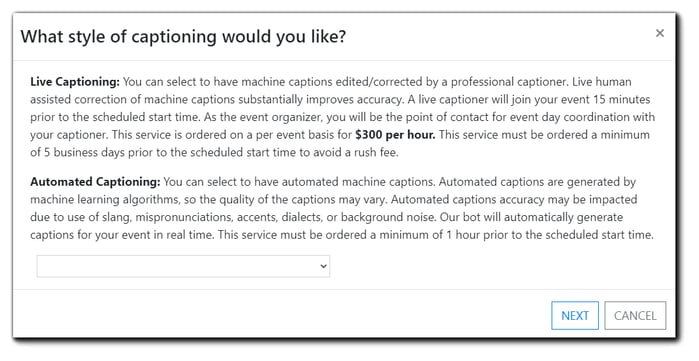
Select your captioning style from the dropdown menu and click 'Next.' Depending on your selection, one of the following confirmation dialog windows will appear:
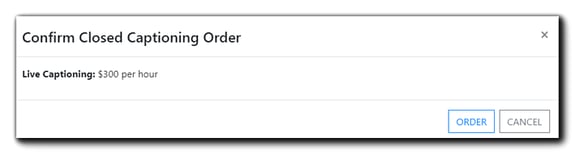
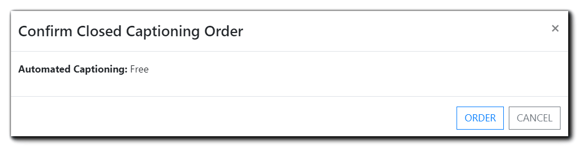
Select 'Order' when you are ready to proceed. Confirm the service charges on the confirmation dialog:

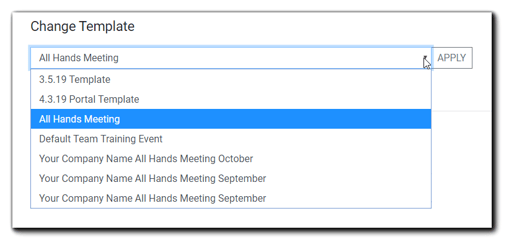 Change Template: Organizers can change their Event's Template if they find that a different Template is a better fit. With this function, the Template can be changed without losing any of their previous Event settings.
Click on the dropdown menu. A list of available Templates will appear. Select the Template you would like to use for your Event, then click 'Apply.'
EventBuilder recommends reviewing all settings after changing the Template of your Event.
Note: Changing an event's Template does not change the Event Type/Mode.
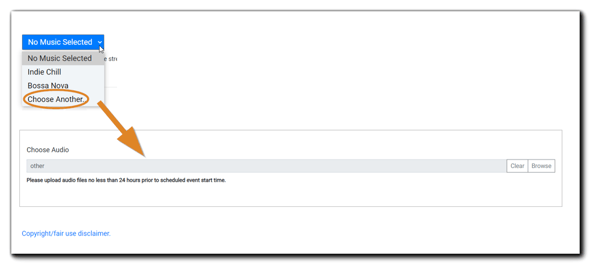
Pre-Event Music Selection: This feature allows for the selection of hold music to play while Attendees are waiting for the live Event to start. EventBuilder provides two original compositions, or Users may choose to upload their own. (Suite subscribers only)
Now that you have successfully created your Event, let's look at other features available to you on your Portal.
Use the navigation on the left to access additional Portal features.
(This feature is for Suite subscribers only)
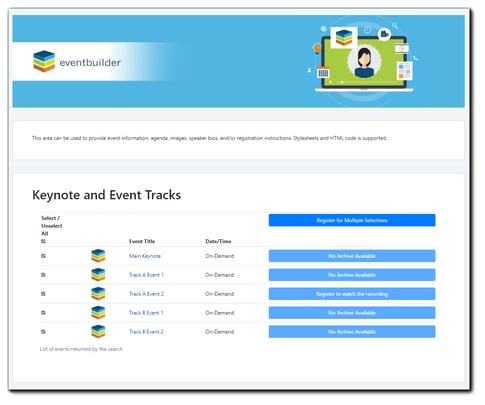
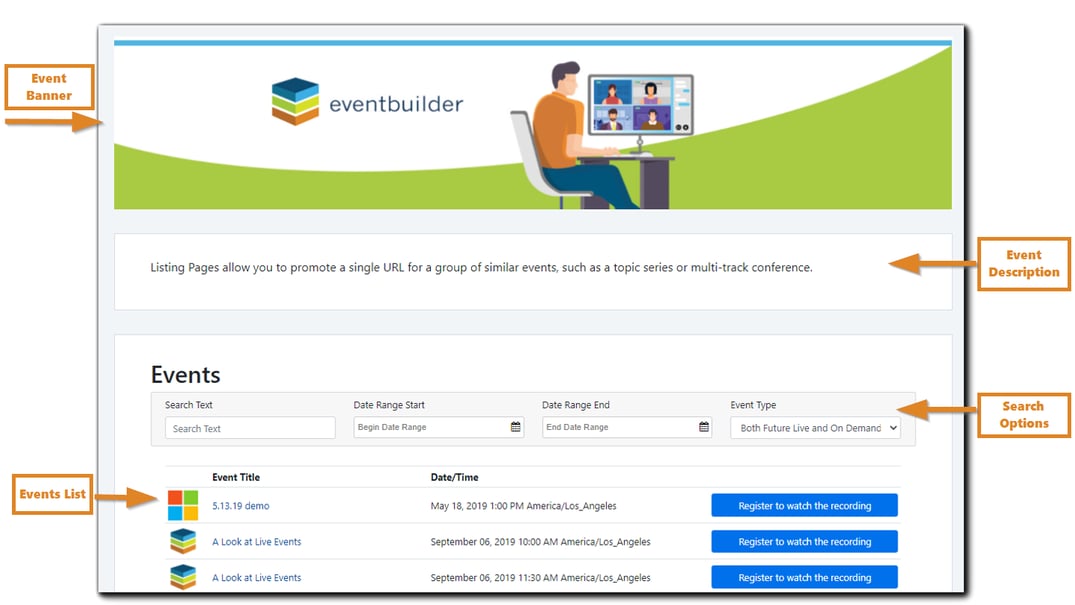
A Listing Page collects links to individual Event Registration Pages on a single view. It provides the ability to promote a single custom URL to a target audience for a group of similar Events, such as a topic series, past or present.
You have the option to use Registration Efficiencies on a Listing Page which will allow your Registrants to register for multiple events at one time.
A Custom Page is a fully customizable and provides the ability to share content links, files, etc. with a target audience via custom link.
Click on the Create New Page button.

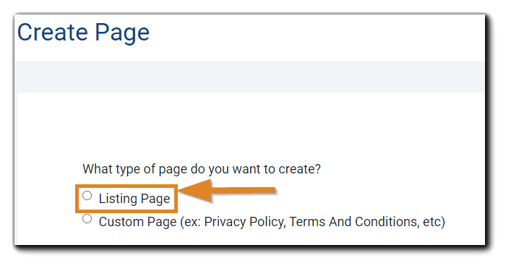
The Listing Page creation mirrors that of building Events, with three steps: Set Up, Design, Extras. Custom pages are standalone webpages supporting HTML, CSS, and other elements via full-featured text editor for customizations.
Page type selection: Select Listing Page
The Set Up dialog will appear:
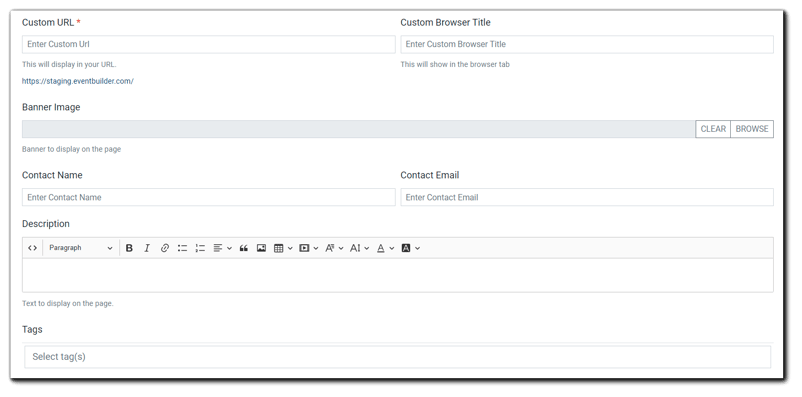
Custom URL: is the name that appears in the Listing Page link. Example: https://yourcompanyname.eventbuilder.com/
Custom Browser Title: appears on the browser tab when you navigate to the page.
Banner Image: appears at the top of your Listing Page.
Contact Name/Contact Email: Can be assigned to anyone you choose, including general email addresses, e.g., organizer@event.com
Description: Events offered, appears directly under the Banner. This area is a fully customizable editor, supporting HTML, Images, iFrame, and CSS stylesheets.
Tags: Used to filter Events you wish to display on your Listing Page. The Events you want to appear on your Listing Page must have the correct Tag(s) and match exactly. Tags cannot have spaces and are not case sensitive.
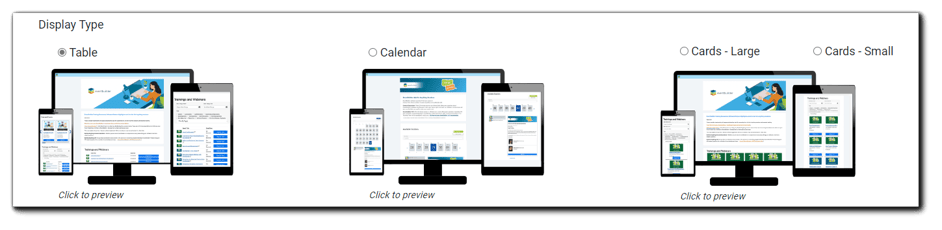
Click 'Save & Continue' to move to the Design step
Display Type: Options include Table, Cards (Large or Small), and Calendar
Background: Image displayed on your Listing Pages. Supported image types: .jpg, .png, .gif. The image appears as a step-and-repeat pattern

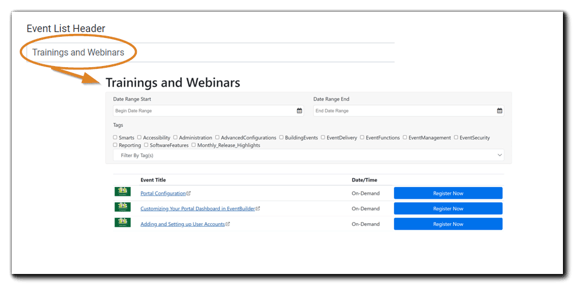
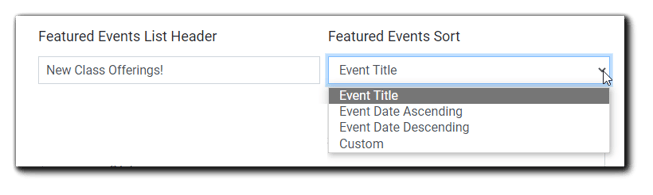
Event List Header: Default will read 'Events,' however, you can customize the wording to suit your Events
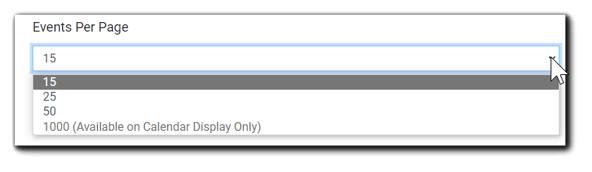
Events Per Page: Display 15, 25 or 50 events at a time
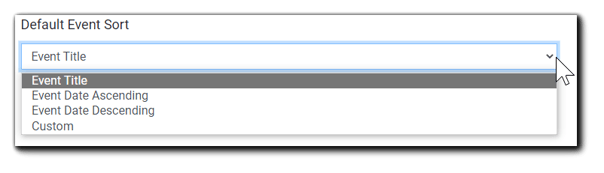
Default Sort: Decide what order to display your Events on the Listing Page. Options are 'Event Title,' 'Event Date Ascending,' 'Event Date Descending,' and 'Custom'
Click 'Save & Continue to move on to the Extras step
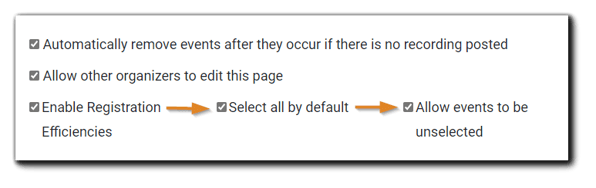
Page Options: Choose to remove once finished if no recording is posted, allow other Organizers to edit the page, and Enable Registration Efficiencies.
Registration Efficiencies allow options for events to be pre-selected on the listing page and/or allows for the events to be De-selected by Registrants.
Featured Events
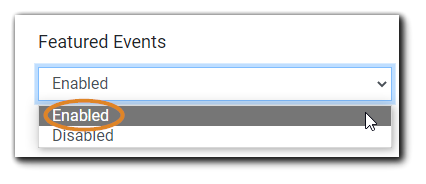
Next, click on the Featured Events Tags dropdown menu and select the Tag associated with the event(s) you will to feature on your Listing Page.
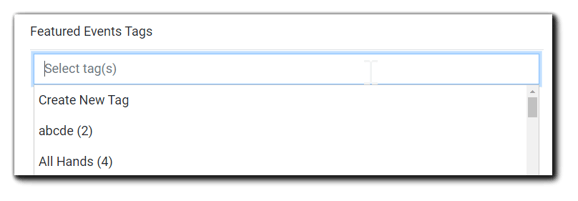
Note: The Events you wish to feature must have the same Tag associated with them.
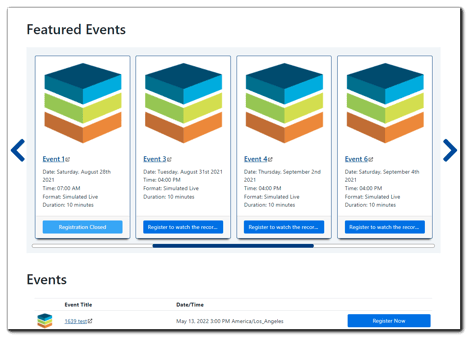
Sample Listing Page with Featured Events enabled
Search Filter Settings - Allow Invitees to broaden or narrow Event search results. Filtering options include:
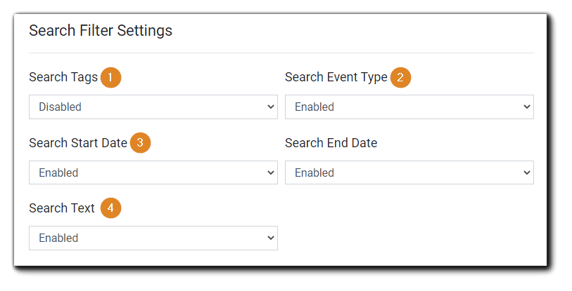
1. Tags: Registrants filter search results by event Tags
2. Event Type: Filter search results by type of event
3. Start Date/End Date: Results filtered by start and/or end date
4. Search Text: Registrants can input words or characters to filter search results
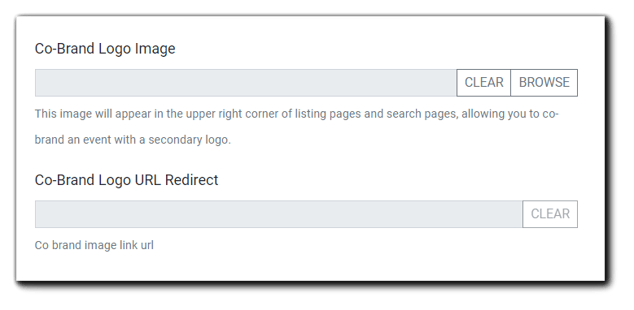
Co-Brand Logo Image: appears on Listing Page for co-hosted Events (if applicable).
Co-Brand Contact Name and Contact Email: for co-hosted Events.
Templates: Save time by maximizing efficiency when creating multiple Events that have a similar setup. Simply create a Template that has all the common settings, branding, configuration, etc. When creating Events that use a Template, the Events inherit all the properties of that Template. Templates enforce consistent collection and dissemination of data across multiple Events, therefore files and questions set at the Template level cannot be modified on Events created with that Template.
When you modify a Template, all existing Events created using that Template will be modified.
Templates can be created on either a Portal Level or User Level.
Portal-level Templates: Available to all Organizers but are created or edited by Administrators only. This is an ideal location to implement company-wide initiatives for branding, legal, and privacy requirements.
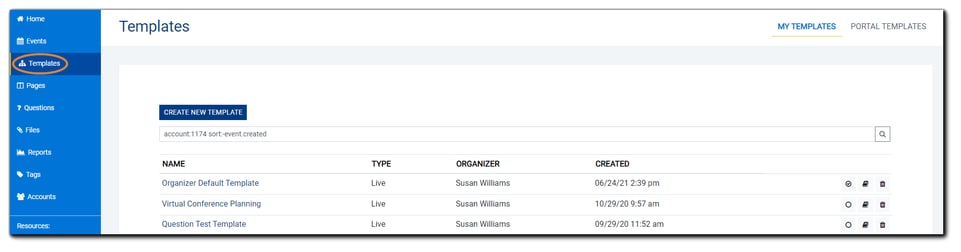
Click My Templates to view a list of all your User-Level Templates and your selected default Template for E-publishing. User-Level Templates are associated with individual User Accounts (Administrators and Organizers).
Creating a Template follows similar steps taken to create a new Event. Click Create New Template to build.
Before building Templates, please read the Templates Overview Knowledge Base article to become familiar with their functionality.
Any questions created for your live Events will be stored here in your Question Bank. You can edit existing questions or create new questions to be added to events.

My Questions/Portal Questions: Sorts questions by Organizer level or Portal level.
My Questions: Associated with individual User Accounts.
Portal Questions: Available to any Organizer and Administrator on the Portal.
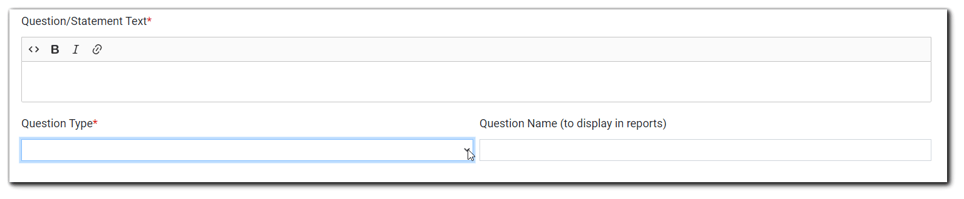
Question/Statement Text: Enter the body of the question here. Some limited HTML formatting is available in the editor.
Question Type: Select the answer format via a dropdown.
Question Name: Create a column header to represent this question on your reports.
Answer Format Types
Learn more about the Unified Question Bank.
Files
This section displays your File Repository. Any type of file may be uploaded, and Files in your File Repository may be attached to any of your events.
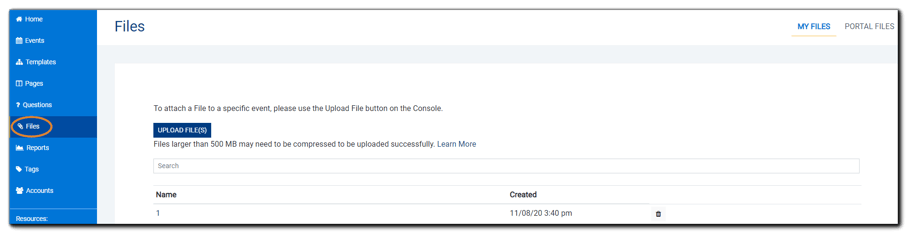 My Files/Portal Files: Displays files by Organizer-level or Portal-level files. *
Portal-level: Files are available to any Organizer and Administrator on your Portal.
*Organizers have their personal files and portal files displayed together. Administrators will see "My Files" and "Portal Files" (as shown)
EventBuilder's reporting tools equip Administrators and Organizers to collect Event and Registrant data, providing you with detailed analytics.
EventBuilder takes the privacy and security of your data seriously. We have internal procedures and processes in place for maintaining compliance with applicable laws regarding data processing and security protocols.
Available Event-level ReportsEvent Activity: Overview of all scheduled events with attendance counts.
Registrant Activity: Information collected from Registrants at the time of Registration and Live Event Polling & Survey questions from EventBuilder Streaming Events.
Recording View Activity: Registrant views of a recorded Event. (Not available for free-level subscribers)
Messages Activity: (Available for Streaming Mode only) Questions and responses from Attendees and Moderators/Presenters with time stamps. (Suite-level subscribers only.)
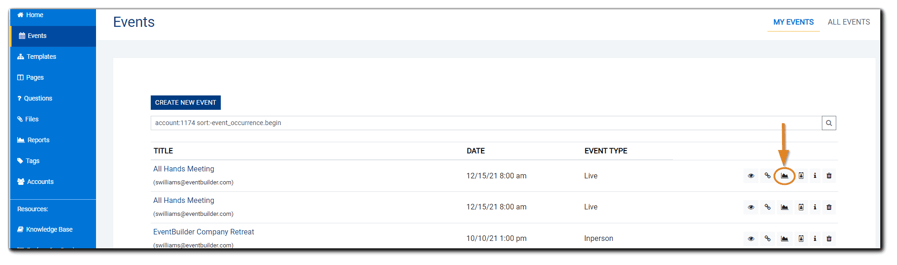
Event-level Reports are accessed through the Events View by clicking on the report icon next to each Event:
Available Portal-level Reports (Suite subscribers only)
Event Activity: View data from multiple Events across the Portal.
Registrant Activity: View Portal-wide Registrant data, including Attendance status.
User Activity: Gather information on Portal User Accounts.
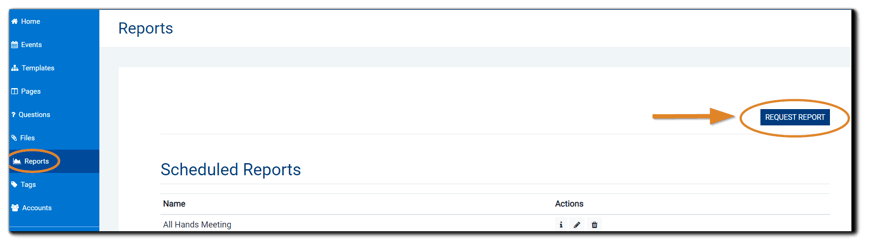
Portal-level reports are accessed through the Reports option on the left navigation:
Before you cancel your Event, please make sure to review the cancellation email on that Event. You can find this email in the Communication step on your Event build. Once you cancel the Event, the cancellation email will be sent automatically to each of your Registrants.
To cancel your event, click on Events on the left-hand navigation. Locate the Event you wish to cancel and click the Trash icon next to it.
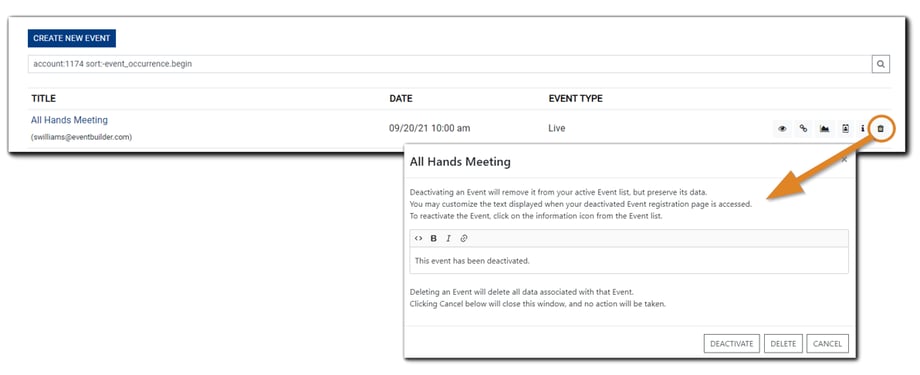
A window will appear explaining Deactivating versus Deleting Events. A simple editor is included to customize your messaging. Select the option best suited for your situation.
Image transcript: Deactivating an Event will remove it from your active Event list but preserve its data. You may customize the text displayed when your deactivated Event registration page is accessed. To reactivate the Event, click on the information icon from the Event list. Deleting an Event will delete all data associated with that Event. Clicking Cancel below will close this window, and no action will be taken.
To reschedule your Event, click on the Event details page. Click on Schedule at the top and change the date and time.

If you created your Event using your Outlook calendar, you can also reschedule or cancel the Event directly from there.
Locate the original meeting invite. 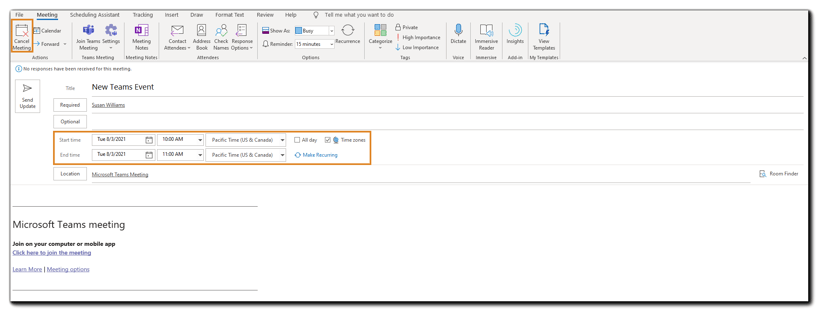
To Reschedule, select the new date and time for your Event and click Send Update.
To Cancel your Event, click Cancel Meeting.
Note: If an Event is deleted from an Outlook calendar, the Event and all associated data is deleted from the Portal. If you don't want to delete all the data, consider deactivating instead of deleting.
Learn more about Deactivating or Deleting Events