Managing Guest Accounts
Last updated: May 2, 2023
Organizers and/or Administrators create Guest Accounts to provide live Event access for Presenters and Moderators who do not have a paid portal User Account.Guest Accounts Overview
Organizers and Admins can create and manage Guest Accounts at the time of the Event build on the Schedule step when assigning Moderator or Presenter roles.
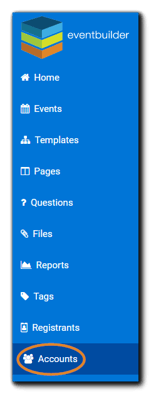
Additionally, Administrators can create and manage Guest Accounts at the Portal level via the 'Accounts' option located on the the left-side navigation.
Administrator/Organizer Permissions for Guest Accounts
| Permissions | Administrator | Organizer |
| Add/Edit/Remove Guest Accts: Event-level | ||
| Add/Edit/Disable Guest Accts: Portal-level |
Organizers can add, edit, and remove Guest Accounts at the Event level only. Administrators can add, edit, or disable Guest Accounts at the Portal level, as well as all available actions on the Event level.
The Schedule Step: Adding Presenters, Moderators and Organizers.
Guest Account Management
Editing Guest Accounts on an Event
To edit a Guest Account holder's information on an Event, navigate to the Schedule step and locate the Presenter/Moderator/Organizer section at the bottom.
Click on the pencil icon to edit:

The Event User dialog will open:
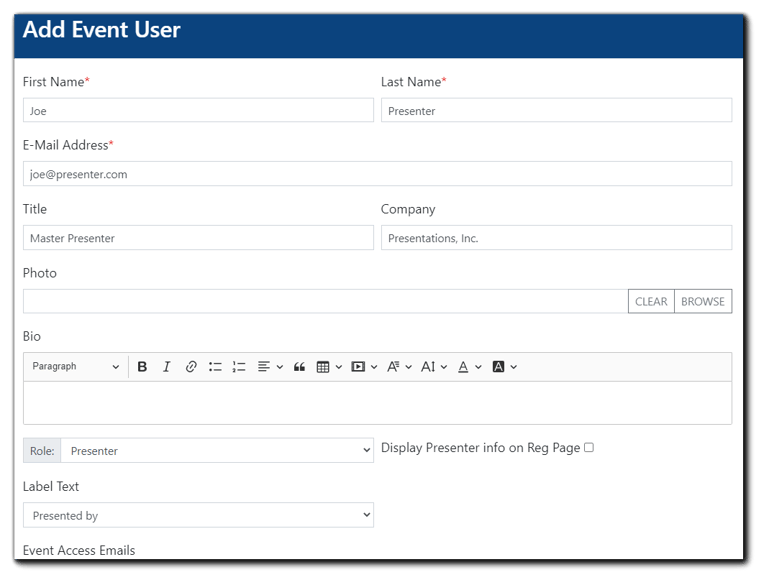
Make any necessary changes and click 'Save.'
Note: Changes made to Guest Account information on the Event build's Schedule step apply to that specific Event only.
Removing Guest Accounts on an Event
To remove a Guest Account holder from an Event, click on the trash icon:

Editing Guest Accounts at the Portal-Level (Admins Only)
To edit a Guest Account's information Portal-wide, Administrators will navigate to the Accounts option on the left-side navigation:
Click on the magnifying glass icon to the right of the Search field:

The Filter Accounts dialog will appear:
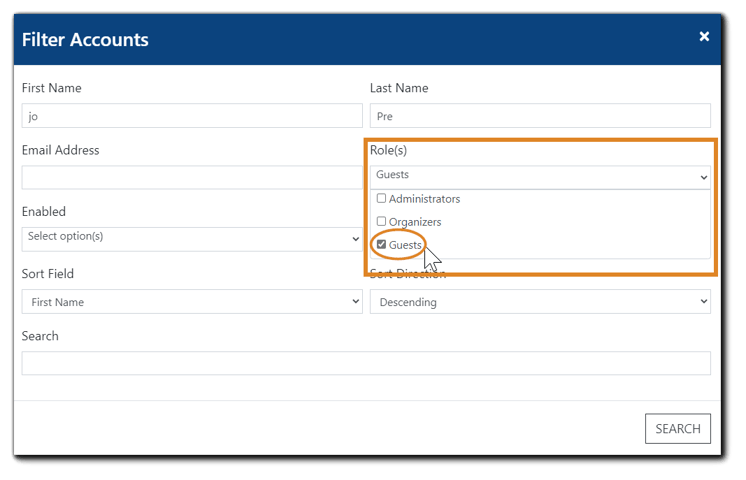
Add the Guest Account name or email in the corresponding fields. Next, click on the 'Role(s)' dropdown menu and select 'Guests.' Click Search. Results will display as follows:
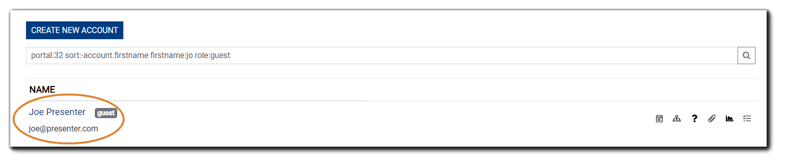
From the search results display, click on the Guest Account name. The Guest's account record will appear: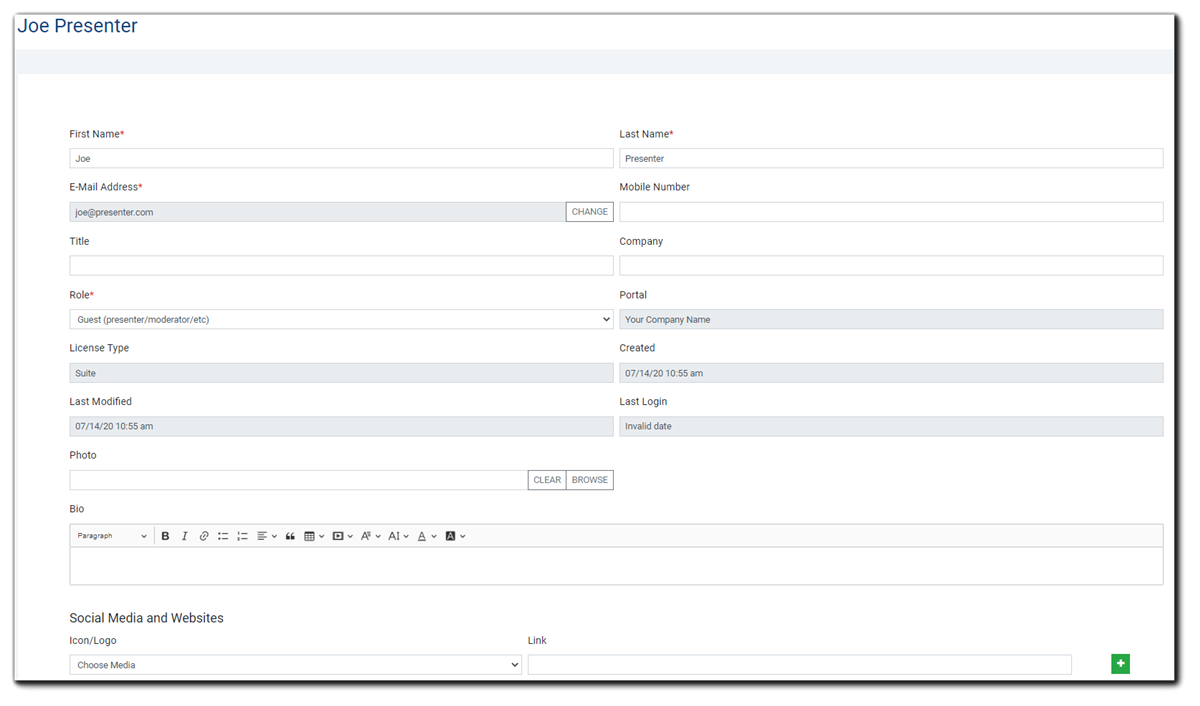
Make any necessary edits, then click 'Save.'
Note: Any changes made at the Portal level apply to future Event builds only. Existing Events retain the Guest Account's previous information.
Disabling Guest Accounts at the Portal Level
To disable a Guest Account, navigate to the lower portion of the Guest's account window:
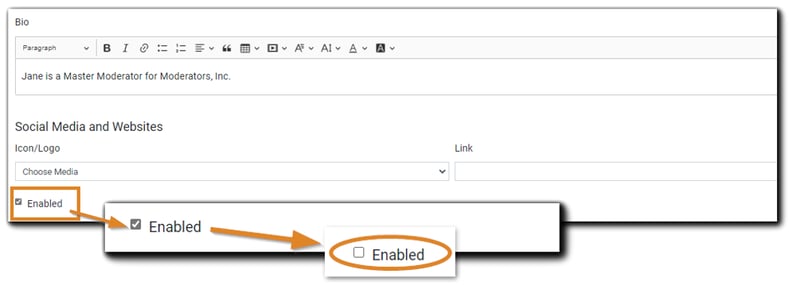
Locate the 'Enabled' checkbox and deselect. The Guest Account will no longer be available to assign to Events. The account can be re-enabled at any time.
Guest Account Portal Permissions
Guest Account holders have limited access to your Portal. Individuals assigned Guest Accounts permissions include:
- File Repository - Guest Account holders may upload Event-related files in the Moderator Console. Learn more about uploading files via the Moderator Console.
- Assigned Events - Presenters and Moderators can access the Moderator Console and view details of the Event(s) they are assigned.
Video Training: Guest Account Management
.png)