Building Events: Security
Last updated: December 8, 2023
When creating a Template or Event, the Security portion of the Event build allows Organizers to manage registration and attendance for their events. The settings can be decided upon at Template creation or Event creation and adjusted on-the-fly to suit the situation.
Note: changes made to security settings after initial Event build will not apply to any existing Event Registrants.
To create or edit a Template or Event, navigate to the Security step:

The Security options will appear: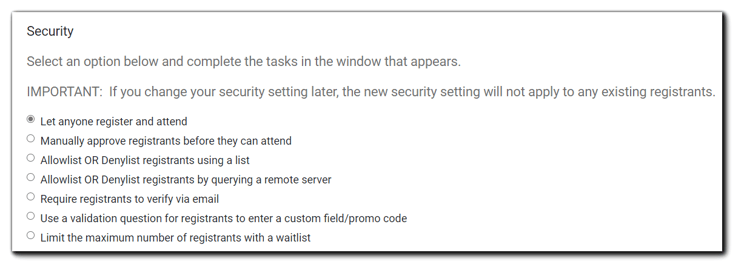
Organizers may also choose to block an Attendee after registration or during a live event.
Let anyone register and attend
EventBuilder's default setting, this option allows anyone with a registration URL to sign up and attend.
Manually Approve Registrants Before They Can Attend
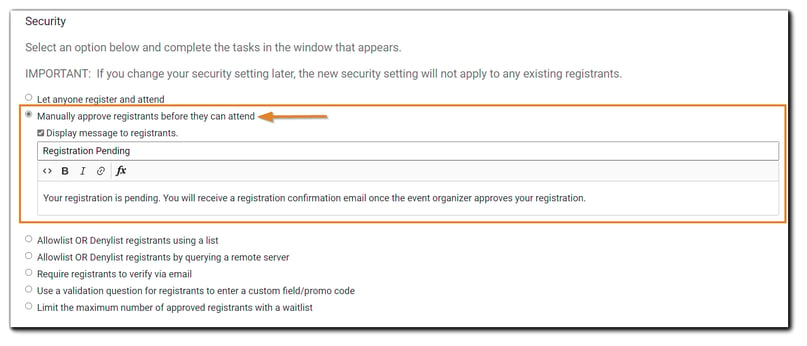
When Organizers select "Manually approve registrants before they can attend," a set of options opens, where 'approve' or 'deny' registrant controls are located. Organizers may select 'Display message to registrants' and customize their notification to pending Registrants via the text editor provided.
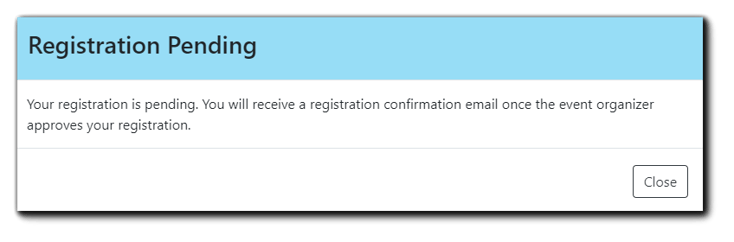
The default for the Registrant's pending message reads: "Registration Pending. You will receive a confirmation once the event organizer approves your registration."
Organizers will receive an email notifying them of pending Registrations. To opt out of receiving notification emails, select the 'Disable the notification of pending registrants' checkbox.

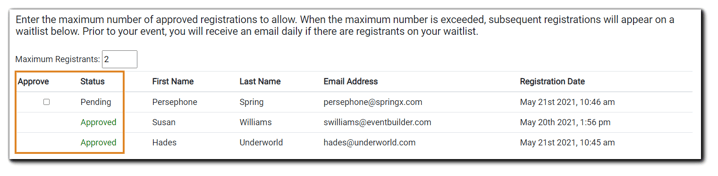
Image text: Enter the maximum number of approved registrations to allow. When the maximum number is exceeded, subsequent registrations will appear on a waitlist below. Prior to your event, you will receive an email daily if there are registrants on your waitlist.
Once approved, the Registrant will receive a confirmation email and be allowed to attend the Event. If a Registrant is denied or left in a pending state, they will not receive system-generated communication emails.
Allowlist or Denylist Registrants by Email/Domain or List
- An allowlist allows only Registrants whose email address/domain is on the list to attend.
- A denylist allows everyone to attend an Event except those whose email address/domain is on the list.
Select 'Allowlist OR Denylist registrants using a list.' The options will appear below:
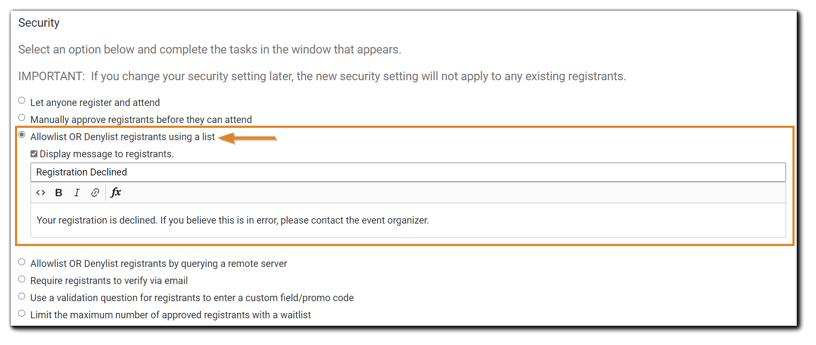
Organizers may select 'Display message to registrants' and customize their notification to declined Registrants via the text editor. "Your registration is declined. If you believe this is in error, please contact the event organizer."
Organizers can use the controls to select Allowlist or Denylist, manually enter specific email addresses or a specific domain, e.g., @abcinc.com, or upload a list in .csv format.
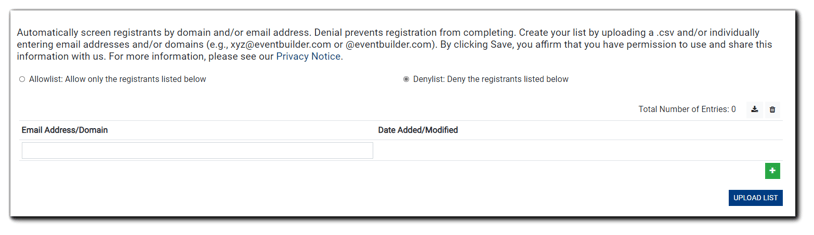
Image text: Automatically screen registrants by domain and/or email address. Denial prevents registration from completing. Create your list by uploading a .csv and/or individually entering email addresses and/or domains (e.g., xyz@eventbuilder.com or @eventbuilder.com) By clicking Save, you affirm that you have permission to use and share this information with us. For more information, please see our Privacy Notice .
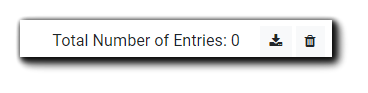
With Total Number of Entries, Organizers can check the total added against their expected number. EventBuilder Security options also allow Organizers to download a manually created list, saving effort for future events where the list is needed, or delete the list entirely:
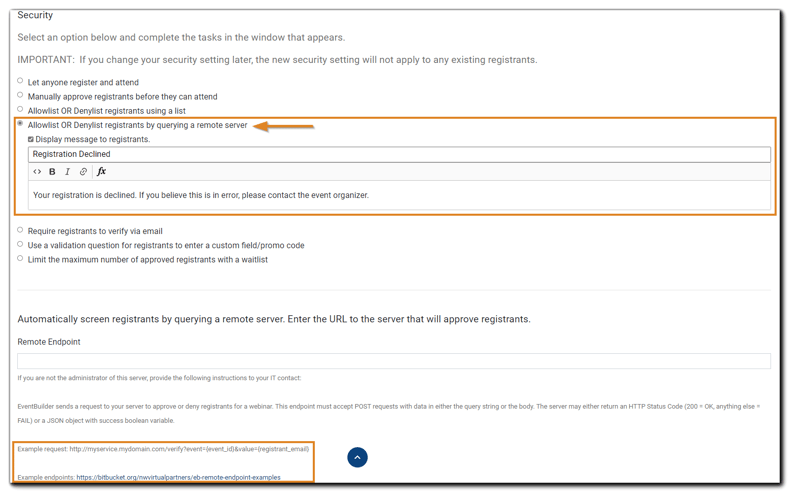
Allowlist or Denylist Registrants by Querying a Remote Server
The 'Query Server Allowlist/Denylist' functions the same as the list option, however, the list is hosted on a remote server. To utilize this option, Organizers must have administrator access to the endpoint server. Organizers may select 'Display message to registrants' and customize their notification to declined Registrants via the text editor. "Your registration is declined. If you believe this is in error, please contact the event organizer."
Instructions provided within the software read as follows:
If you are not the administrator for the remote endpoint, provide the following instructions to your IT contact:
EventBuilder sends a request to your server to approve or deny registrants for a webinar. This endpoint must accept POST requests with data in either the query string or the body. The endpoint may either return an HTTP Status Code (200 = OK, anything else = FAIL) or a JSON object with success boolean variable.
Example request: http://myservice.mydomain.com/verify?event={event_id}&value={registrant_email}
Endpoint examples: https://bitbucket.org/nwvirtualpartners/eb-remote-endpoint-examples
Organizers can also enable the optional Registration limit.
Require Registrants to Verify Via Email
With this option, a Registrant receives an Event email and must validate receipt by clicking the link provided. The Registrant will not receive a confirmation email with Event instructions until they have verified. Organizers may select 'Display message to registrants' and customize their notification to Registrants via the text editor provided. The default text reads, "Your registration is pending. You will receive a verification email with a link. Once you click on the link to verify your identity, you will receive a registration confirmation email."
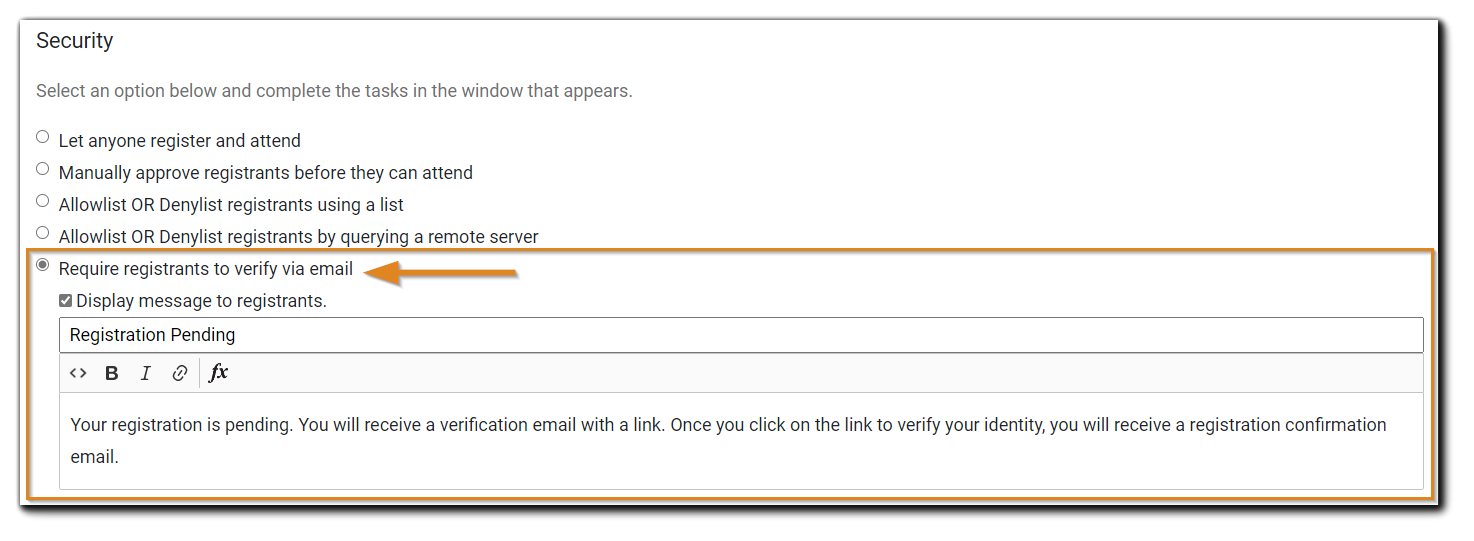
A list of verified Registrants can be found in the Security section for your Event:

Image text: Upon registering, registrant receives a verification email and must validate receipt by clicking a link. Registrant will not receive a confirmation email (with attendance instructions) until they have verified.
Organizers can also enable the optional Registration limit.
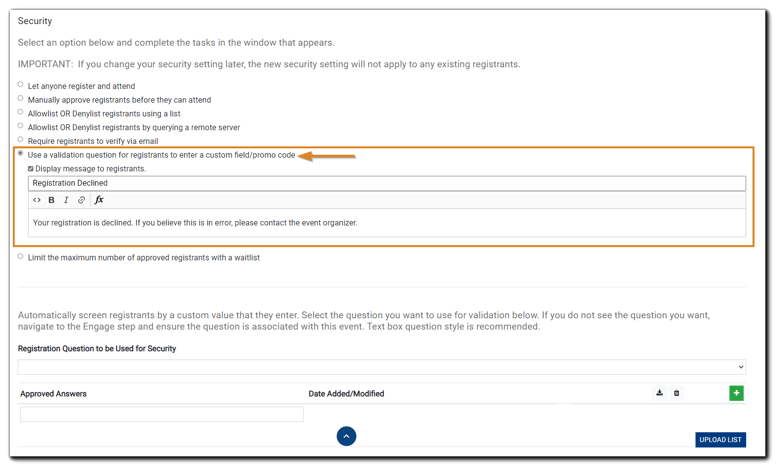
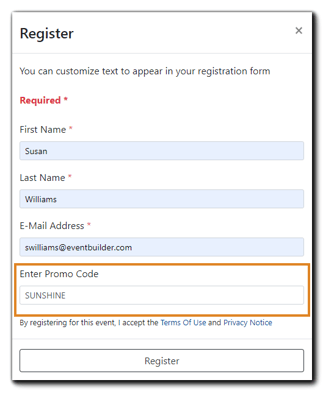
Use a Validation Question for Registrants to Enter a Custom Field/Promo Code
Organizers can set a validation question to screen Registrants via a custom value for Registration security.
Select or create the validation question on the Engage step of your Event build, and add it to the Registration Questions area: 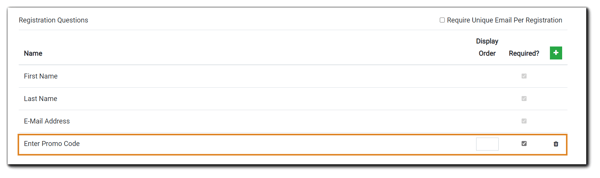
Note: We recommend a text box question type for registration validation questions.
This action will associate the validation question with your Event. Complete any other engagement tools you would like to add to your Event, then select 'Save & Continue.'
On the Security step, select the validation question added on the Engage step from the drop-down menu, and add applicable security question values by clicking the green '+' icon highlighted below:
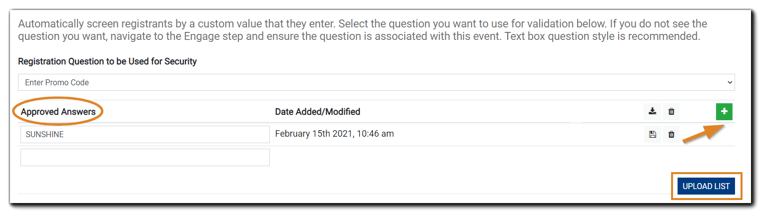
Image text: Automatically screen registrants by a custom value that they enter. Select the question you want to use for validation below. If you do not see the question you want, navigate to the Engage step and ensure the question is associated with this event. Text box question style is recommended.
Organizers can manually add custom security question values or upload a list in .csv format. Choose this option for Events with multiple potential values. E.g., Employee number.
To upload a list of validation options, click on the 'Upload List' button. Select the appropriate .csv file from your computer and upload the file to your Portal.
Registrants are prompted for the validation code/answer at the time of event Registration:
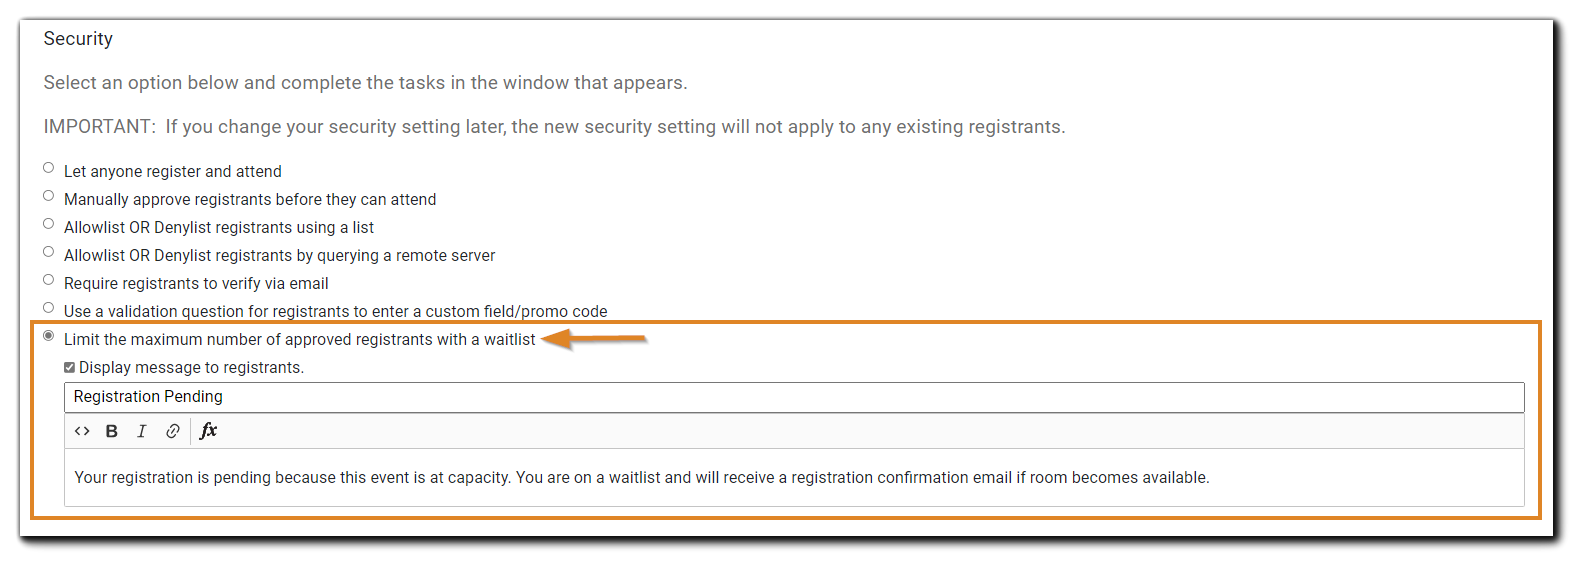
Limit the Maximum Number of Registrants with a Waitlist
You can set a maximum number of Registrants allowed to register for your Event and add any additional Registrants to a waitlist.
Waitlist Management

Image text: Enter the maximum number of approved registrations to allow. When the maximum number is exceeded, subsequent registrations will appear on a waitlist below. Prior to your event, you will receive an email daily if there are registrants on your waitlist.
Waitlists allow Organizers to set the maximum number of Registrants for an event and decide whether or not to allow additional registrations once the previously determined limit has been reached.
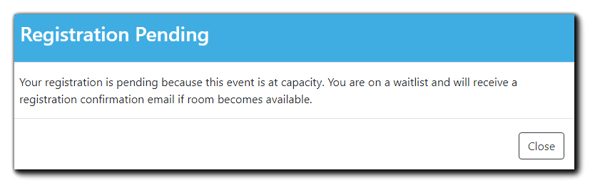
Organizers may select 'Display message to registrants' and customize their notification to pending Registrants via the text editor provided. If you are allowing a waitlist, Invitees who attempt to register after your limit has been reached will see your message, or the default text notification stating, “Registration Pending. Your registration is pending because this event is at capacity. You are on a waitlist and will receive a registration confirmation email if room becomes available.”
Organizers can approve Registrants from the waitlist. This addition will automatically be reflected in the 'Maximum Registrants" field.
Security Add-ons
Organizers can select Add-on features and use them in conjunction with any other Security option. Add-on features include:
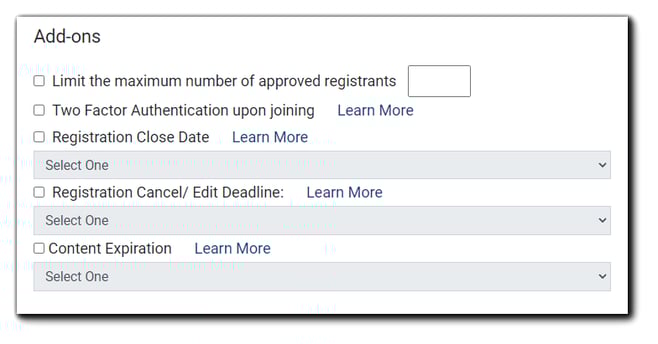
- Limit the maximum number of registrants - Places a hard registration limit on your Event
- Two-Factor Authentication upon joining - Requires Registrants to enter a one-time access code to join the event.
- Registration Close Date - The Event's Registration button will change to 'Registration Closed' on the date selected.
- Registration Cancel/Edit Deadline - Prevents Registrants from editing or canceling their registration after 12:00 am on the date specified, based on the Registrant's time zone.
- Content Expiration - The Event page will be deactivated on the date selected. If Organizers would like to create a waitlist after the maximum has been reached, select 'Limit the maximum number of Registrants with a waitlist' for the Event's security option.
Block Registrants
Registrants can be blocked from attendance by an Organizer at any time during the registration process, or from the Console during the live event.
Block from Show Registrants:
Navigate to the Events section on your Portal. A list of your Events will appear. Select the 'show registrants' icon:

The following window will appear:
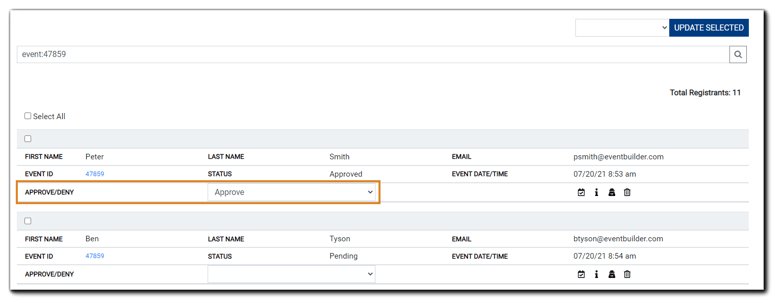 Here, Organizers have Registrant controls. They can approve or deny a Registrant from the Status dropdown menu, as well as mark attendance, view Registrant information, redact the Registrant's information, or delete the Registrant.
To block a Registrant from attending the Event, click on the drop-down menu under 'Approve/Deny' and select 'Deny.'
The following window will appear:
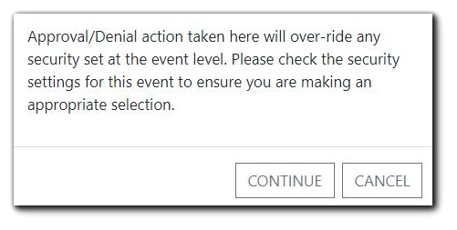
Image text: Approval/Denial action taken here will over-ride any security set and the event level. Please check the security settings for this event to ensure you are making an appropriate selection.
This means the individual Registrant is approved or denied, regardless of the Event's security setting.
If a Registrant is denied, they will not receive email notification of denied status. Organizers may choose to send notification via the Communicate step within the Event's configuration.
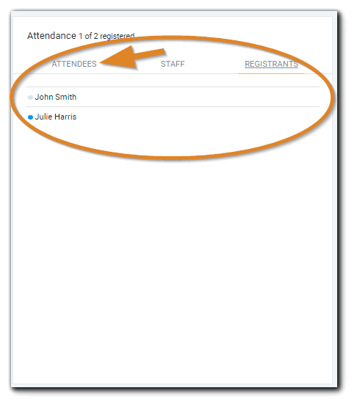
Block from Console During a Live Event:
During a live event, select the Attendee you wish to block from the Console's Attendance widget:
A window will appear with information about the Attendee. To block the Attendee, click on the symbol highlighted below in orange:
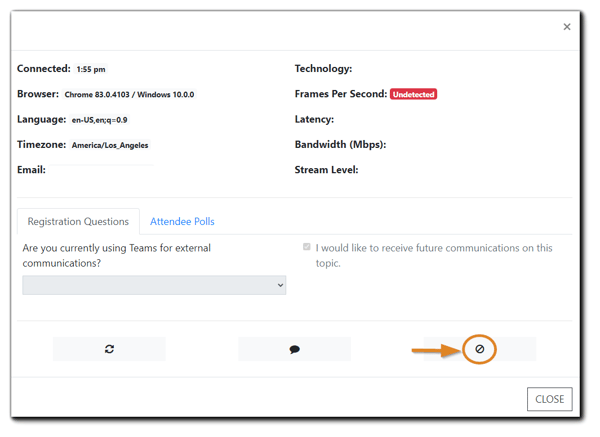
Once blocked, the Attendee will be routed to the Registration page, and a message will display. Once this action has been taken, no additional registrations will be allowed from the blocked Attendee's registration email. (The blocked Attendee cannot re-register using the same email.)