Setting Up Paid Events
Last updated: December 8, 2023
While EventBuilder doesn't presently have an integrated e-commerce feature, Organizers can still monetize their Events by enlisting a separate, third-party payment processor to collect funds. Then, utilizing EventBuilder's Registration and Security tools, Organizers will complete the process for hosting a revenue-generating Event.
Payment Vendor
To add a payment option to your Event, secure a third-party processor to accept registration payments, such as Square. The payment vendor will operate independent of your Event build.
Event Settings
Build your Event using the EventBuilder interface, including the Teams link, branding, registration questions, and other details. To align paid registrations with your Event build, we recommend the following settings:
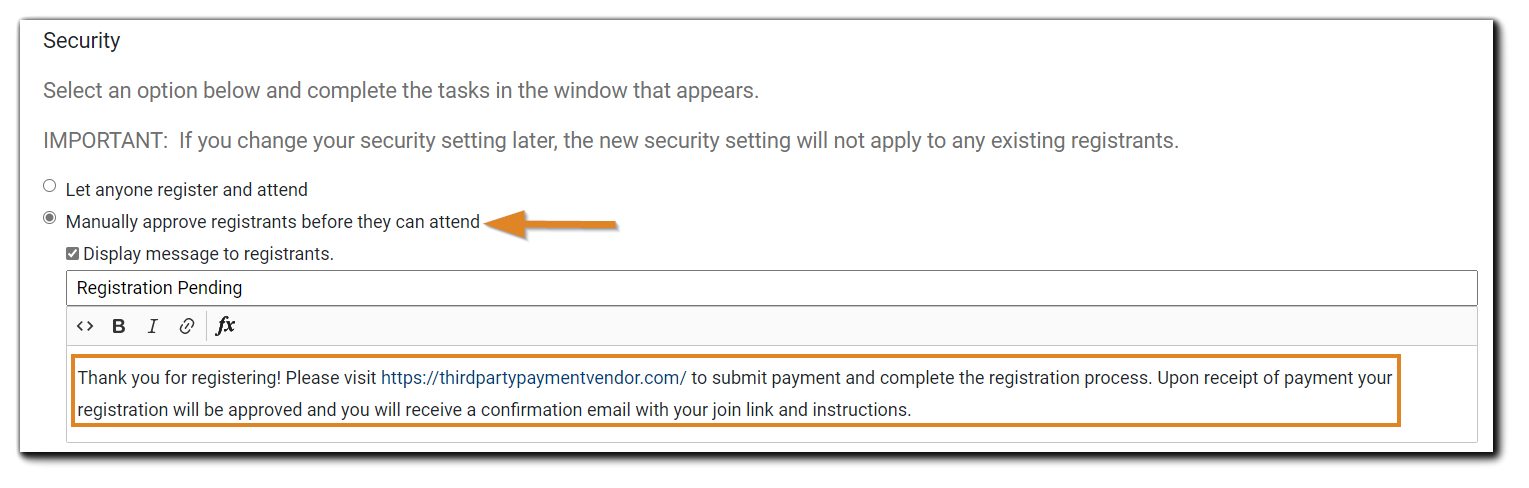
Security Settings
On the Security Step, select 'Manually approve registrants before they can attend.'
Select 'Display message to registrants.' In the editor provided, customize the message to include payment instructions and information on what to expect after their payment is received.
E.g., "Thank you for registering! Please visit https: [third-party-payment-vendor].com to submit payment and complete the registration process. Once payment has been processed, your registration will be approved. You will then receive a confirmation email with your join link and instructions."
Next, from the Security Add-ons section, select 'Two-Factor Authentication upon joining.'
Image text: Learn More - Enabling this will require your registrants to enter a one-time access code to join this event.
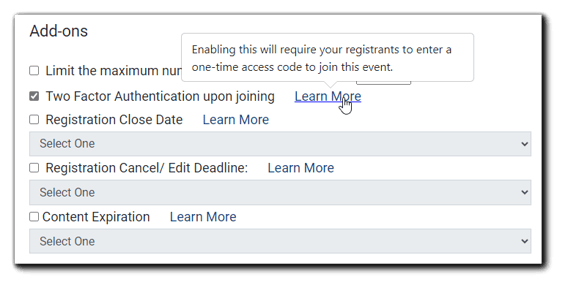
EventBuilder recommends setting a 'Registration Close Date' from the Security Add-ons options to allow adequate time for payment processing and Registrant approval.
Registration Close Date options: One Day Prior to Event Date, One Week Prior to Event Date, or Custom, which allows Organizers to choose a specific date for registration closing.
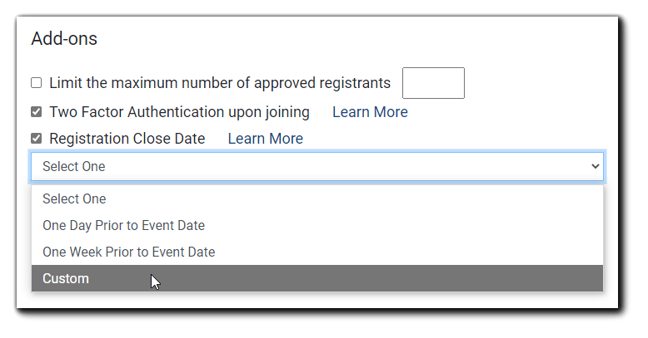
Note: Registration will close on the date selected at midnight, based on the Registrant's time zone.
Once finished, click 'Save' and promote your event as planned.
Learn more: Security Add-on features.
For instructions on uploading and sending event invitations, visit Communicate Step: Send Invites.
Registrant Approval Process
Upon Registration, the Registrant will be added to the Approve/Deny Registrant list located in the Security step of your Event build.
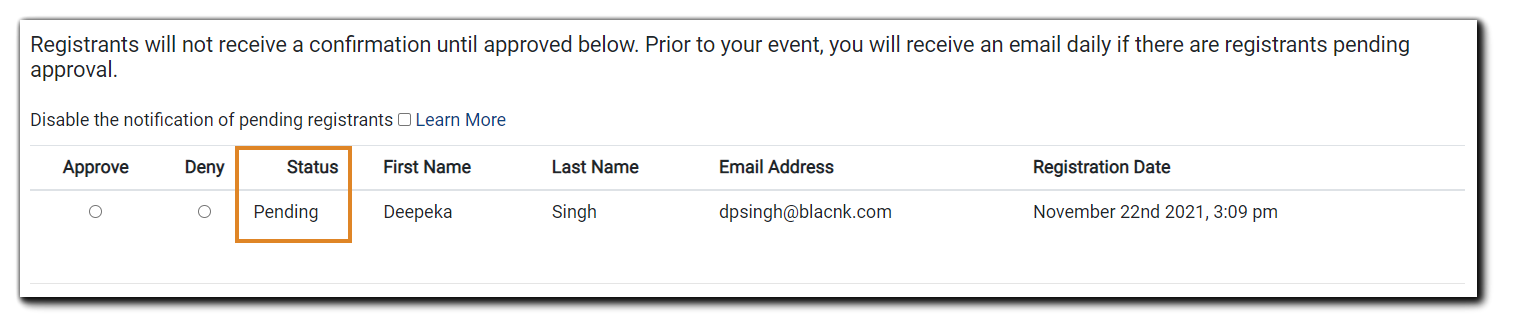
To change Registrant status to 'Approved,' obtain a report of paid registrations from your payment vendor.
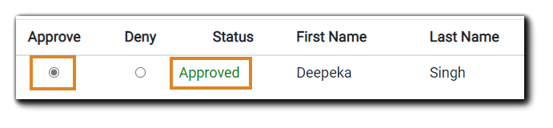
Log into your Portal, and navigate to the Security step in your event build. Scroll down to locate the paid Registrant(s) on your Pending Registrant list and select 'Approve.' Registrant status will change to 'Approved.'
What Attendees Can Expect
Invitees access the Registration link via invite method, i.e., promotional link, email, etc.
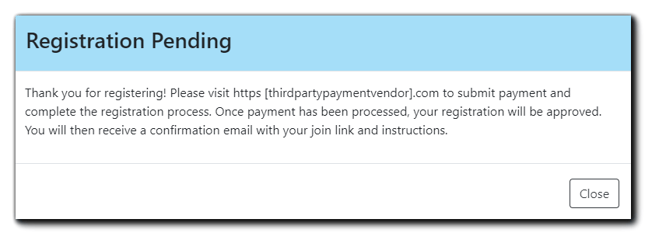
After registration, the Registrant follows the instructions to pay for the Event. They will see 'Your Registration is Pending' on the Registration page:
After the Registration is approved, Registrants will receive a confirmation email with the Event link and joining instructions.

At Event time, Registrants will click on the Event link. A One-Time Access Code Request dialog will appear. The code is sent to the email address associated with their Event registration:Upon entering the access code, the Attendee is delivered to the Event environment.
Setting Up Monetized Events Video Training
.png)