Building Events: Extras
Last updated: April 26, 2023
The last step in building Events, the Extras section provides Organizers the opportunity to add Event Tags, a unique Listing Page image, create Completion Certificates, and more.

Tags
Tags help Organizers filter and group Events together for a variety of purposes, including streamlining multiple Event Registrations, combining a series of Events on a single Listing Page, and Reporting.
Note: Presently, Tags can only be added at the Event level.
Click on the dropdown to open the list of available Tags, or to create a new Tag:
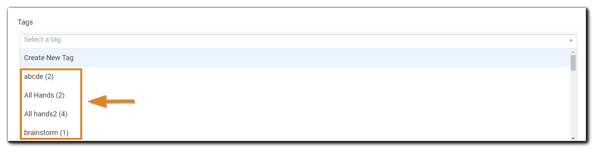
The number appearing next to the available Tags indicate how many Events are currently associated with the Tag.
Click on the Tag you wish to add to your Event from the list.
To create a new Tag, click on 'Create New Tag'

A dialog window will appear at the top of the screen:
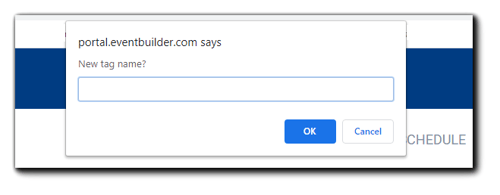
Create a Tag name and click 'OK.' Your new Tag will be added to your Event. If you wish to remove the Tag from your Event, click on the trash icon highlighted below:

Co-Branding
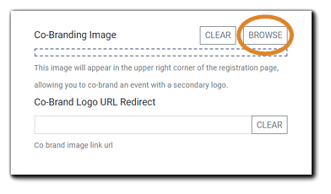
For co-hosted Events. Organizers can add an additional company's logo and URL redirect on their Registration pages on an event-by-event basis. The logo appears on the upper right corner on the page ribbon.
To add an additional logo to your Registration Page, click on the 'Browse' button:
Your File Repository will appear. Either select from a file already saved, or upload a new logo file, then click 'Select'
The new logo will appear in the 'Co-Branding Image' box. Next, add the redirect URL in the space provided:
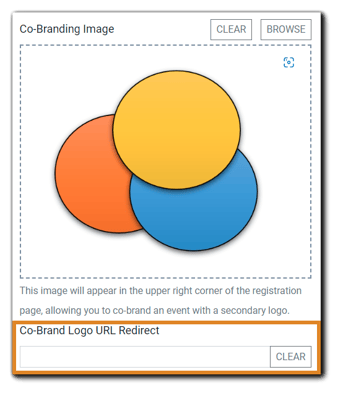
Next, add the redirect URL in the space provided:

The co-brand logo will now appear on your Event's Registration Page.
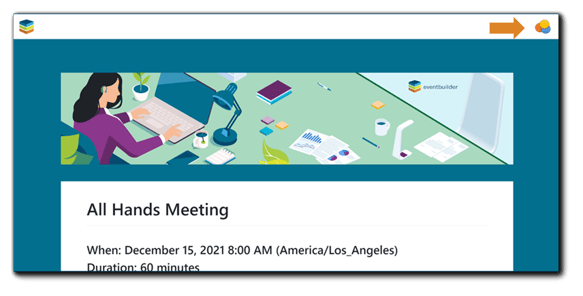
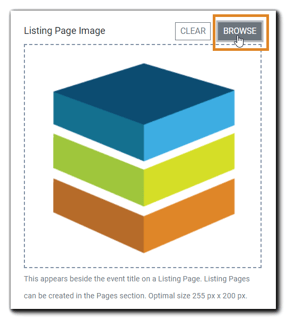
Listing Page Image
Organizers can select a unique image for their Listing Page with this function. (Optional) The image appears on the Listing Page next to the Event Title. The Listing Page Image can also be set at the Template level for consistency across Events. Optimal size: 255 px x 200 px.
To choose or add a Listing Page Image, click on the 'Browse' button:
The 'Select File' window will appear. If the image you wish to add to your Event already exists on your Portal, locate it in the list and click 'Select.'
To upload a new image, click on the 'Upload File(s)' button. Browse to your File's location and select the image you wish to add. The newly uploaded image will appear on your list. Click 'Select' to add the image to your Listing Page.

Learn more about Listing Pages.
Source Tracking
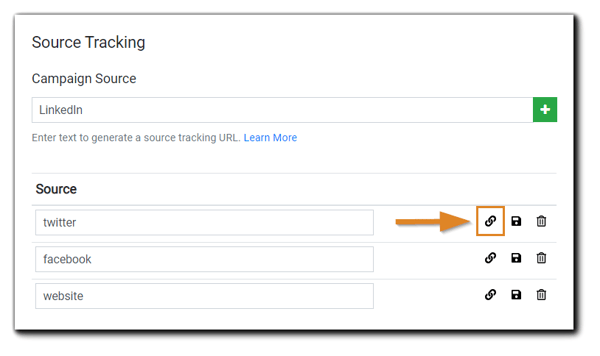
Source Tracking allows Organizers to evaluate the effectiveness of their marketing campaign efforts by creating a unique URL for each of the channels used to invite Attendees. Organizers can use this information to track where their Registrants are coming from when they register; such as LinkedIn, Facebook, etc. Organizers can add as many unique URLs as fits their needs.
To create Source Tracking URLs for your Event:
- Enter the source you would like to track (e.g., LinkedIn) into the text field provided, and click the green '+' to create the unique tracking URL. It will be added to the list below.
- Copy the link by clicking on the link icon ().
- Paste the copied link into the corresponding promotion/marketing channel you have chosen.
- Note: For accurate source tracking, the Registrant must use the tracking URL you created. E.g., yourcompanyname.com/twitter.
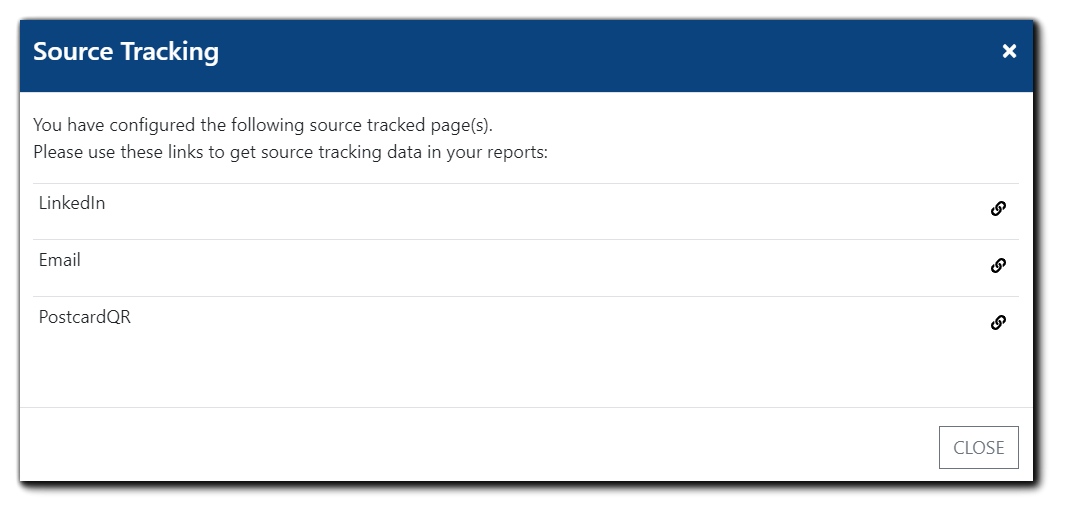
Upon saving configurations on the Extras Step, a Source Tracking confirmation will appear:
 Organizers can verify and/or copy their Source Tracking links from the Info icon () located in their Events list:
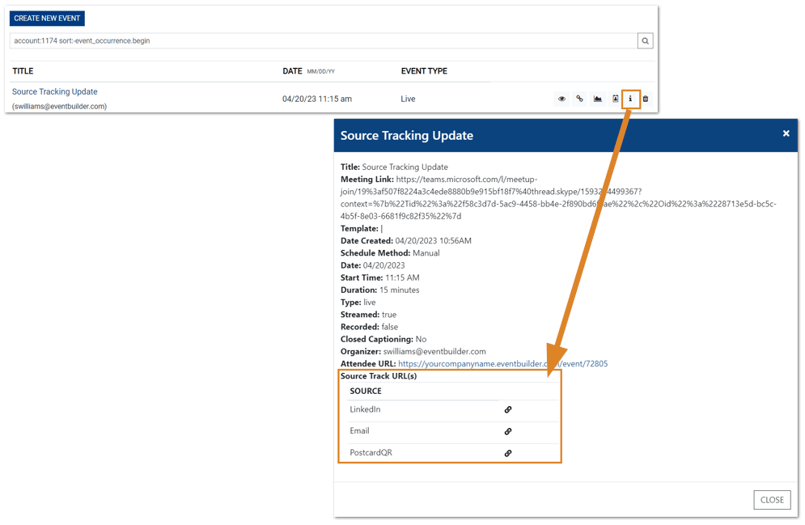
The Registrant source information will appear in the Registration Report under the column 'registrant.source.'

Certificates
Create customized Completion Certificates for Event Attendees:
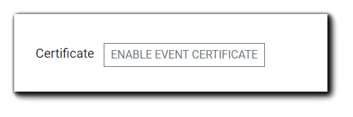
Click on the "Enable Event Certificate' button. The following window will appear:
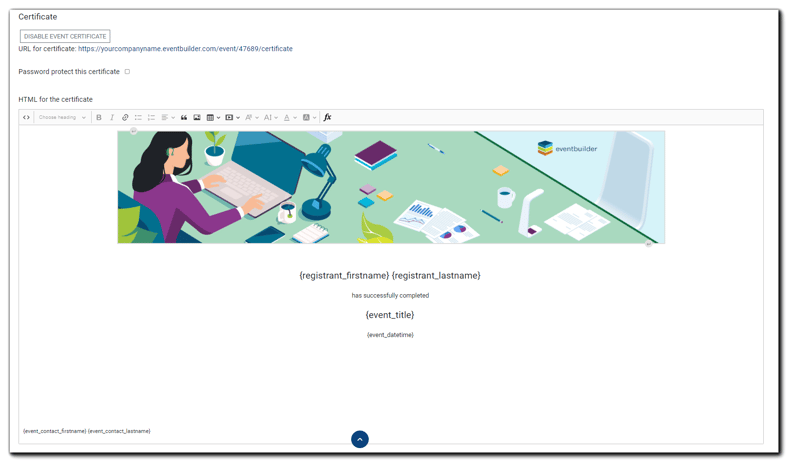
If you would like to password-protect your Event Certificate, select "Password Protect this certificate." An auto-generated password will appear. You may use the password provided or create your own. The password will be distributed to Attendees in the "Thank you for attending" system-generated email.
Learn more about passwords for Event Certificates.
Edit the content you would like in the HTML editor. Images, links, and styles can be added or changed. Click on the FX button to select Event and/or Registrant variables to add to the Certificate:

See a list of all available database variables
Certificate Distribution
Certificates links can be distributed as an Announcement in the EventBuilder Streaming Console, Post-Event email, or Post-Event Survey.
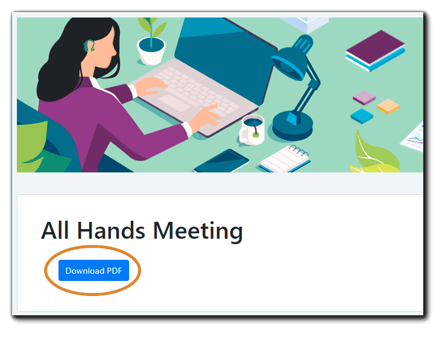
For recorded content, including On-Demand and Simulated Live, the following popup will appear at the end of the recording:
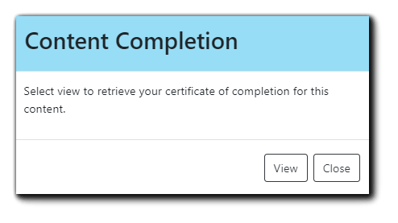
Once Attendees select 'View' they will be taken to a link where they can download a PDF of the Completion Certificate:
Registration Page Action Button Labels
Organizers can customize the text on action buttons included on Registration Pages. The buttons are dynamic based on the cycle of the Event and functional as-is. However, Organizers can edit the label copy if they wish.
Note: Each button label must be unique. Duplicate action button labels will cause an error.
To edit Action Button Labels, click on 'Show/Hide:'

The following window will appear:
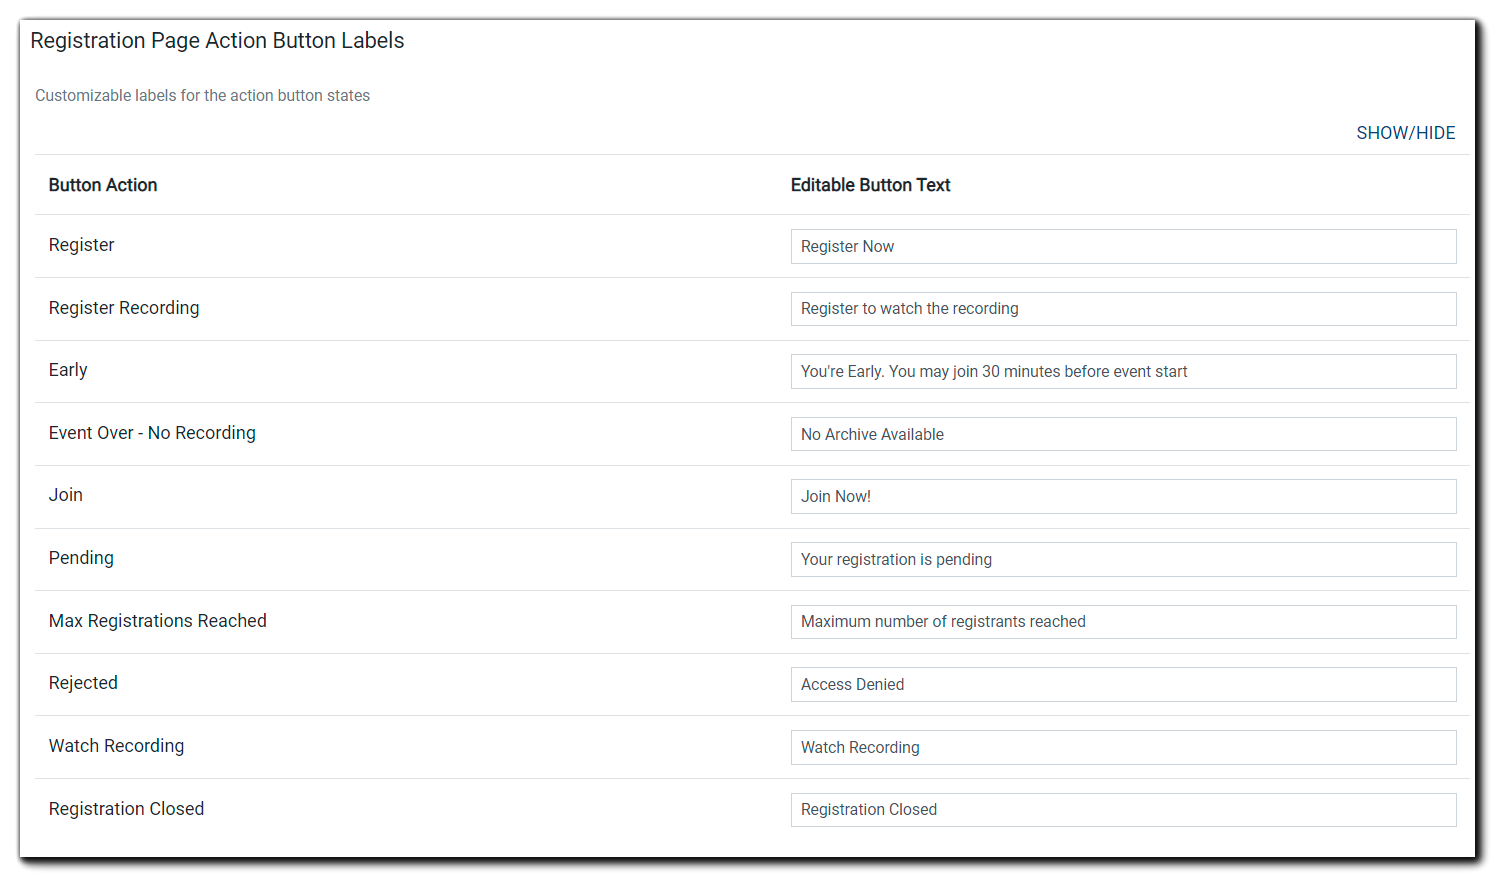
Click in the text field of each label you would like to change. The new copy will appear on your Event's Registration Page.
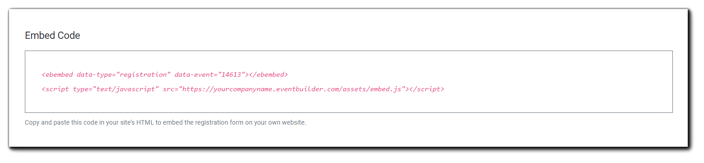
Embed Code
Organizers have the option to embed their Event's registration form to provide a consistent look and feel with their website or other HTML-supported asset.
Copy the code (in red) included in the window provided and paste where appropriate on your website.
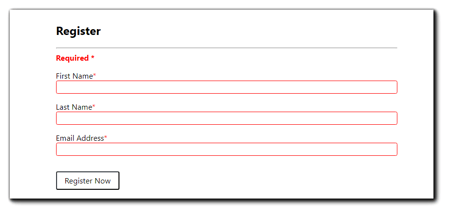
Once added, the Registrant will see this displayed, and can register for your Event as usual with a form based on your Event's Registration fields:
Closed Captioning
Organizers have two options for Closed Captioning as an additional paid service: Live Captioning and Automated Captioning. Live Captioning services include live captioning during your Event, captions included on the archive recording, a WebVTT file, and an editable transcript. With Automated (machine) Captioning, the EventBuilder bot will automatically generate captions for your event in real time. Our Automated Captioning service will also include captioning on your archive recording and a WebVTT file.
EventBuilder's captioning services are compliant with Section 508 of the Rehabilitation Act and the Americans With Disabilities Act .
For further details and instructions on ordering Closed Captioning for your Event, see Closed Captioning Instructions.
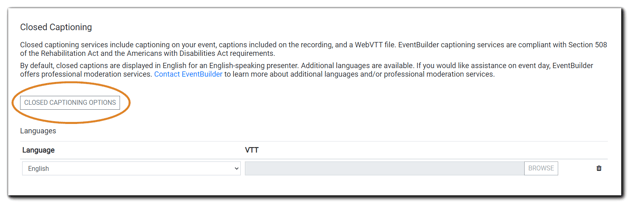
WebVTT files recorded from Microsoft Stream are compatible with EventBuilder and can be uploaded to your Event via the 'Browse' button VTT file field shown above.
Change Template
This function gives Organizers the opportunity to change their Event's Template without having to rebuild from scratch. An Organizer may find that a different Template on the Portal is a better fit for the type of Event they are building. With this function, they can change the Template without losing any of their previous Event settings.
Note: Changing an Event's Template does not change the Event type/mode.
To change your Event's Template, click on the dropdown menu:
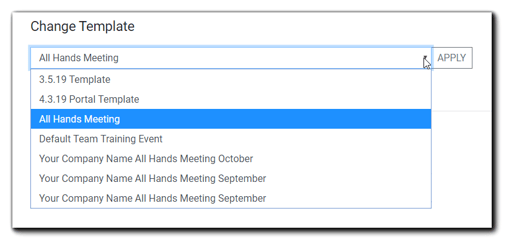 A list of available Templates will appear. Select the Template you wish to change your Event to, then click 'Apply;'
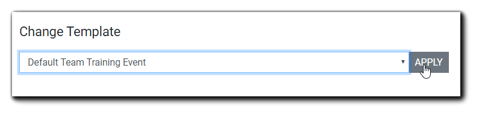
The selected Template's settings will then be applied throughout your Event's build. EventBuilder recommends reviewing all settings after changing a Template.
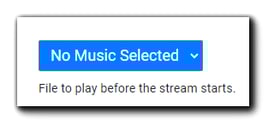
Pre-Stream Music
Organizers can choose to play recorded music pre-Event when Streaming mode is chosen. EventBuilder offers two original compositions for pre-event music selection: Indie Chill or Bossa Nova. Organizers may also upload their own music selection. Note: Available for Suite-level subscribers only.
Selecting EventBuilder's Pre-loaded Music:
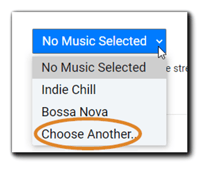
Click on the blue drop-down menu labeled 'No Music Selected'
Choose the composition you wish to add to your Event:
 Once selected, the yellow 'play' button will allow you to hear a preview of the music.
Uploading a Recording for Your Event
From the drop-down menu, select 'Choose Another..."
The following dialog will appear:
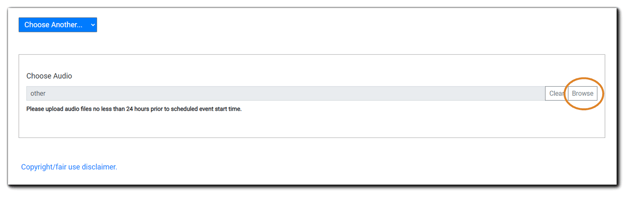 Click 'Browse' to open the File window:
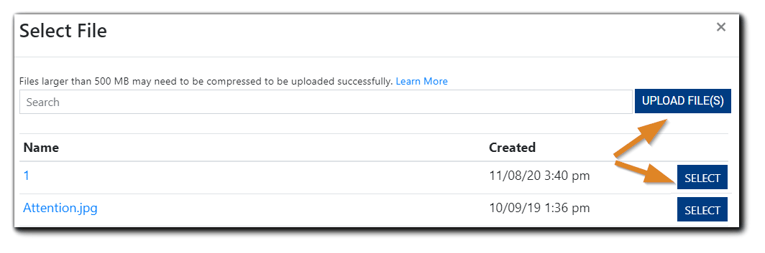 Select the music File you wish to add to your Event or upload your MP3 file. Once uploaded, click 'Select' to add the new MP3 file to your Event.
Please be aware of the following copyright/fair use disclaimer, which states:
You acknowledge that you own or have the right to upload and use this music/audio file for this event, and that your uploading and use of such music/audio file does not violate our Customer Terms of Service, Privacy Notice, Terms of Use, or the rights of any third party. You are solely responsible for any liability associated with your uploading and use of music/audio file for this event.
When finished with the Extras section, click 'Save' on the bottom left to complete your Event build.
Custom Field for Reporting
Organizers can add a unique text identifier in this field to more precisely identify, categorize, and sort Event Activity data.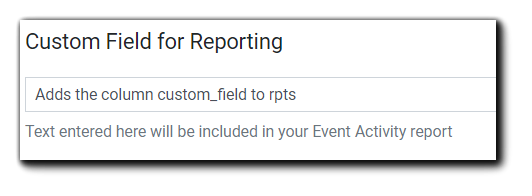
Adding custom text this field creates the column 'custom_field' in the Event Activity report. For general information about EventBuilder Reports, see the Reports Overview article.
Video Training: The Extras Step
.png)